2.1 Attach the Power Cord
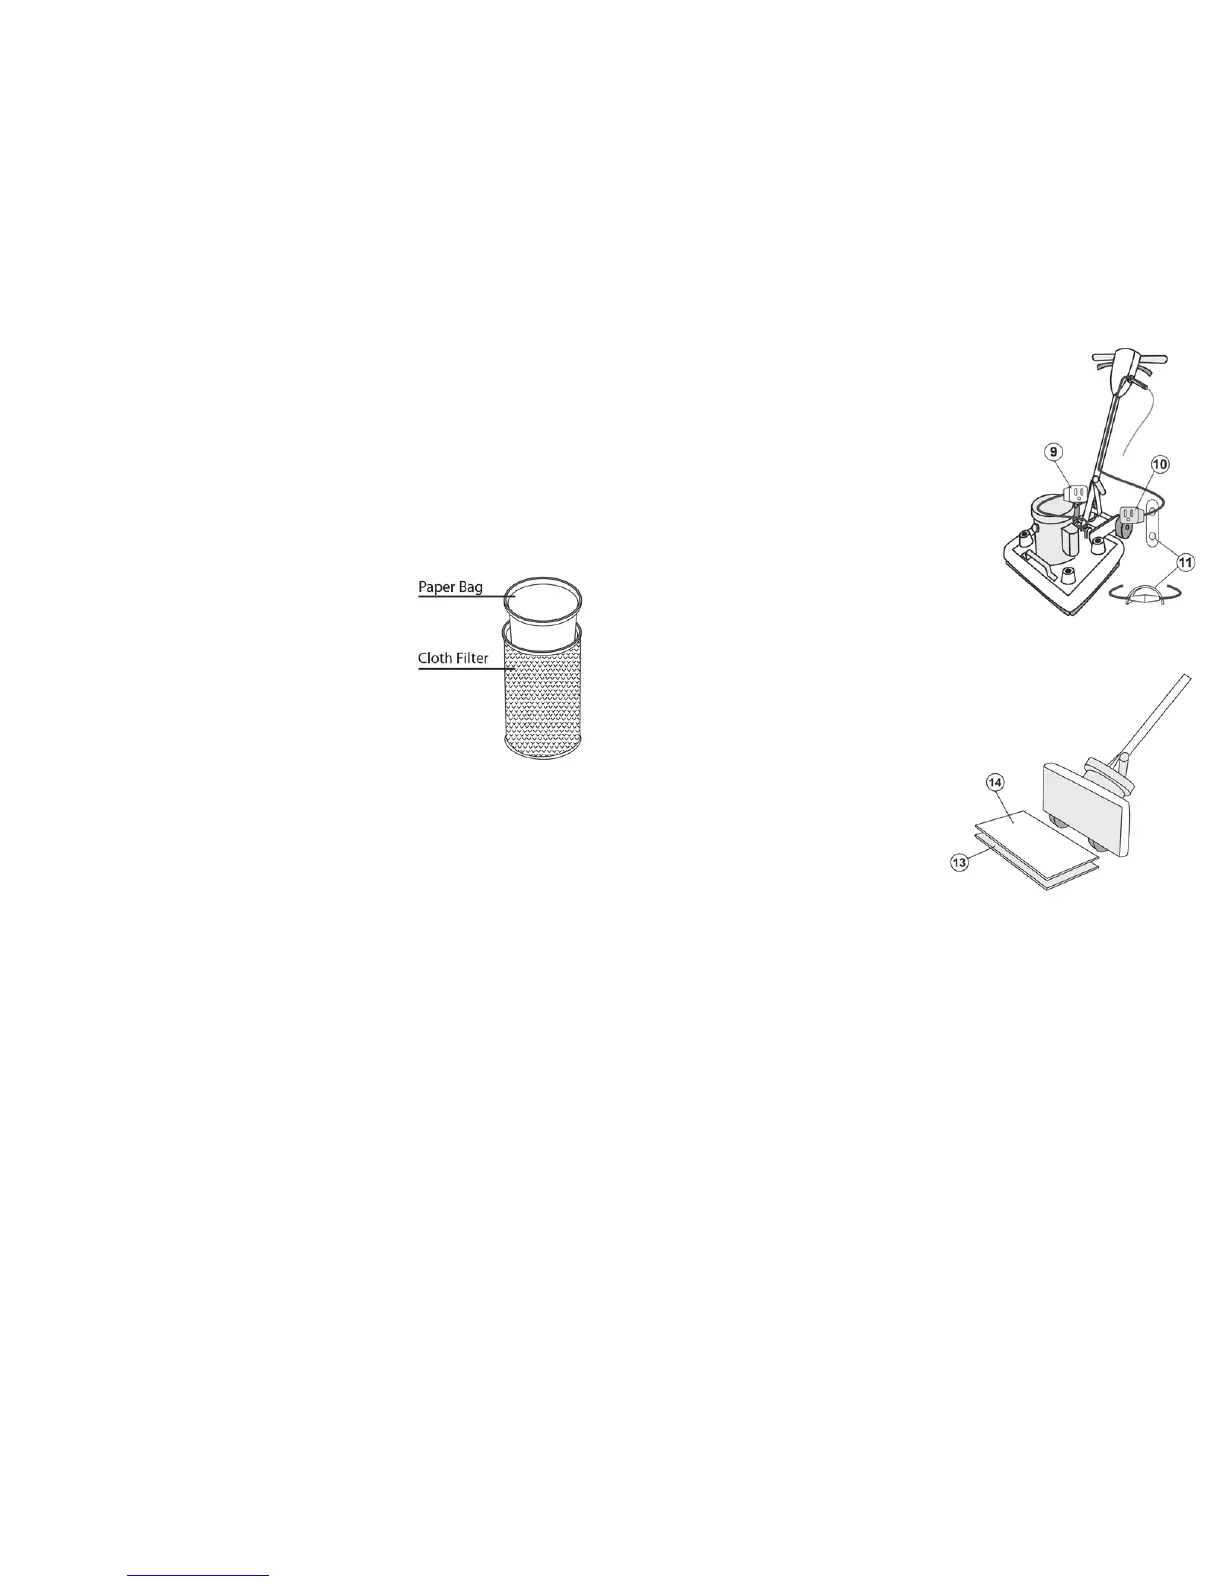
Thetriple-wiregroundedpowercordhasbeenfactory-
installedintothehandletube.Aexiblerubbercable
connector(11)isusedtosecuretheplug-inconnections.
Theoormachineshipswiththisconnectormountedon
thecordcomingoutofthehandle(10).
Stretchtheconnectorandslipthemaleconnector(9)
(comingoutofthemotorhousing)throughtheconnector
holeandthenintothefemaleconnector.
Plugtheendofthe50-footpowercordintoagrounded
poweroutlet.Squeezethetriggersonthehandleand
checkforpowertothemotor.
2.2 Install the Pads
Unplugtheoormachine.Lockthehandlein
the“up”positionandtipthemachinebackfully.
First,placethemaroon-coloredStripping
Pad(13)ontotheoor,belowthefootofthe
machine.Next,placetheFillerPad(14)directly
ontopofthemaroon-coloredstrippingpad.
WARNING:TheFillerPadmustbeusedwhen
usingthismachine.TheFillerPadhelpsreach
intodepressionsandvariationsintheoor’s
surface.Also,astheStrippingPadwears,the
FillerPadprotectstheoorfromscratchingby
themachine’sbaseplate.
Tipthemachinetowardsthepadsandmaneuver
themachinesothatthepadsarealigneddirectly
belowofthebottomplate.Placethemachine
baseontothepads,ensuringtheentirestackof
padsaretuckedunderneaththemachinebase,
andtipthemachineintotheuprightposition.
Themachineisnowreadyforoperation.
(12) Dry Scrub Floor Machine
Dry Scrub Floor Machine (5)
8.0 6-Quart Backpack Operation Instructions
PREPARATION AND OPERATION. DRY ONLY!
The 6-quart backpack is attached to the oor machine when shipped from the factory. No
assembly is required. This vacuum is equipped with an air-thru motor and is designed for
dry pickup only.
Getting Started:
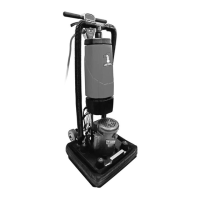
Make sure your on/off switch is in the OFF position. Remove lid and check to make
sure you have both a cloth lter bag and paper lter bag in place. Secure lid back onto
the vacuum body, tightening securely. Both bags must be used at all times. Any damage
resulting from the lack of using both bags will not be covered under warranty.
To Change Paper Filter Bag:
1. Unscrew lid from body.
2. Remove full paper bag from the tank and dispose of
properly.
3. Take new paper lter bag and set inside cloth lter bag,
expanding it to the sides of the cloth lter bag.
4. Screw lid tightly back onto body.
Cloth Filter Maintenance:
The cloth lter should be inspected and cleaned each time you empty the tank. DO NOT
wash the cloth lter. It could cause shrinkage of the cloth and damage to the gasket.
Simply shake off any dust or loose particles and brush the exposed surface with a soft
bristle brush.
 Loading...