75/90/115 OPTIMAX
Page 11 of 18
Fuel Hose Connection
PORTABLE FUEL TANK
Select a suitable location in boat within engine fuel line length limitations and secure tank
in place.
PERMANENT FUEL TANK
These should be installed in accordance with industry and federal safety standards which
include recommendations applicable to grounding, anti-siphon protection, ventilation, etc.
FUEL HOSE SIZE
Minimum fuel line inside diameter (I.D.) is 5/16 in. (8mm), with separate fuel line/fuel tank
pickup for each engine.
FUEL HOSE CONNECTION
Fasten remote fuel hose to fitting with hose clamp.
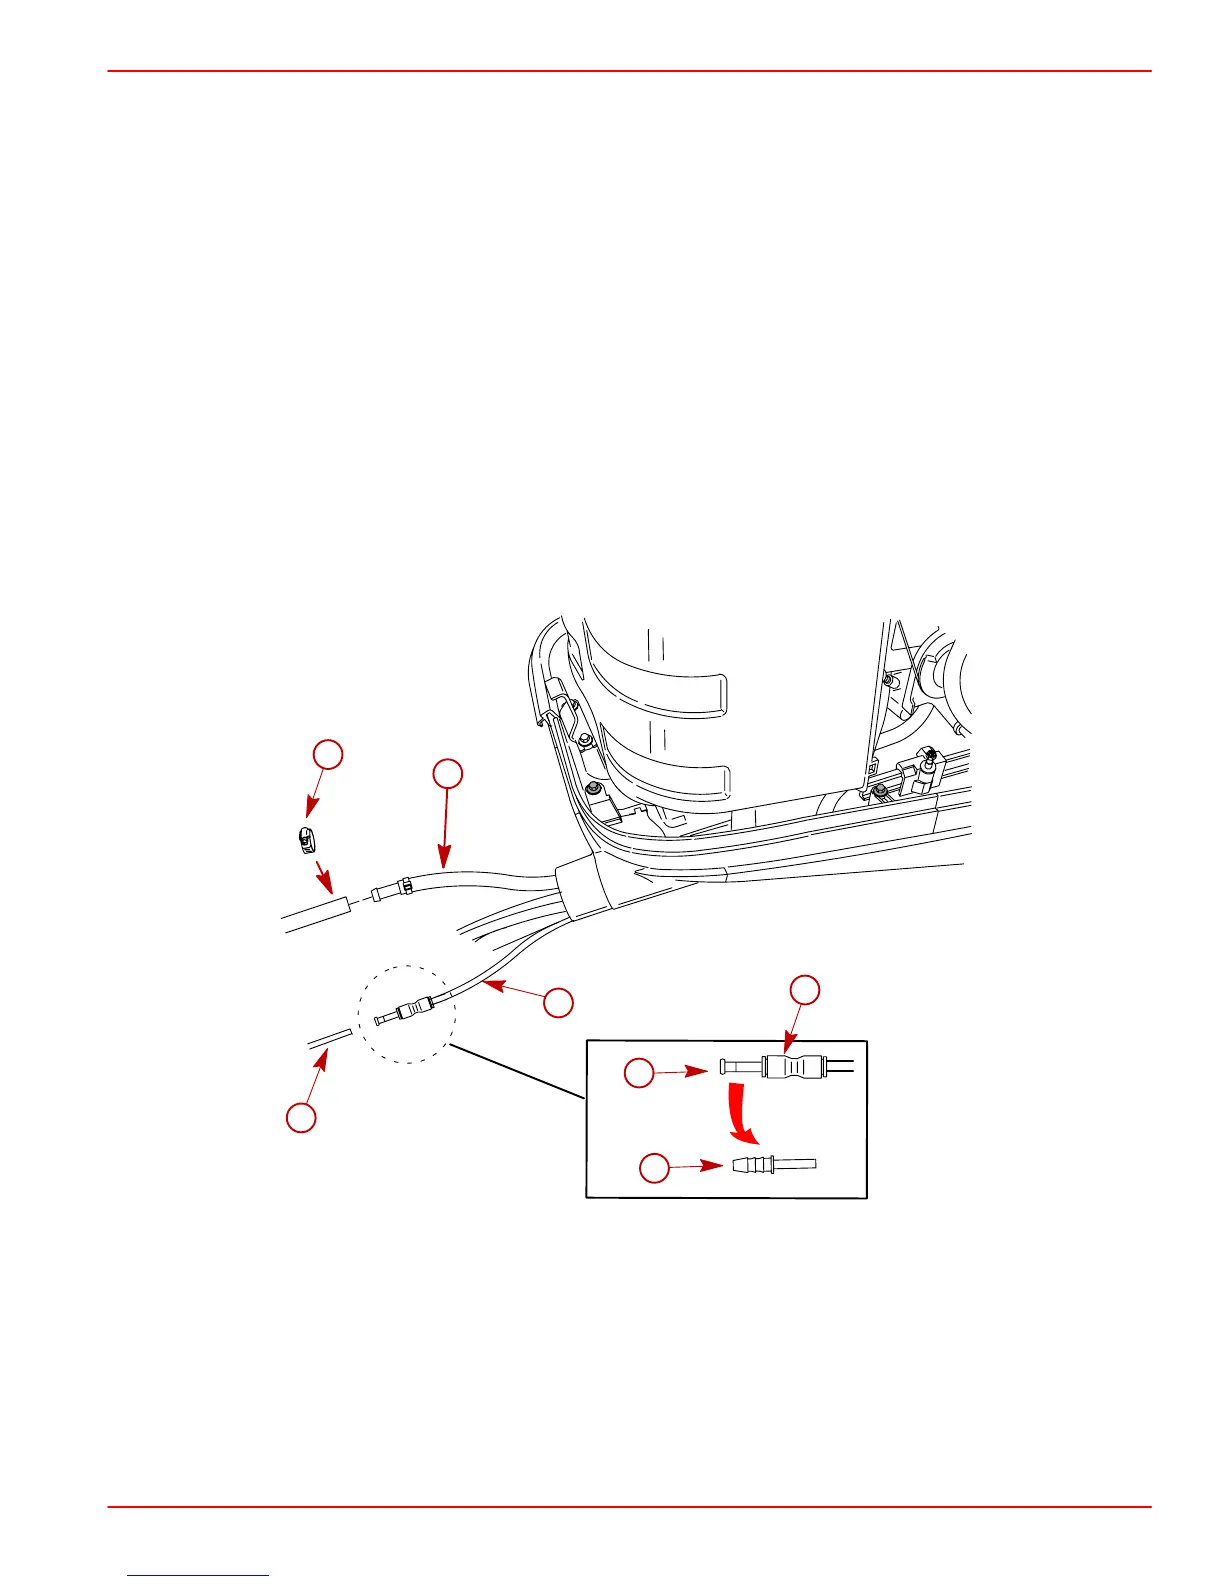
Water Pressure Tubing Connection (Models without SmartCraft Water PSI Gauge)
Make the water pressure gauge hose connection to this tubing as shown.
a
b
f
g
c
d
e
a-Fuel Hose
b-Hose Clamp – Secure Remote Fuel Hose
c-Water Pressure Tubing (Gray Color)
d-Water Pressure Tube – Insert into Coupler, Pull on Tube to Verify That it is
Locked
e-Coupler (859747) – Push In on End of Coupler to Disconnect Plug or Tubing
f-Plug (if equipped) – Remove when Making Coupler Connection
g-Barb Hose Fitting (859731) Provided with Outboard – Install this fitting into Cou-
pler, if a Rubber Hose Connection is Required

 Loading...