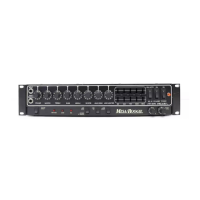
CHANNEL SELECT: CH 1 FS/MD/CH 2 CH 3
This mini toggle allows convenient selection of the Channels when there
is either no other means of selection (no Footswitch), or you purposefully don’t want the JP-2C Footswitch or Midi
Footcontroller attached for perhaps a studio engagement or even just living room enjoyment without cables on the floor.
Channel 1 (switch up) engages the Clean Channel, FS/2 (switch middle) allows selection of the middle LEAD (or
Crunch) Channel and also allows selection of any of the Channels when the JP-2C Footswitch is connected, and
CH 3 (switch down) calls up the 2nd (Right) high gain Lead Channel (Channel 3).
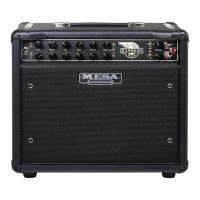
SHRED
This new-to-the-II-C+ voicing switch (Mode) adds upper harmonic content and a layer of more extended top end or
“z’s”–as we sometimes refer to them–to the two high gain Channels (2 and 3) only. It sounds and feels to the player
as if the SHRED Mode has more gain, and in fact it does, but it’s gain in a narrow and specific region aimed at
adding more cut and edge for truly aggressive Chording sounds. It can also be applied to single note Lead sounds,
but in that application SHRED will likely be coupled with lower PRESENCE and/or TREBLE settings to achieve the
best blend of frequencies.
NOTE: Avoid high settings of both GAIN and TREBLE contorls when SHRED is activated. Ignoring thisa will increase microphonic
tendancies and may cause high pitched squaling.
Selecting the upper position SHRED 2 (switch up), engages the SHRED voicing mode in Channel 2 only. Selecting the lower position
“SRD 2+3” (switch down) activates SHRED in both Channels 2 and 3. As mentioned above, SHRED is not available in Channel 1.
As with the other features controlled via a mini toggle switch, when storing settings under a Midi Program number, you must “reset”
the SHRED mode before storing it with the Rear Panel STORE toggle by turning SHRED OFF (switch in the middle) and then back
ON (switch up or down) while in the desired Lead Channel (2 or 3).
To store the SHRED voicing status of a Channel (2 or 3 Only) under a Midi Program, (as with all the Feature mini toggles on the JP-
2C) you must first reset the switching buss. Follow these simple steps;
1. Go to the desired Midi Program Number on your Midi controller of choice.
2. Call up the desired JP-2C Channel with the Front Panel Channel Select mini toggle located in the upper right corner of the EQ Window.
3. Set the SHRED mini toggle located in the lower right corner of the EQ window to the “MD” (switch center) position.
4. Move the SHRED mini toggle to the corresponding (for the Channel you are storing) SHRED assignment position; “ SHRED 2” or “SRD 2+3”.
5. Toggle the STORE switch on the far left (when viewing from front of amp) of the Rear Panel of the JP-2C one time. The current
Channel and SHRED voicing mode status has been written to the currently displayed Midi program location on the Midi controller.
The Channel and SHRED voicing status is now saved under the current Midi Program Number displayed on your Midi control-
ler and should be called up again when next you return to that Program Number. If it is not, repeat steps 1 – 5 and check again.
Whether adding this layer of harmonic edge to your Crunch Rhythm sounds for more tight-tracking aggression, or blending
it with the other controls responsible for top end shaping in Lead applications, SHRED adds a new dimension to the clas-
sic MARK II-C+ character. This upper extension combined with the Graphic EQ and the powerful Tone controls, updates
the C+ legacy, making it even more menacing and bringing it front and center in today’s race for the ultimate Heavy sound.
POWER
This switch controls the AC power Mains in your amplifier. Always make sure the (supplied) IEC Power Cable is con-
nected to a grounded Outlet delivering the proper AC voltage –117v USA. Never alter the Power Cable as doing so may
cause damage to the amplifier, increase the risk of electric shock for you, and will void your Warranty. Always follow the
Cold Start Procedure below and allow the tubes to warm up before turning the STANDBY on (switch up) as this will help
the tubes and all other components in your amplifier to provide years of reliable service.
80Hz 240 750 2200 6600 80Hz 240 750 2200 6600
EQ 1
FX
MD
CH 1
FS
MD
EQ 2
2
CH 3
SHRED 2
MD
SRD 2+3
80Hz 240 750 2200 6600 80Hz 240 750 2200 6600
EQ 1
FX
MD
CH 1
FS
MD
EQ 2
2
CH 3
SHRED 2
MD
SRD 2+3
REV
MD/FS
EQ
1
EQ 2
I
O
80Hz 240 750 2200 6600 80Hz 240 750 2200 6600
CH 1
FS
MD
2
CH 3
SHRED 2
MD
SRD 2+3
REV
MD/FS
EQ
1
EQ 2
PAGE 16

 Loading...