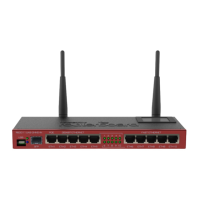
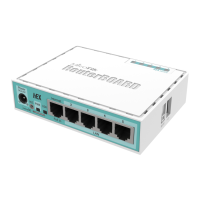
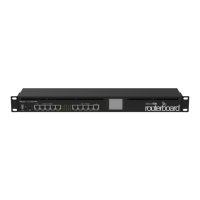
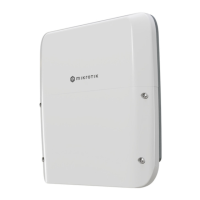
First steps:
Make sure your Internet service provider is allowing hardware change and will issue an automatic IP address;
Connect the service provider cable to the Internet port and connect the device to the power source;
Open network connections on your computer and search for MikroTik wireless network - connect to it;
The configuration can be done through the wireless network using a web browser or mobile app. Alternatively, you can use a WinBox configuration toolhttps://
;mt.lv/winbox
Open in your web browser to start configuration, user name: a and there is no password by defaulthttp://192.168.88.1
dmin
(or, for some models, check user
and wireless passwords on the sticker);
Click the "Check for updates" button and update RouterOS to the latest version;
For a manual update of the device, visit the products page at to find your product. The required packages are accessible under https://mikrotik.com/products
the menu;
"Support&Downloads"
Upload downloaded packages to the menu and reboot the device;
WebFigor
Winbox
"Files"
By upgrading your RouterOS software to the latest version, you can ensure optimal performance, stability, and security updates;
In the menu set up the following: Choose your country, to apply country regulation settings;
"QuickSet"
Set up your wireless network password in the left field;
Set up your router password in the bottom field.
Safety Information:
Before you work on any MikroTik equipment, be aware of the hazards involved with electrical circuitry, and be familiar with standard practices for preventing
accidents. The installer should be familiar with network structures, terms, and concepts.
Use only the power supply and accessories approved by the manufacturer, and which can be found in the original packaging of this product.
This equipment is to be installed by trained and qualified personnel, as per these installation instructions. The installer is responsible for making sure, that the
Installation of the equipment is compliant with local and national electrical codes. Do not attempt to disassemble, repair, or modify the device.
This product is intended to be installed indoors. Keep this product away from water, fire, humidity, or hot environments.
We cannot guarantee that no accidents or damage will occur due to the improper use of the device. Please use this product with care and operate at your own
risk!
The socket-outlet shall be installed near the equipment and shall be easily accessible.
In the case of device failure, please disconnect it from power. The fastest way to do so is by unplugging the power adapter from the power outlet.
To avoid contamination of the environment, separate the device from household waste and dispose of it in a safe manner, for example, in designated areas.
Become familiar with procedures for properly transporting the equipment to designated collection points in your area.
This MikroTik equipment complies with the European Union radiation exposure limits set forth for an uncontrolledExposure to Radio Frequency Radiation:
environment. This MikroTik device should be installed and operated no closer than 20 centimeters from your body, occupational user, or the general public.
Manufacturer: Mikrotikls SIA, Unijas 2, Riga, Latvia, LV1039.
BG - Български. Бързо ръководство:
Това бързо ръководство обхваща модели:
RB941-2nD-TC (hAP lite TC), RB941-2nD (hAP lite),RB931-2nD (hAP mini).
Това е устройство за безжична мрежа. Можете да намерите името на модела на продукта на етикета на регистъра (ID).
Моля, посетете страницата с ръководството за потребителя на за пълното актуализирано ръководство за употреба.https://mt.lv/um-bg
Или сканирайте QR кода с мобилния си телефон.
Технически спецификации, брошури и повече информация за продуктите наhttps://mikrotik.com/products
Най-важните технически спецификации за този продукт могат да бъдат намерени на последната страница на това Кратко ръководство.
Ръководство за конфигуриране на софтуер на вашия език с допълнителна информация можете да намерите на https://mt.lv/help-bg
Ако имате нужда от помощ при конфигуриране, моля, потърсете консултант https://mikrotik.com/consultants
Първи стъпки:
Уверете се, че вашият доставчик на интернет услуги позволява промяна на хардуера и ще издаде автоматичен IP адрес;
Уверете се, че вашият доставчик на интернет услуги позволява промяна на хардуера и ще издаде автоматичен IP адрес;
Свържете устройството към източника на захранване;
Отворете мрежовите връзки на вашия компютър и потърсете безжична мрежа MikroTik - свържете се към нея;
Конфигурацията трябва да се извърши през безжичната мрежа с помощта на уеб браузър или мобилно приложение;
Като алтернатива можете да използвате инструмент за конфигуриране на WinBox ;https://mt.lv/winbox
отвореноhttp://192.168.88.1 във вашия уеб браузър за стартиране на конфигурация, потребителско име: a
dmin
и няма парола по подразбиране(или,
за някои модели, проверете потребителските и безжичните пароли на стикера);
Щракнете върху бутона и актуализирайте RouterOS до най-новата версия;
"Check for updates"
За ръчна актуализация на устройството посетете страницата с продукти на , за да намерите вашия продукт. https://mikrotik.com/products
Необходимите пакети са достъпни в менюто ;
"Support&Downloads"
Качете изтеглените пакети в менюто и рестартирайте устройството;
WebFigилиWinbox"Files"
Чрез надграждане на софтуера на RouterOS до най-новата версия можете да осигурите оптимална производителност, стабилност и актуализации
за сигурност;
В менюто настройте следното: Изберете вашата страна, за да приложите настройките за регулиране на страната;
"QuickSet"
Настройте паролата за вашата безжична мрежа в лявото поле;
Задайте паролата на вашия рутер в долното поле.
Информация за безопасност:
Това устройство трябва да бъде надстроено до RouterOS v7.10 или най-новата стабилна версия, за да се гарантира спазването на местните
наредби!
Крайните потребители са отговорни да спазват местните разпоредби, включително работа в рамките на законни честотни канали, изходна
мощност, изисквания за окабеляване и изисквания за динамичен избор на честота (DFS). Всички радиоустройства MikroTik трябва да бъдат
инсталирани съгласно инструкциите.
 Loading...
