F3 Service Manual
Page 48
NOTE
The noise cancel button and earset connector are an integral part of the main wiring
loom and this assembly is waterproof. Do not try to disassemble the wiring loom. It
is not repairable.
a. To Disassemble the Handle:
Remove the speaker pod. Refer to section 4.6.a. To Remove the Speaker Pod.
Undo and remove the four nuts and bolts holding the handle halves together
using a 3mm Hex Driver (Allen key).
Carefully separate the left handle half from the upper shaft.
Remove the earset dust cap. (Part 5).
Old F3 detectors only remove the captive nut.
The wiring loom (Part 7) and on/off switch assembly slider (Part 6) can now be
removed from the right handle half if required.
b. To Assemble the Handle:
Position the right handle half onto the upper shaft.
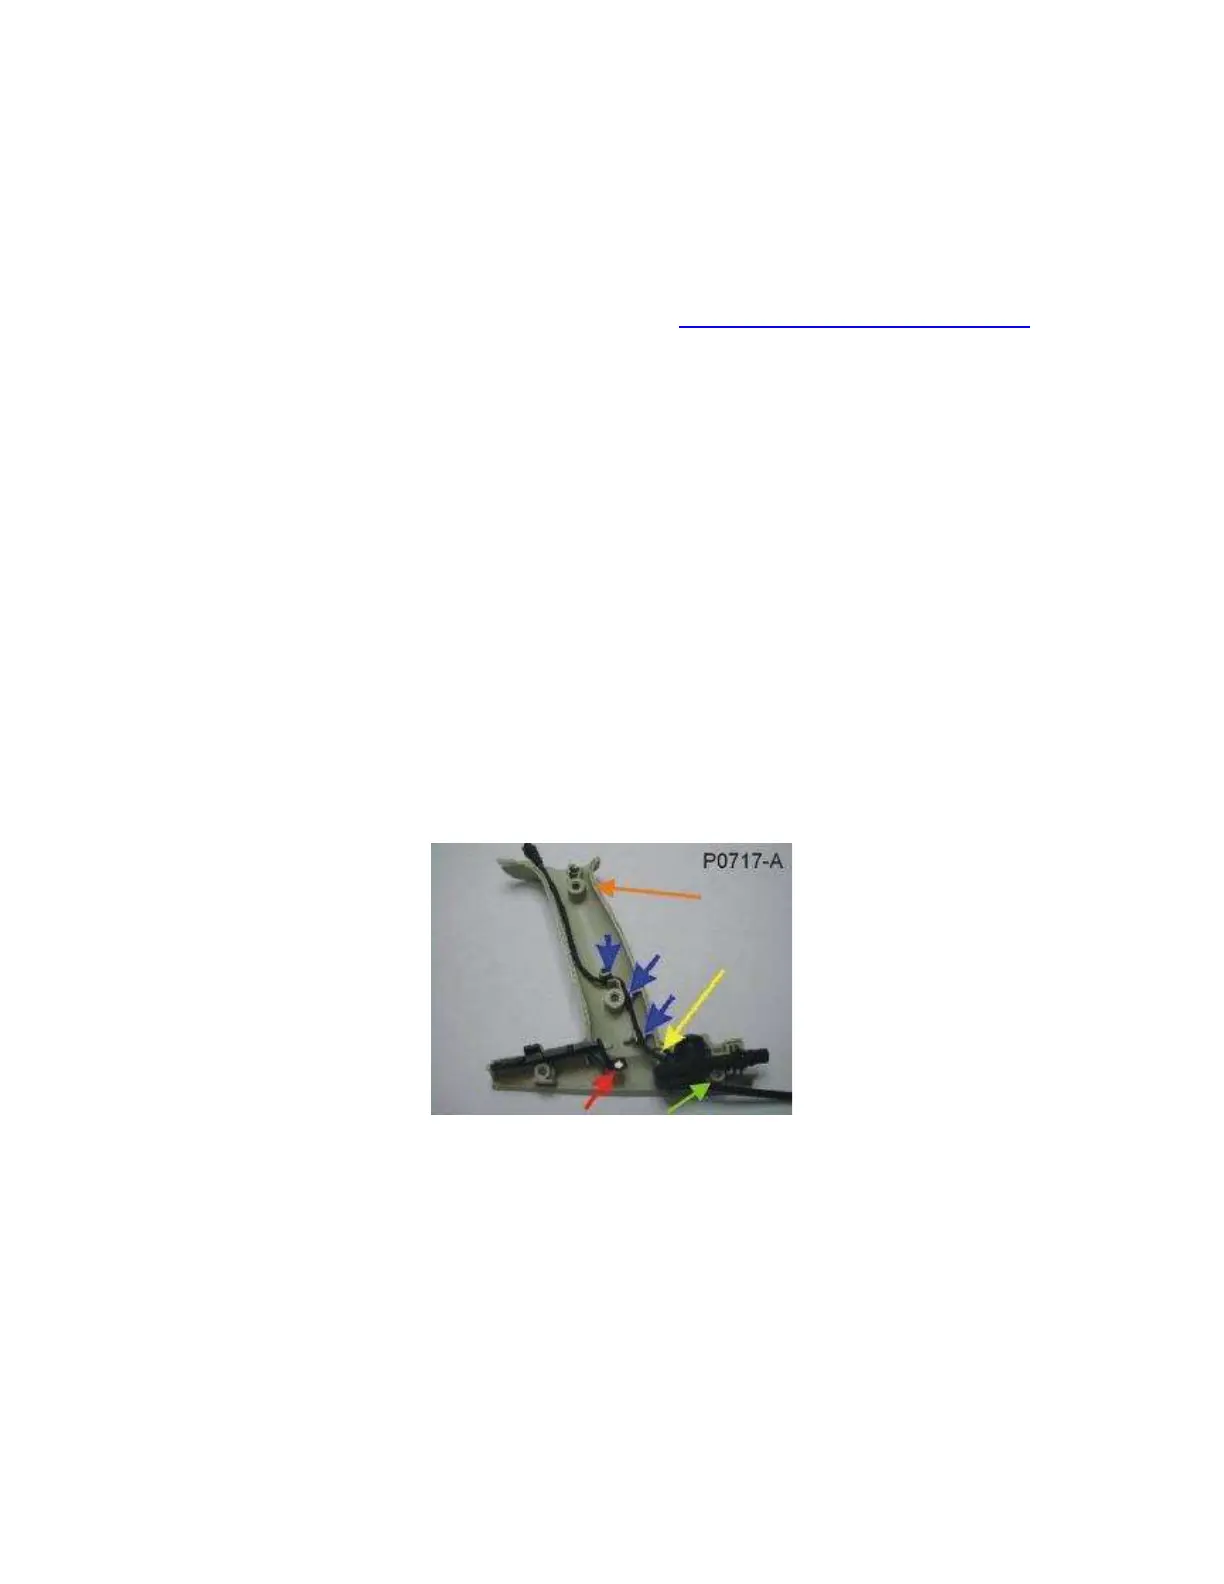
Lay the wiring loom into the cable channels and ensure the wiring loom plug
exits the top of the handle in front of the upper screw boss. As shown in Figure
46.
Figure 46: Handle with Wiring Loom correctly positioned.
Ensure the lower portion of the wiring loom cable sits under the rear handle
screw boss and cannot be snagged by the bolts once the handle is assembled.
Ensure the on/off switch slider (Part 6) is correctly positioned.
Fit the earset dust cap into the recess in the handle just forward of the earset
plug. Shown in Figure 47.
Old F3 detectors only, place the captive nut in the top of the handle.
 Loading...