12
en
6.2. Testrun
The following 3 methods are available.
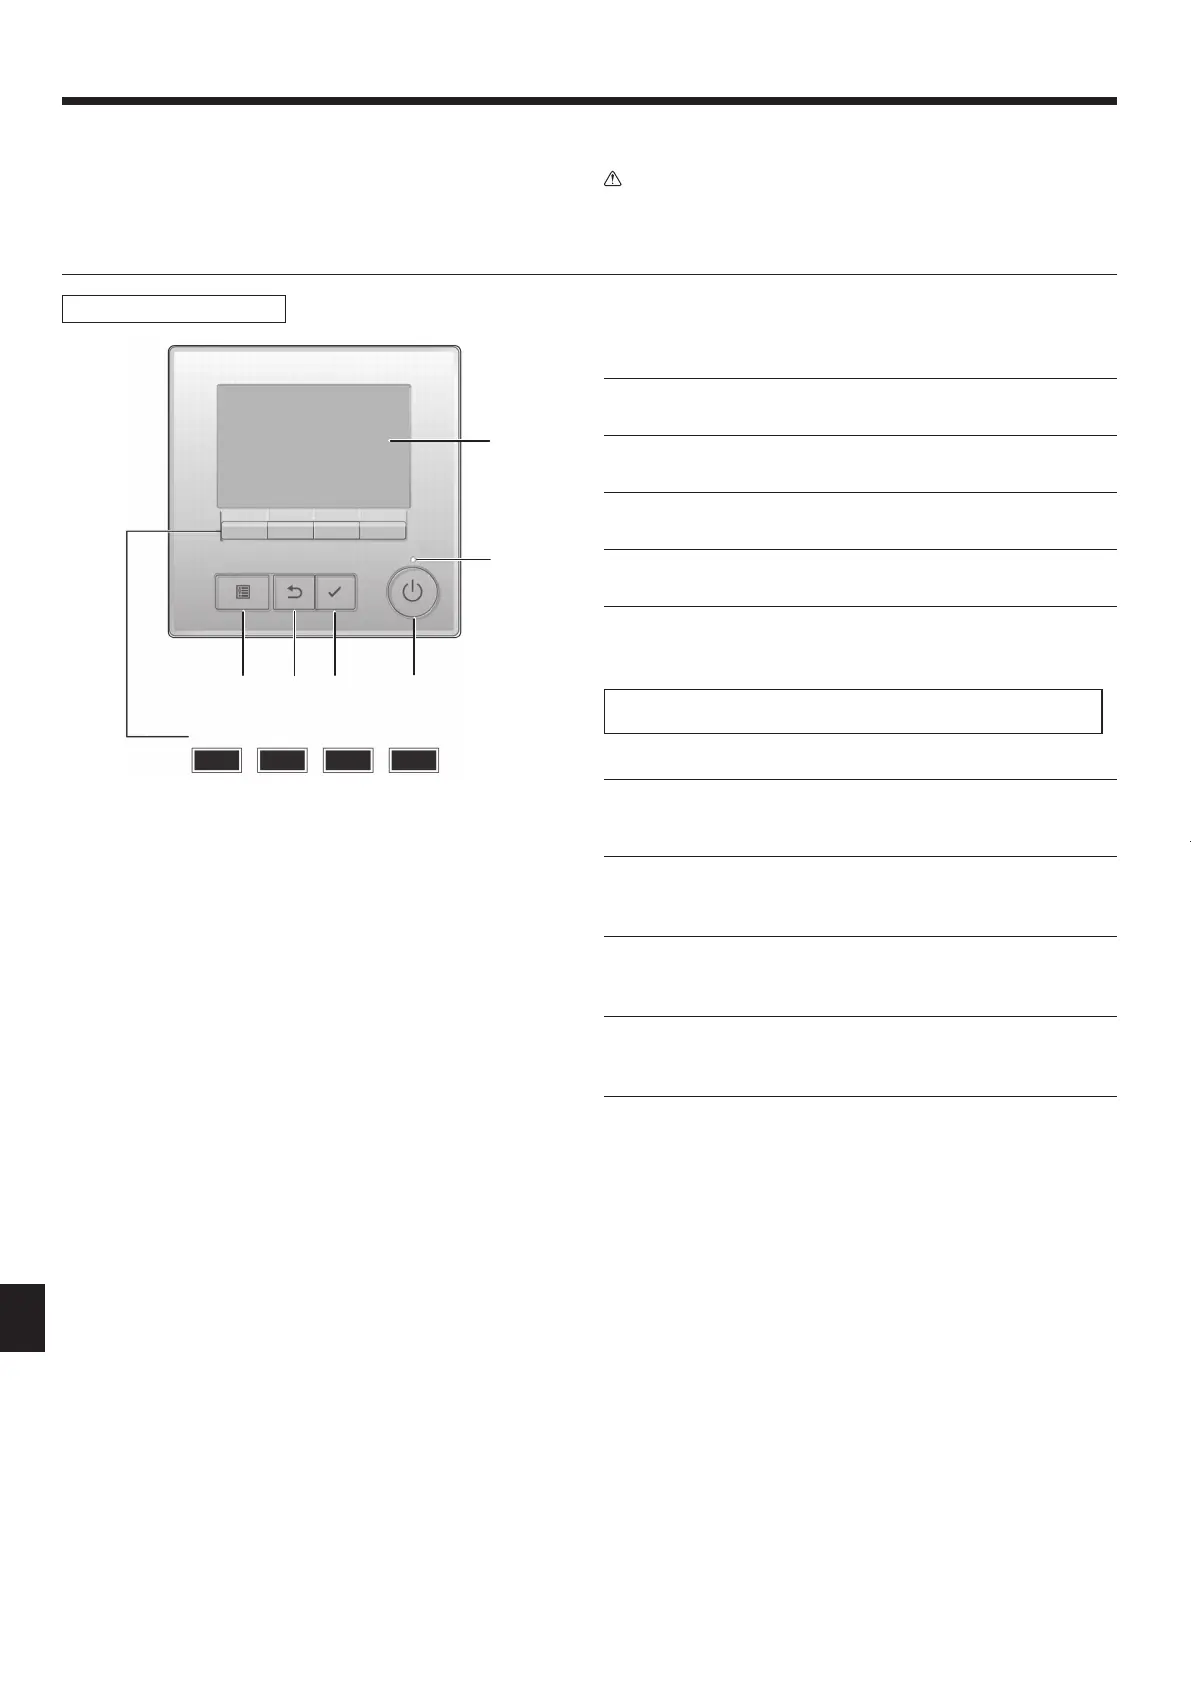
6.2.1. Usingwiredremotecontroller(Fig.6-1)
▌1[ON/OFF]button
Press to turn ON/OFF the indoor unit.
▌2[SELECT]button
Press to save the setting.
▌3[RETURN]button
Press to return to the previous screen.
▌4[MENU]button
Press to bring up the Main menu.
▌5BacklitLCD
Operation settings will appear.
When the backlight is off, pressing any button turns the backlight on and it will
stay lit for a certain period of time depending on the screen.
When the backlight is off, pressing any button turns the backlight on and does
not perform its function. (except for the [ON/OFF] button)
▌6ON/OFFlamp
This lamp lights up in green while the unit is in operation. It blinks while the
remote controller is starting up or when there is an error.
▌7Functionbutton[F1]
Main display: Press to change the operation mode.
Main menu: Press to move the cursor down.
▌8Functionbutton[F2]
Main display: Press to decrease temperature.
Main menu: Press to move the cursor up.
▌9Functionbutton[F3]
Main display: Press to increase temperature.
Main menu: Press to go to the previous page.
▌0Functionbutton[F4]
Main display: Press to change the fan speed.
Main menu: Press to go to the next page.
Controllerinterface
Fig.6-1
► Donotcarryoutthistestonthecontrolwiring(lowvoltagecircuit)terminals.
Warning:
Donotusetheairconditioneriftheinsulationresistanceislessthan1.0MΩ.
6.1. Beforetestrun
► Aftercompletinginstallationandthewiringandpipingoftheindoorand
outdoorunits,checkforrefrigerantleakage,loosenessinthepowersupply
orcontrolwiring,wrongpolarity,andnodisconnectionof1phaseinthe
supply.
► Usea500-voltmegohmmetertocheckthattheresistancebetweenthepower
supplyterminalsandgroundisatleast1.0MΩ.
6. Testrun
4 32
1
5
6
7890
Function buttons
RG79F456H01_en.indd 12 2019/07/03 14:25:32

 Loading...