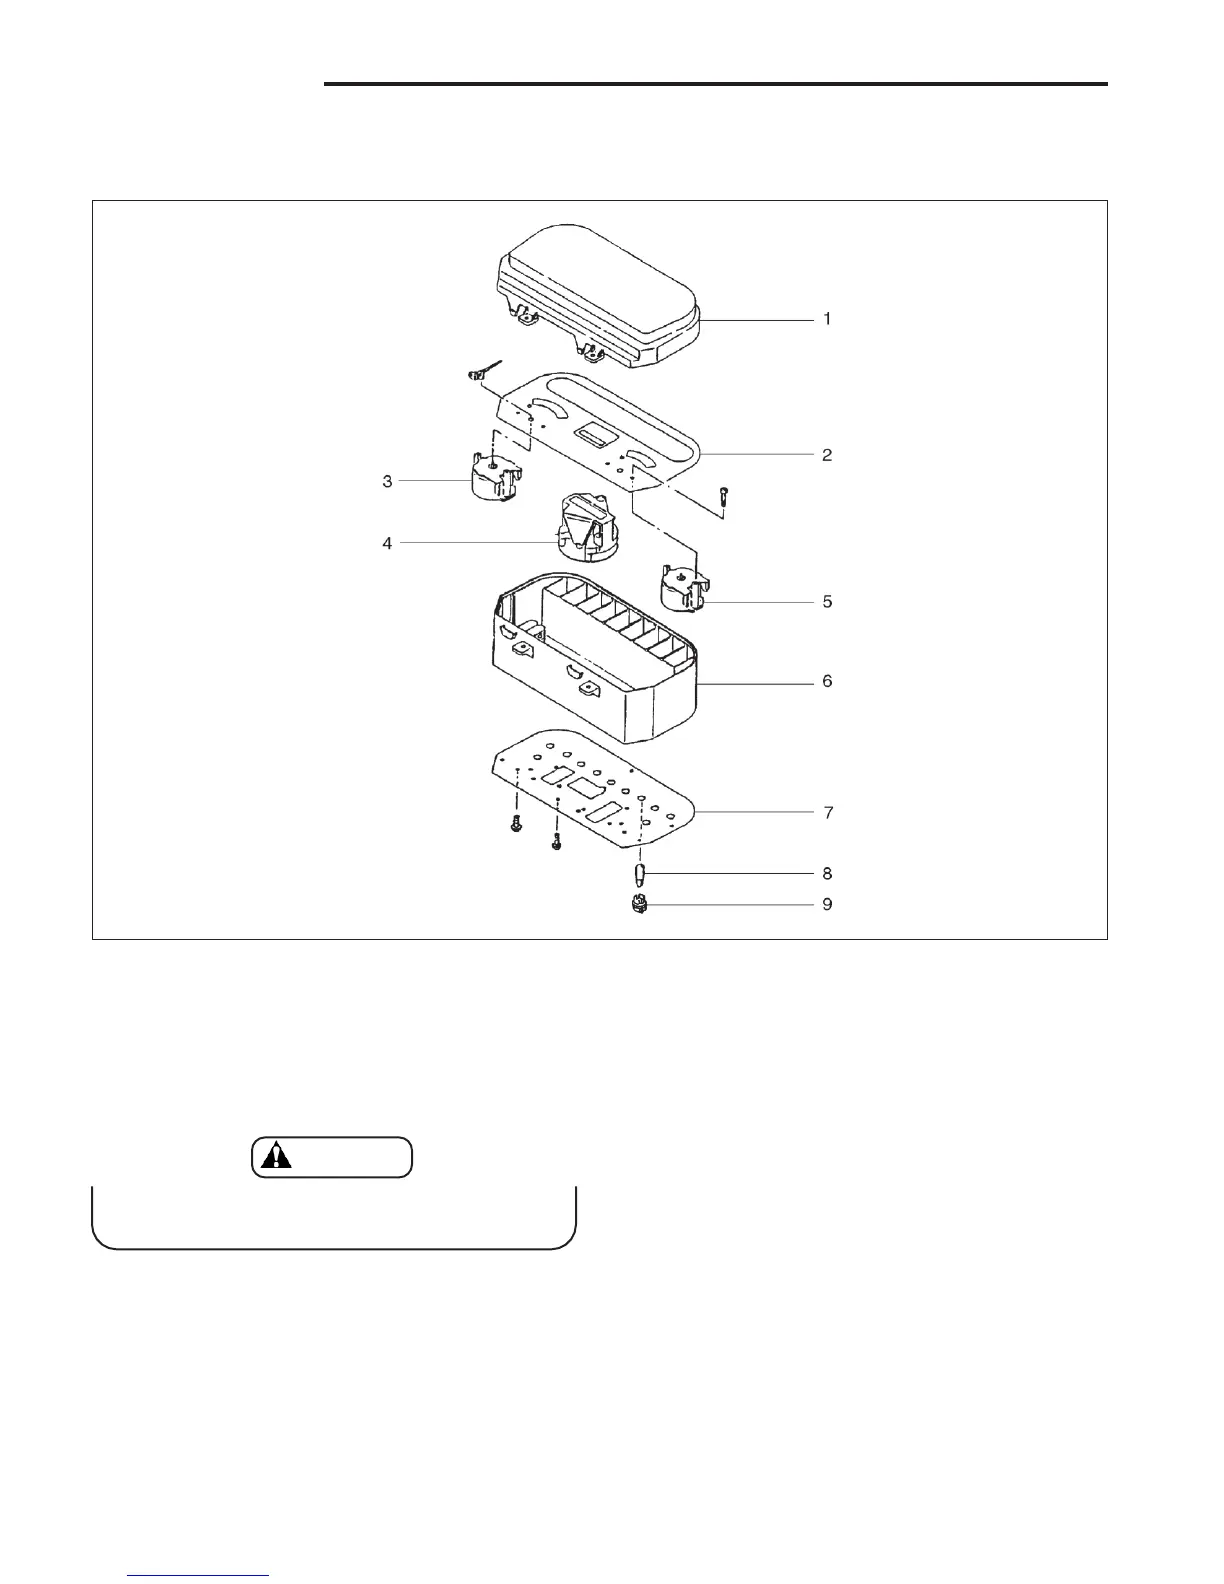
Combination Meter
Disassembly
Sequence
1
Meter cover
2
Dial
3
Engine coolant temperature gauge
4
Service hourmeter
5
Fuel gauge
6
Meter case
7
Printed circuit
8
Bulb
9
Socket
Reassembly
To reassemble the combination meter, follow the reverse
of disassembly procedure.
Bulb Replacement
For bulb replacement, remove the socket from the
printed circuit by turning it to the left. For configuration
of the indicator lights, refer to “OK Monitor”.
Be careful not to damage the printed circuit
when disassembling the combination meter.
 Loading...