-
182
-
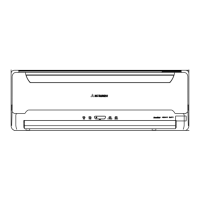
[Drain hose changing procedures]
1. Remove the drain hose.
¡ Remove the drain hose,
making it rotate.
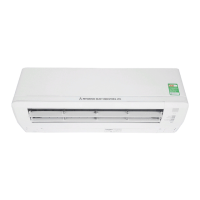
Since this air conditioner has been designed to collect dew drops
on the rear surface to the drain pan, do not attach the power
cord above the gutter.
Gutter
Pipe accommodation section
Drainage
¡ Arrange the drain hose in a downward angle.
¡ Avoid the following drain piping.
Higher than specified The drain hose
tip is in water.
Weavy The gap to the ground
is 5 cm or less.
The drain hose tip is in
the gutter.
Odor from
the gutter
¡ Pour water to the drain pan located under the heat exchanger, and ensure that the water is discharged outdoor.
¡ When the extended drain hose is indoor, always use a shield pipe (to be arranged by the user) and ensure it is thermally
insulated.
Shield pipe
Extended drain hose
When it is exposed indoor.Drain hose
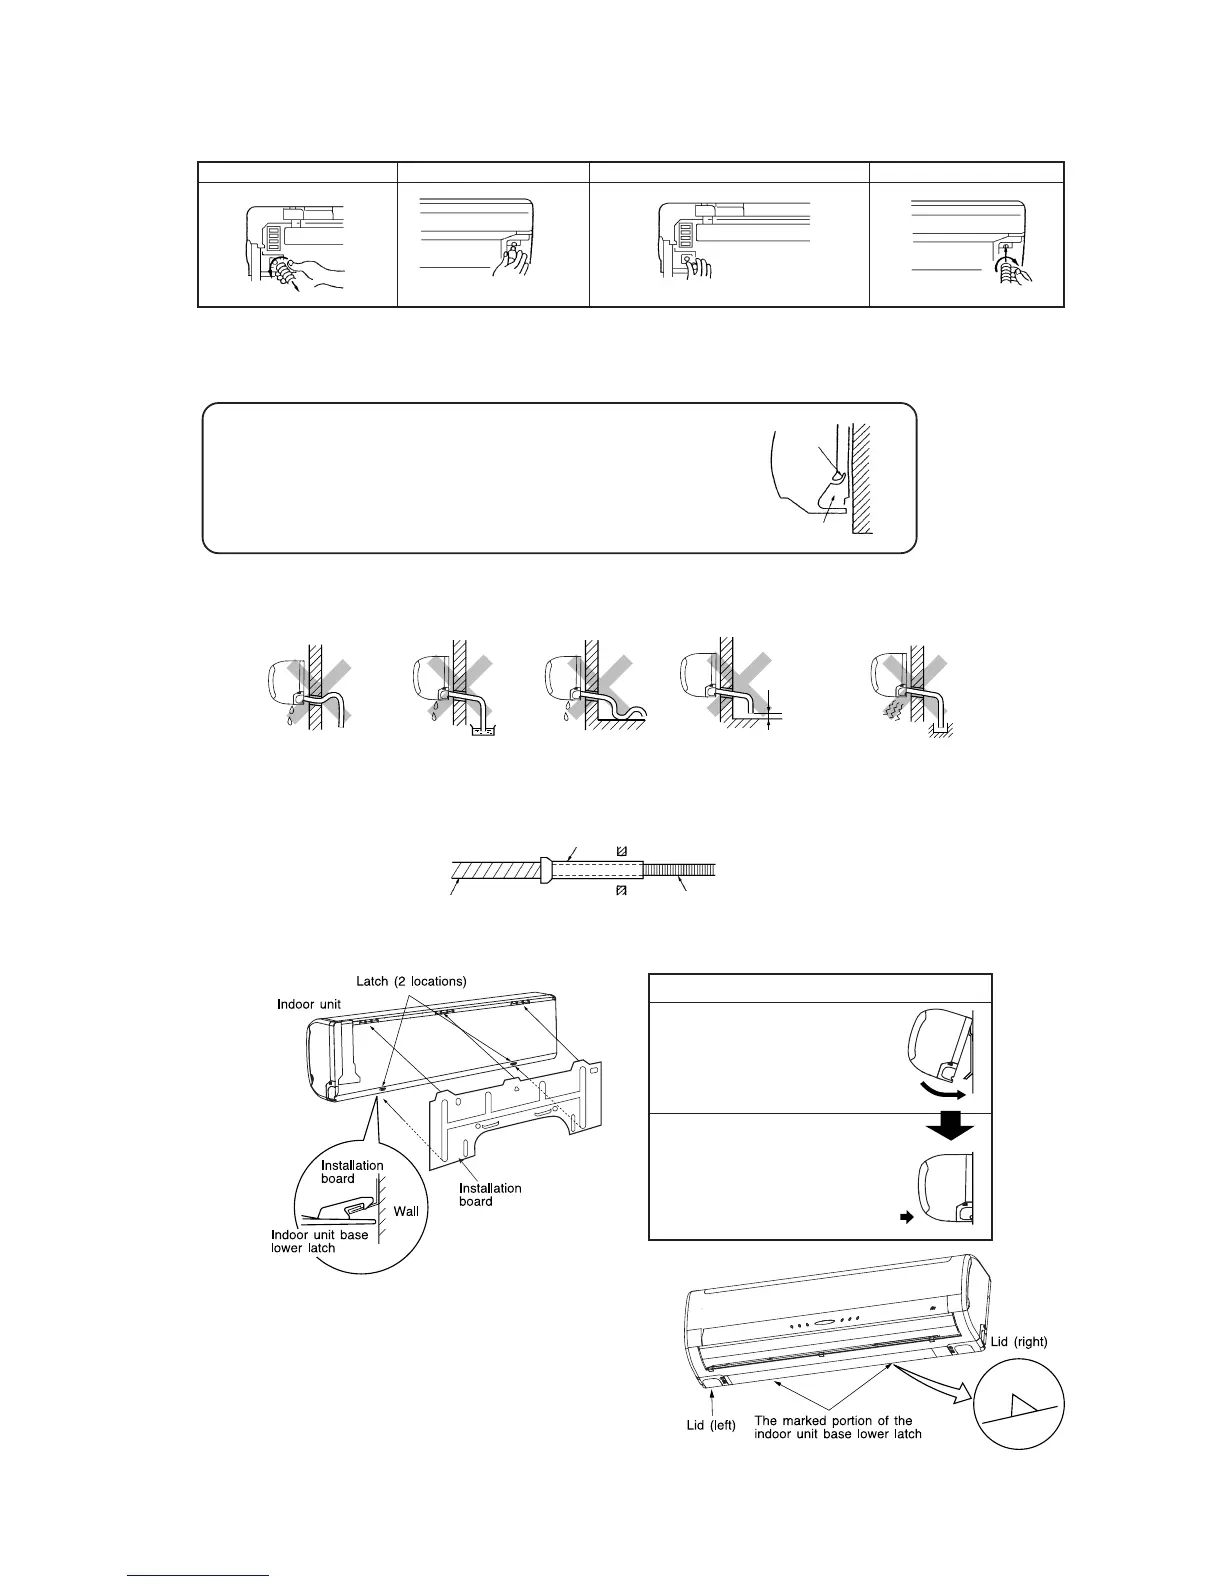
(iii) Fixing of indoor unit
¡ How to remove the indoor unit from the installation board
1 Push up at the marked portion of the indoor unit base
lower latch, and slightly pull it toward you.
(both right and left hand sides)
(The indoor unit base lower latch can be removed from
the installation board)
2 Push up the indoor unit upward. So the indoor unit will
be removed from the installation board.
¡Remove it with hand or
pliers.
¡ Insert the drain cap which was removed at
proce-dure “2” securely using a hexagonal
wrench, etc.
Note: Be careful that if it is not inserted
securely, water leakage may occur.
¡ Insert the drain hose
securely, makingit rotate.
Note: Be careful that if it is
not inserted securely, water
leakage may occur.
2. Remove the drain cap. 3. Insert the drain cap. 4. Connect the drain hose.
Installation Steps
1 Pass the pipe through the hole
in the wall, and hook the upper
part of the indoor unit to the
installation board.
2 Gently push the lower part to
secure the unit.
 Loading...