Rev. 00 of 01.01.2009 9 / 29
3.1 INSTALLATION LAYOUT
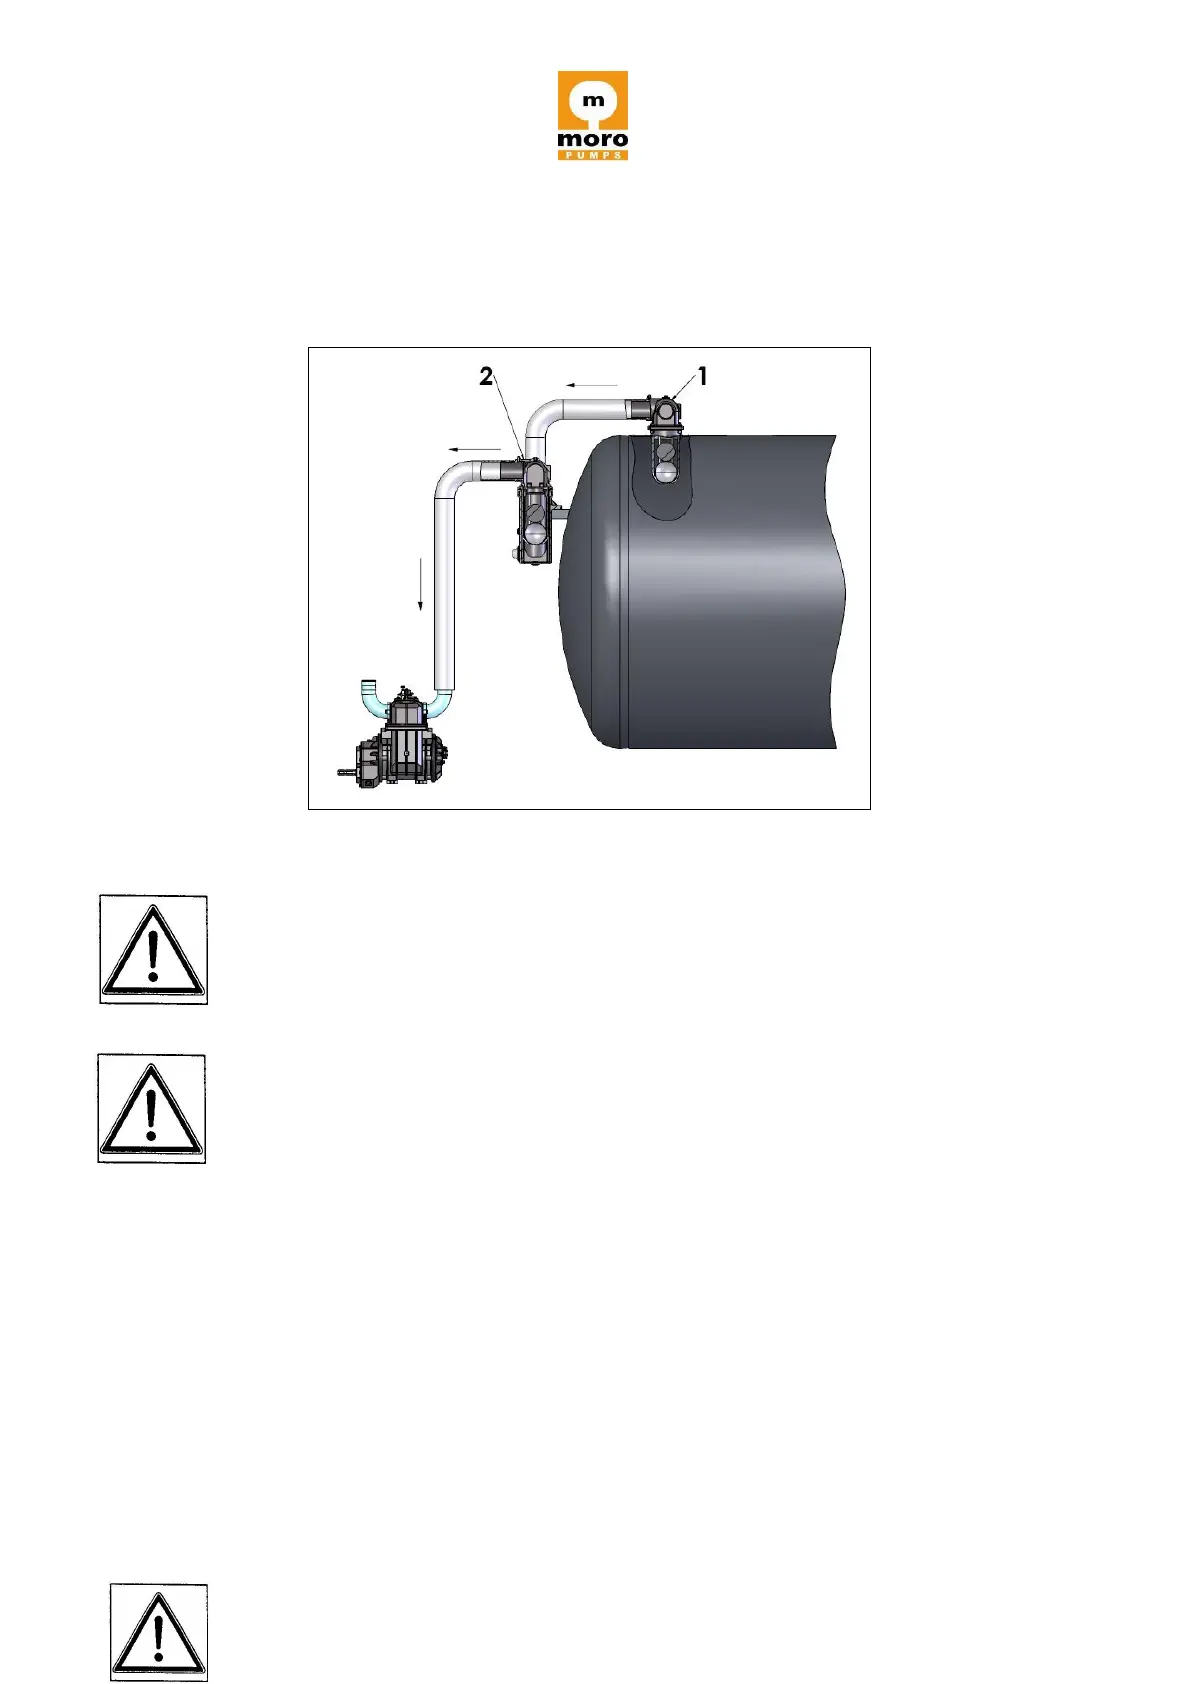
Vacuum pump assembly layout (figure 1)
Maintenance, inspection, use and repair must be performed with maximum care,
with the drive switched off and the power take off disengaged.
It is absolutely mandatory to avoid the ingestion of foreign bodies in the vacuum
pump as this is likely to cause damage to the pump.
It is thus necessary to provide the system with a primary trap “1” and a secondary
trap “2” between the vacuum pump and the tank
(see Figure 1).
3.2 ASSEMBLY AND FITTING - INSTALLATION
The vacuum pump must be assembled and installed following this procedure:
1. Assemble the vacuum pump in horizontal position with its feet facing downward. The
position of assembly on the vehicle must be easily accessible and protected. It is
necessary not to exceed a longitudinal angle of 5° on the horizontal plane.
2. Position the vacuum pump and fasten it by means of bolts, nuts and washers in the
specific slots or holes provided in the feet.
3. To install the vacuum pump:
- version with overgear (…AM) it is necessary to connect the coupling of the 540
 Loading...