I 26 I
7.1.1 Open the RSLogix 5000 software interface
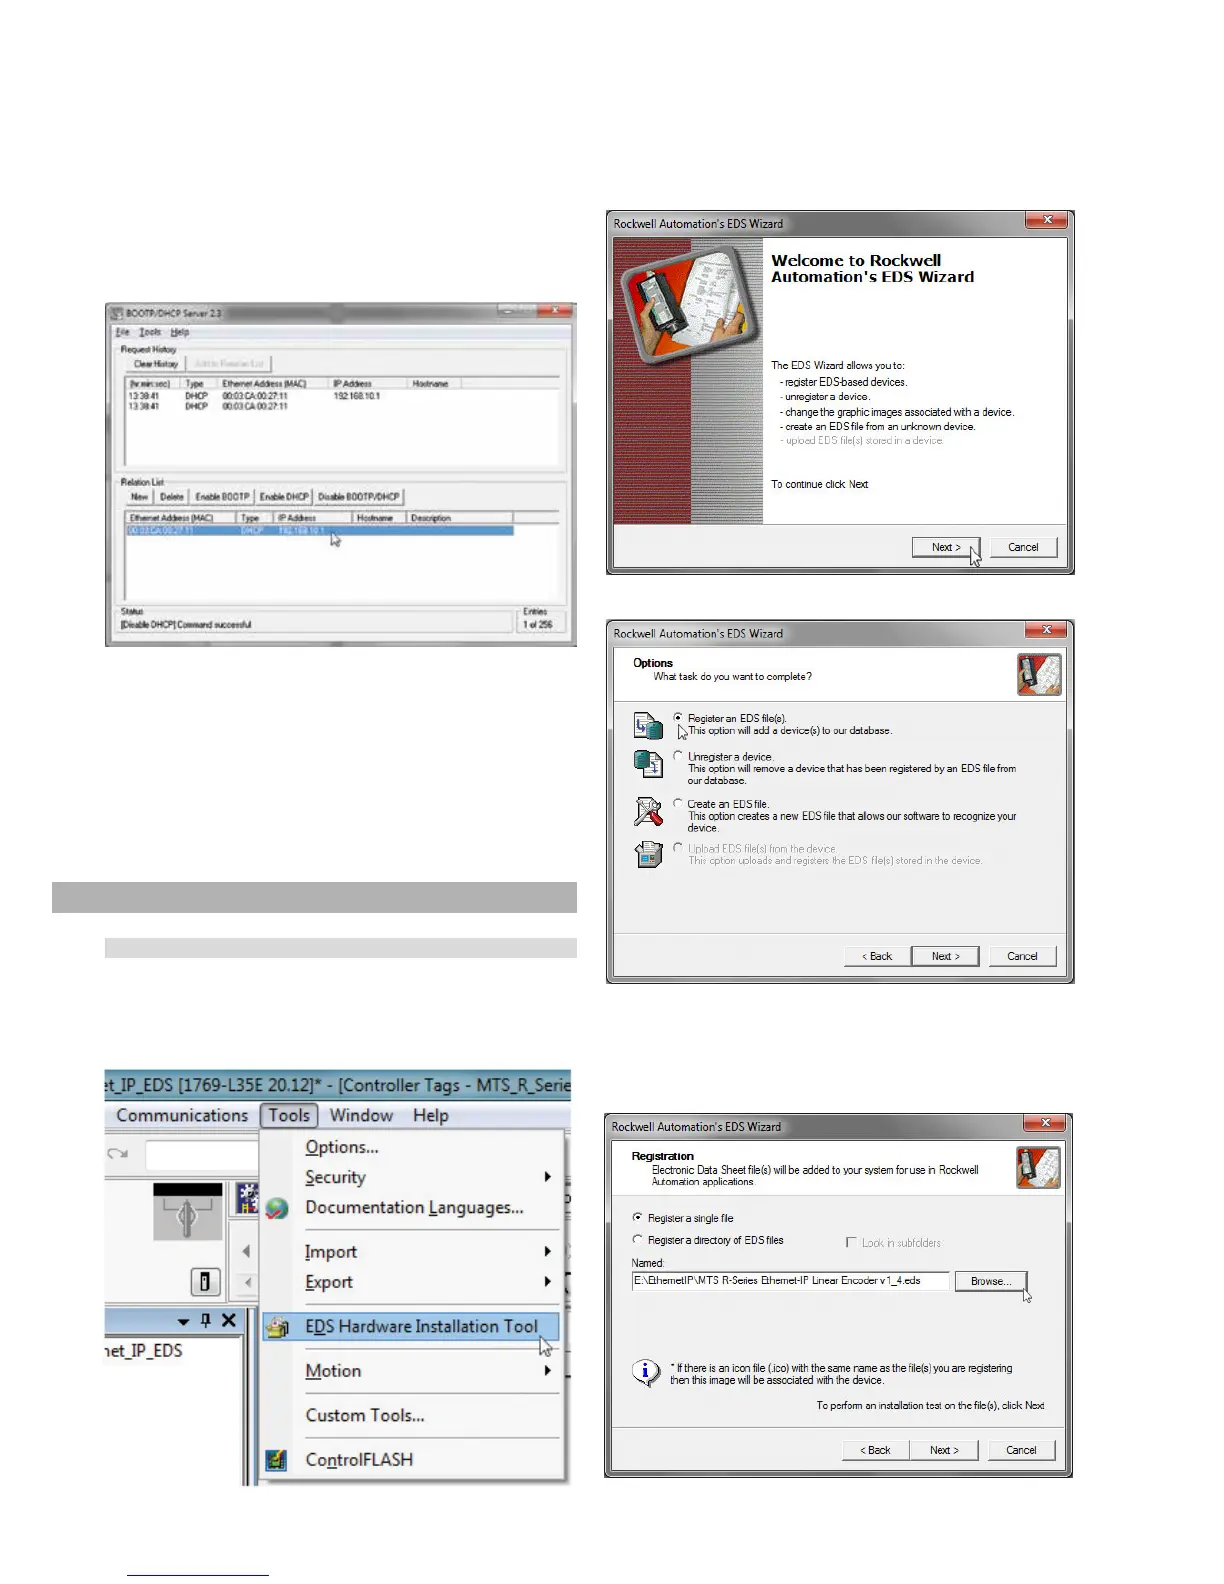
7.1.2 Click the Tools menu and select “EDS Hardware Installation
Tool”
7.1.3 The ‘EDS Wizard’ window opens, click Next, in the ‘Options’
window select Register an EDS le(s) and click “Next”.
7.1.4 The ‘Registration’ window opens, click Browse and select the
EDS le provided either with the sensor or downloaded from
the MTS website. Click “Next”.
Fig. 54: Select the “EDS Hardware Installation Tool”
Fig. 55: EDS wizard launch screen
Fig. 56: Register an EDS file
Fig. 57: Enter the path to the EDS file
Fig. 53: Sensor shows the permanent IP adress
6.1.7 Click to select your sensor in the ‘Relation List’ box and click
the disable BOOTP/DHCP button.
6.1.8 The ‘Status’ message at the bottom of the window will read
“Command Successful” if the disable command was
successful. The sensor is now assigned a permanent IP
address. If needed, repeat step 6.1.7 until the disable command
6.1.9 Exit the BOOT/DHCP Server software. If installing the MTS
EtherNet/IP EDS file (download at www.mtssensors.com)
continue with chapter 7.1. To utilize the EDS file, the RSLogix
5000 software must be version 20 or later.
If not installing the sensor EDS file, or if using an earlier version
of the RSLogix 5000 software, the sensor parameter data must
be manually loaded. In that case, continue with Steps 2 and 3.
7. Integration in RSLogix5000
7.1 Install the MTS EtherNet/IP EDS le
(only required for the first installation)
 Loading...