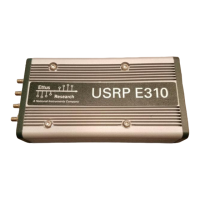
Ettus E3XX Getting Started Guide ANGRYVIPER Team
5 Script Setup
There are two type of setups or modes for running applications on any embedded radio: Network and Standalone.
In Network mode, a development system hosts the OpenCPI tree as an NFS server to the E310 which is an NFS
client. This configuration provides quick and dynamic access to all of OpenCPI, and presumably any applications,
components and bitstreams. In Standalone mode, all the artifacts are located on the SDR’s local storage (e.g. SD
card) and no network connection is required. This may be more suited for deployment scenarios in which network
connection is not possible or practical. Network mode is generally preferred during the development process.
5.1 Setting up the Network and Standalone Mode scripts
For each mode, a startup script is used to configure the environment of the embedded system. The OpenCPI
framework provides a default script for each mode. The default scripts are to be copied and modified per the user’s
requirements.
5.1.1 Network Mode
1) Make a copy of the default script for editing.
$ cp /run/media/<user>/<partition>/opencpi/default_mynetsetup.sh \
/run/media/<user>/<partition>/opencpi/mynetsetup.sh
2) Edit the copy
1. In mynetsetup.sh, uncomment the following lines which are necessary for mounting core and assets project:
mkdir -p /mnt/ocpi_core
mount -t nfs -o udp,nolock,soft,intr $1:/home/user/ocpi_projects/core /mnt/ocpi_core
mkdir -p /mnt/ocpi_assets
mount -t nfs -o udp,nolock,soft,intr $1:/home/user/ocpi_projects/assets /mnt/ocpi_assets
2. Edit /home/user/ocpi_projects/core and /home/user/ocpi_projects/assets to reflect the paths to the
core and assets project on the host, e.g.:
mkdir -p /mnt/ocpi_core
mount -t nfs -o udp,nolock,soft,intr $1:/home/johndoe/ocpi_projects/core /mnt/ocpi_core
mkdir -p /mnt/ocpi_assets
mount -t nfs -o udp,nolock,soft,intr $1:/home/johndoe/ocpi_projects/assets /mnt/ocpi_assets
5.1.2 Standalone Mode
In this mode, all OpenCPI artifacts that are required to run any application on the E310 must be copied onto the
SD card. Building the provided projects to obtain such artifacts is discussed in Section 3.3. Once the artifacts have
been created, they must be copied to the SD card in Section 4. In general, any required .so (RCC workers),
.bit.gz (hdl assemblies), and application XMLs or executables must be copied to the ATLAS partition of the SD
card.
1) Make a copy of the default script for editing
$ cp /run/media/<user>/<partition>/opencpi/default_mysetup.sh \
/run/media/<user>/<partition>/opencpi/mysetup.sh
2) Edit the copy
Unlike Network mode, there is no required modifications to this script.
3) Copy any additional artifacts to SD card’s opencpi/xilinx13_4/artifacts/ directory
9

 Loading...