English-7
English
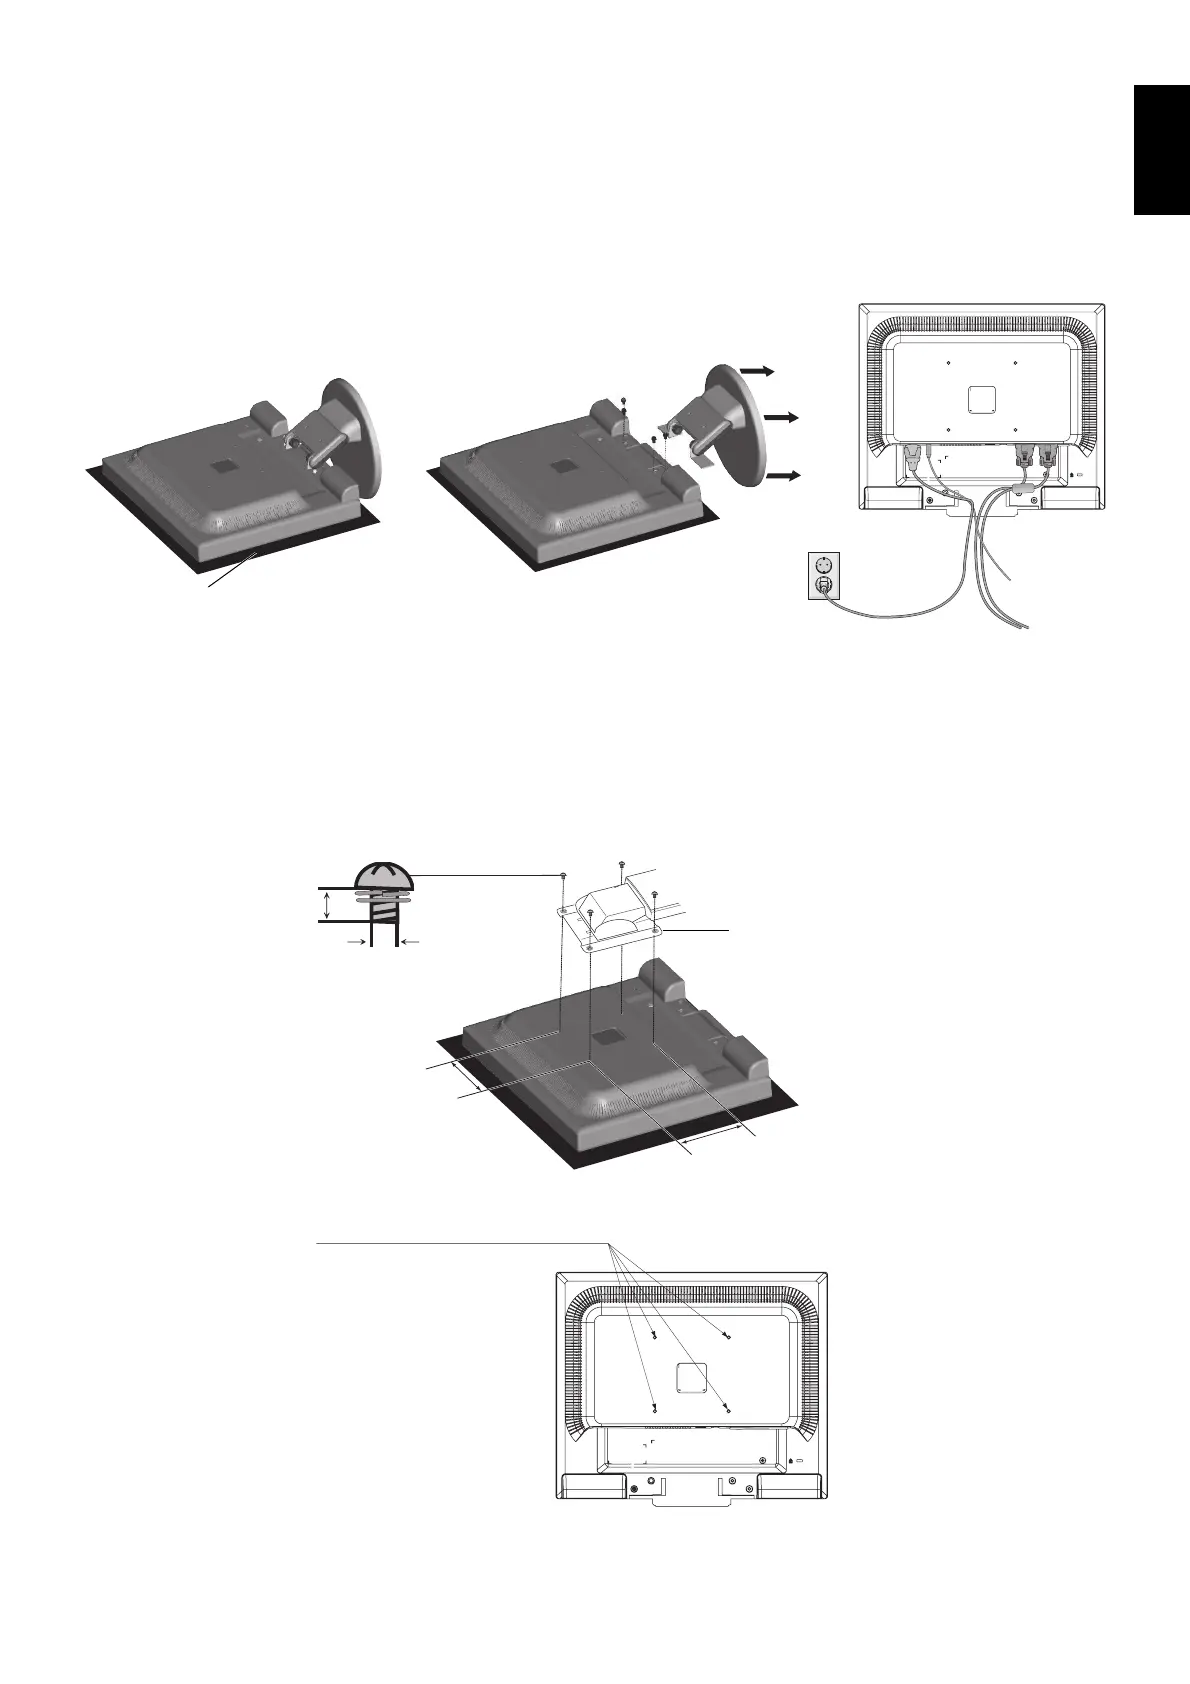
Figure R.1
Non-abrasive surface
Figure R.2 Figure R.3
Connecting a Flexible Arm
This LCD monitor is designed for use with a fl exible arm.
Please use the attached screws (4pcs) as shown in the picture when installing. To meet the safety requirements, the monitor
must be mounted to an arm which guaranties the necessary stability under consideration of the weight of the monitor.
The LCD monitor shall only be used with an approved arm (e.g. GS mark).
M4
4 x 12 mm with lock washer and
fl at washer
Tighten all screws
100 mm
100 mm
Thickness of Bracket
(Arm) 2.0 ~ 3.2 mm
12 mm
Specifi cations
4-SCREWS (M4)
MAX depth: 8.0 mm
If use other screw,
check depth of hole.
Weight of LCD assembly: 3.0 kg (MAX)
Remove Monitor Stand for Mounting
To prepare the monitor for alternative mounting purposes:
1. Disconnect all cables.
2. Place monitor face down on a non-abrasive surface (Figure R.1).
3. Remove the 4 screws connecting the monitor to the stand and remove the stand as indicated (Figure R.2).
The monitor is now ready for mounting in an alternative manner.
4. Connect the AC cord and signal cables to the back of the monitor (Figure R.3).
5. Reverse this process to re-attach stand.
NOTE: Use only VESA-compatible alternative mounting method.
NOTE: Handle with care when removing monitor stand.
 Loading...