English-6
Attaching Mounting Accessories
The monitor is designed for use with the VESA mounting
system.
1. Attach Mounting Accessories
Be careful to avoid tipping monitor when attaching
accessories.
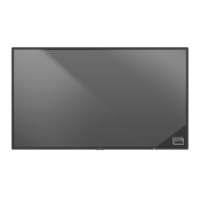
VESA Mounting Interface
300 mm (P402/P462)
400 mm (P552)
300 mm (P402/P462)
400 mm (P552)
Mounting accessories can be attached with the monitor in
the face down position. To avoid damaging the screen face,
place the protective sheet on the table underneath the LCD.
The protective sheet was wrapped around the LCD in the
original packaging. Make sure there is nothing on the table
that can damage the monitor.
When using mounting accessories other than NEC compliant
and approved, they must comply with the VESA-compatible
mounting method.
2. Installing and removing optional table
top stand
CAUTION: Installing and removing the stand must be done
by two or more people (P402/P462), by four or
more people (P552).
To install, follow those instructions included with the stand or
mounting apparatus. Use only those devices recommended
by the manufacturer.
NOTE: Use ONLY thumbscrews which are included in the
monitor.
When installing the LCD monitor stand, handle the unit with
care to avoid pinching your fi ngers.
Optional table top stand
Table
Protective Sheet
NOTE: Install the stand so the long end of the feet face
forward. Use the ST-4020 for the P402, the
ST-4620 for the P462 and the ST-5220 for the
P552.
3. Ventilation Requirements
When mounting in an enclosed space or recessed area,
leave adequate room between the monitor and the enclosure
to allow heat to disperse, as shown below.
Allow adequate ventilation or provide air conditioning around
the monitor, so that heat can properly dissipate away from
the unit and mounting apparatus; especially when you use
monitors in multiple screen.
NOTE: The sound quality of the internal speakers will
differ according to the acoustics of the room.
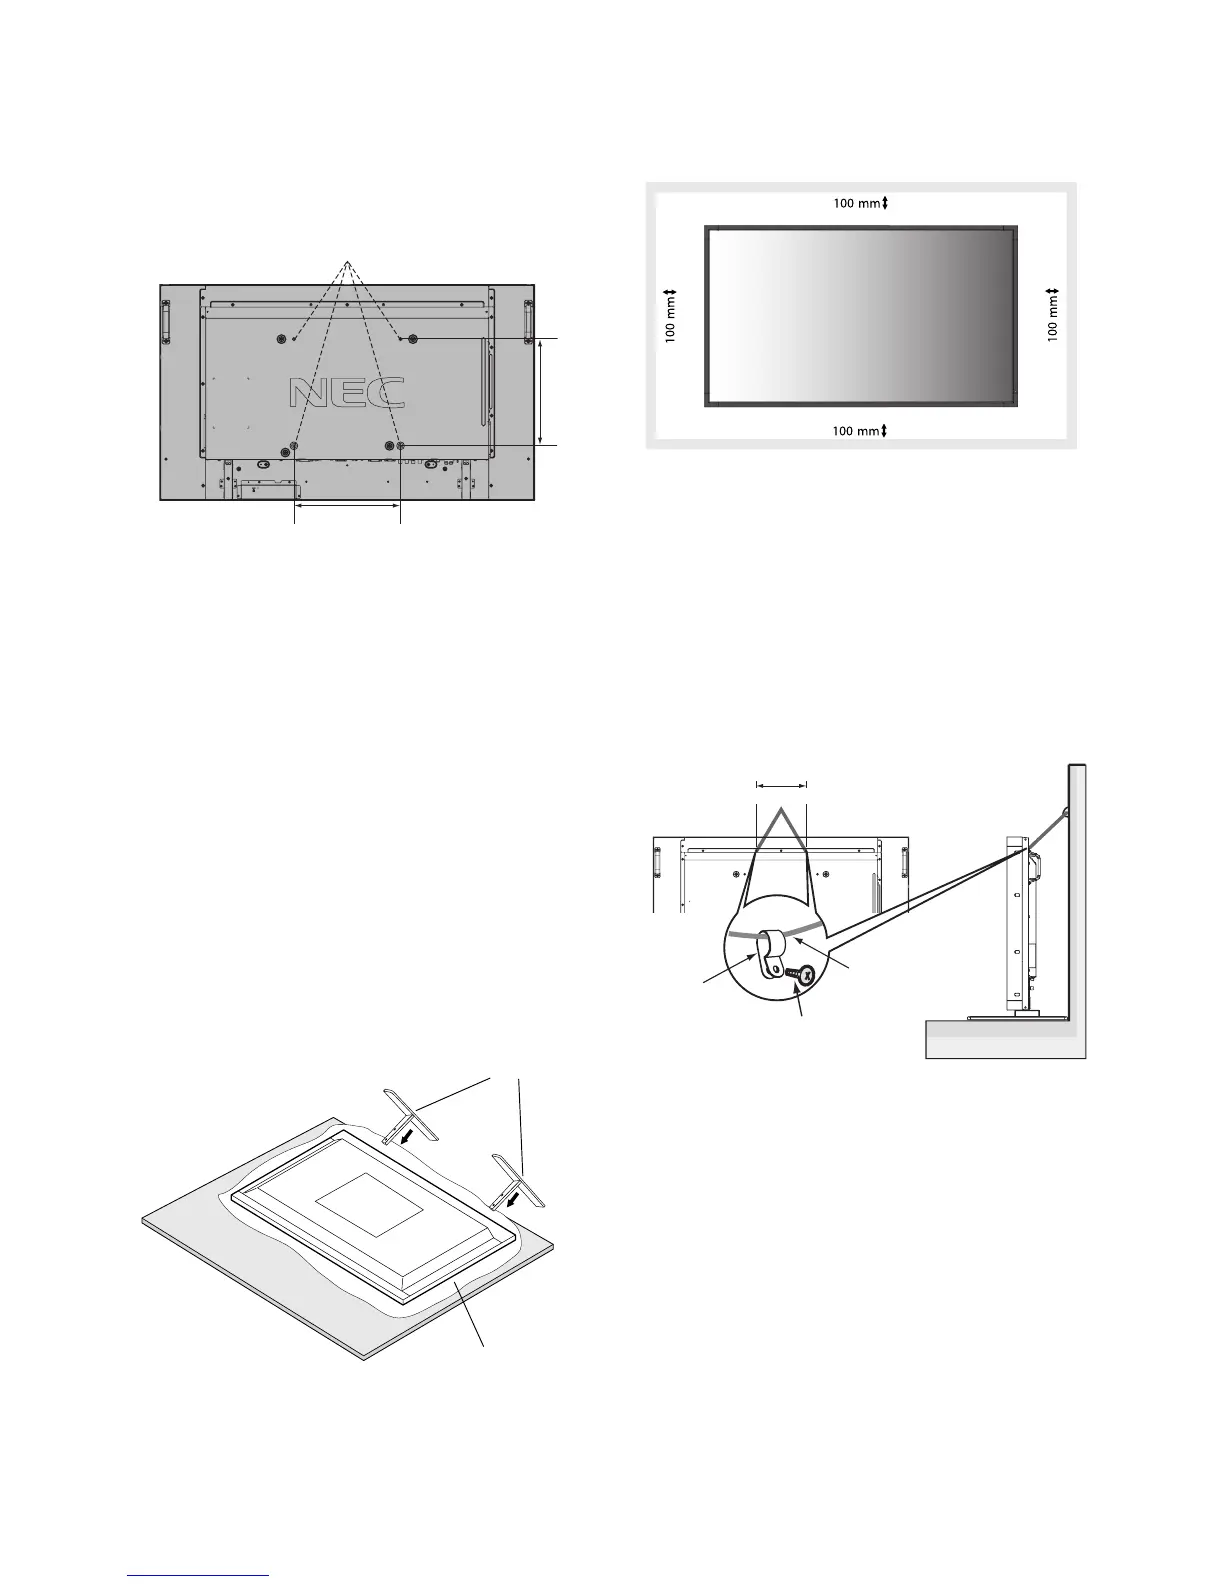
4. Prevent Tipping
When using the monitor with the optional table top stand
fasten the LCD to a wall using a cord or chain that can
support the weight of the monitor in order to prevent the
monitor from falling. Fasten the cord or chain to the monitor
using the provided clamps and screws.
Screw
Cord or chain
Clamp
204 mm (P402/P462)
400 mm (P552)
Screw Holes
Before attaching the LCD monitor to the wall, make sure that
the wall can support the weight of the monitor.
Be sure to remove the cord or chain from the wall before
moving the LCD.
 Loading...