www.nektartech.com Nektar Impact GX49 & GX61 User Guide 7
Setup Menu
The Setup menu gives access to additional functions such as selecting Transpose button functions, control assign, selecting
velocity curves and more. To enter the menu, press the [Setup] button which is illuminated in blue when active. This will
mute the MIDI output of the keyboard and instead the keyboard now is used to select menus.
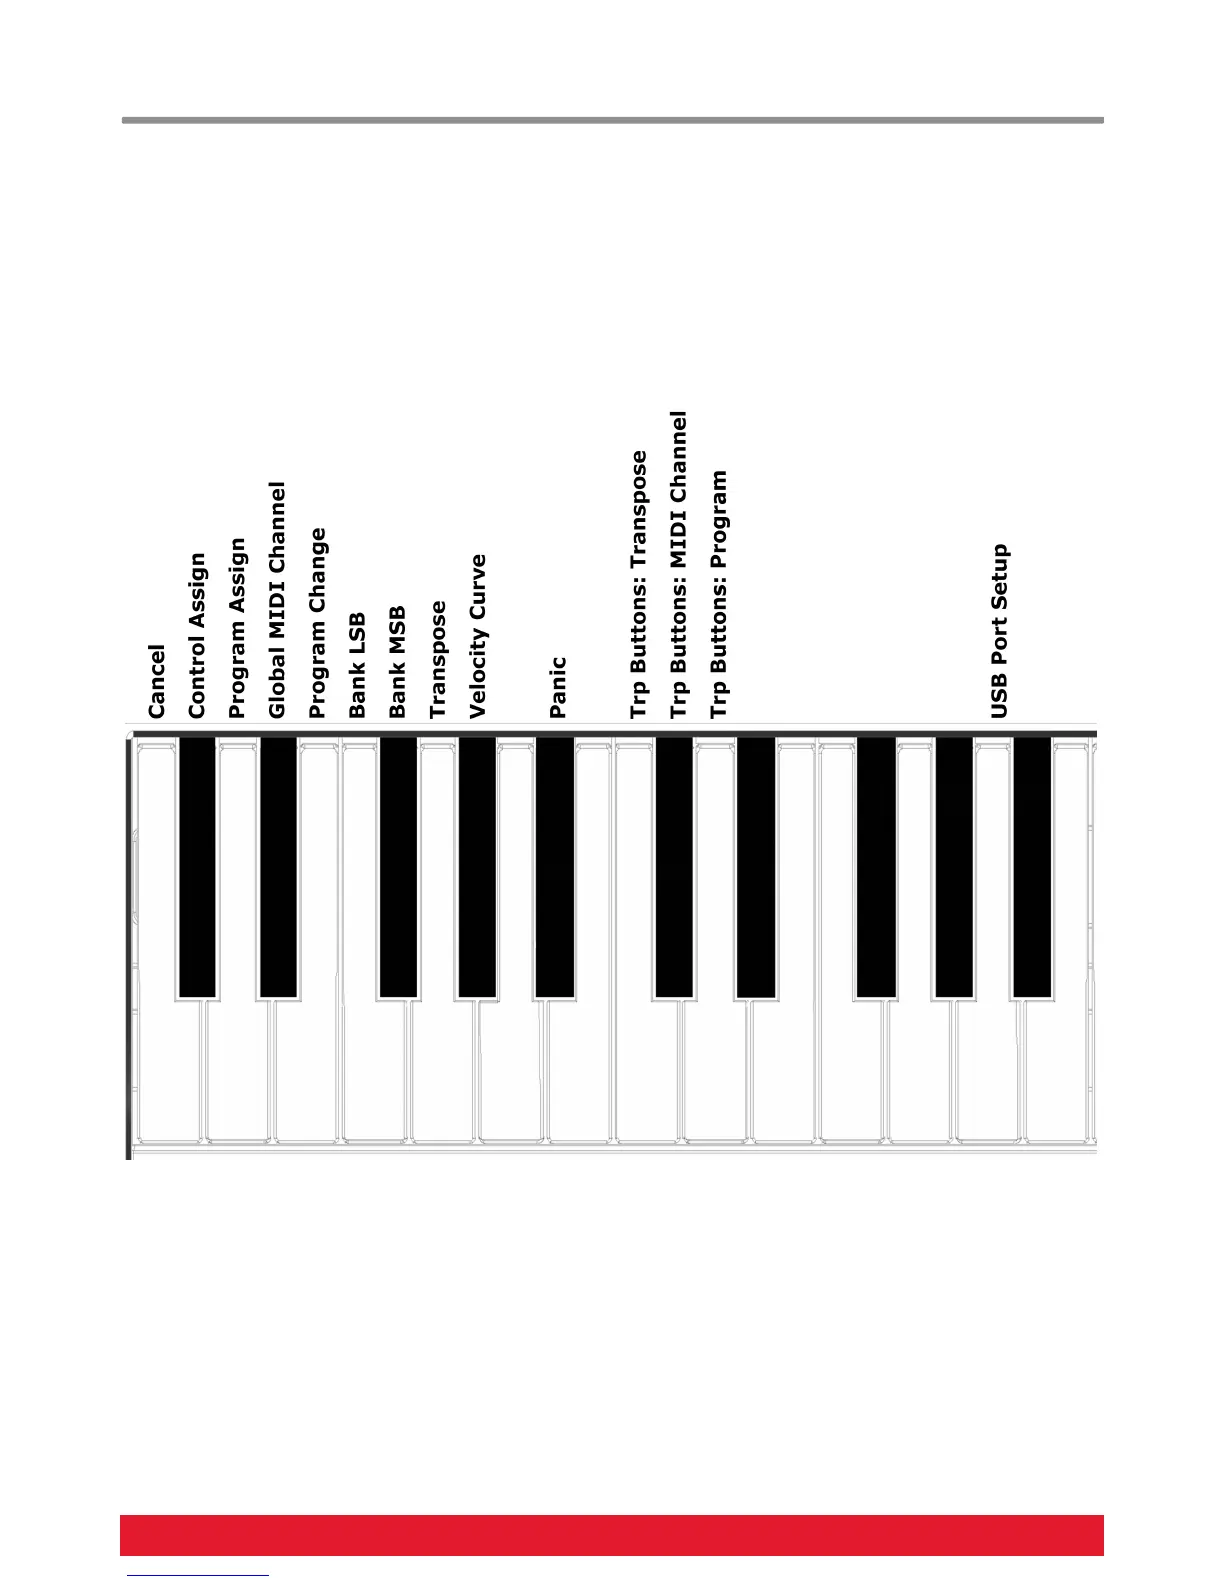
The chart below provides an overview of menus assigned to each key.
Menu keys are the same for both Impact GX49 and GX61 but value entry using the keyboard is one octave higher on GX61.
Refer to the screen printing on the unit to see which keys to press to enter values.
The functions are separated in to two groups. The first group spanning C1-G#1 covers general setup functions.
The second group spanning C2-D2 covers the transpose button assignment options.
On the following page we cover how each of these menus work. Note the documentation assumes you have an understanding
of MIDI including how it works and behaves. If you are not familiar with MIDI, we recommend you study MIDI before making
control assignment changes to your keyboard. A good place to start is the MIDI Manufacturers Association www.midi.org
C1
C2
 Loading...