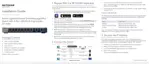
Installation
8-Port Gigabit Ethernet Smart Managed Plus
Switch with 2-Port 10G/Multi-Gig Uplinks
Desktop Pro Series GS110EMX
August 2017
NETGEAR, Inc.
350 East Plumeria Drive
San Jose, CA 95134, USA
Cables and Speeds
The following table describes the network cables that you can use for the switch
connections and the speeds that these cables can support, up to
100 meters (328 feet).
Speed Cable Type
100 Mbps Category 5 (Cat 5) of higher rated
1 Gbps, 2.5 Gbps, or 5 Gbps Category 5e (Cat 5e) or higher rated
10 Gbps Category 6A (Cat 6A) or higher rated
Note: For speeds of 10 Gbps, if the cable length is shorter than 55 meters
(180 feet), you can use a Category 6 (Cat 6) cable.
Configure the Switch
By default, the switch receives an IP address from a DHCP server (or router that
functions as a DHCP server) in your network. To configure the switch, access the
switch from a Windows-based computer, from a Mac, or through the ProSAFE
Plus Utility. If you do not use a DHCP server or the switch requires a static
network address, configure the switch with a static IP address.
Note: Aer you configure the switch for your network, you can use the NETGEAR
Insight app on a mobile device to discover the switch in your network, register the
switch, and display basic switch information in the app. To download the app, on
your iOS or Android mobile device, go to the app store or Google Play and search
for NETGEAR Insight.
(Continued on the next page)
Package Contents
• Switch
• Power adapter (localized to the country of sale)
• Rack-mount brackets and screws for rack installation
• Wall-mount screws for wall installation and rubber feet for desktop installation
(in one bag)
• Installation guide
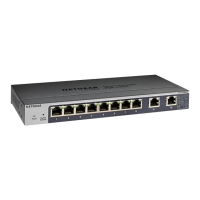
Connect Devices to the Switch
1. Connect devices to the RJ-45 network ports on the switch front panel.
Ports 1 through 8 support 1G, 100M, and 10M. Ports 9 and 10 support 10G,
5G, 2.5G, 1G, and 100M. Use the cables that we recommend on the other
side of this installation guide.
2. Connect one RJ-45 port on the switch to a network. In a high-speed network,
use port 9 or 10.
Note: In a small oce or home oce network, connect the switch to the LAN
port of a router that, in turn, is connected to an Internet modem.
Connect the Power Adapter to the DC Input
Sample connections
Internet
10G/Multi-Gig switch (XS508M)
10G link to
network router
GS110EMX switch GS110EMX switch
10G link 10G link
1G link to
computer
1G link to
computer
2.5G link to
WAC740 AP
1G link to
computer
1G link to
WAC740 AP
10G link
to 10G NAS
Check the LED Status
Power LED Gigabit Ethernet port LEDs for ports 1 through 8
On
O
1G link (both port LEDs on). Both port LEDs blinking
indicates trac activity.
100M link (le port LED on, right port LED o). Le port
LED blinking indicates trac activity.
10M link (le port LED o, right port LED on). Right port
LED blinking indicates trac activity.
No link (both port LEDs o).
Multi-Gigabit Ethernet port LEDs for ports 9 and 10
10G link (both port LEDs on). Both port LEDs blinking
indicates trac activity.
5G link (le port LED on, right port LED o ). Le port LED
blinking indicates trac activity.
2.5G link (le port LED o, right port LED on). Right port
LED blinking indicates trac activity.
1G or 100M link (both port LEDs on). Both port LEDs
blinking indicates trac activity.
No link (both port LEDs o).