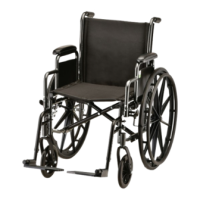
ARMRESTS
INSTALLING ARMREST
1 - PRESS the armrest release levers at the front the armrest so the push button retracts
into the tube.
2 - Lightly position the armrest in the front and rear armrest sockets
3 - Push armrest down evenly and so the push button locks into place.
4 - Ensure the armrest is secure by gently pulling up on the armrest.
5 - If armrest is loose, or not locked in place, then repeat above steps.
REMOVING ARMREST
1 - Push down armrest to ensure proper position prior to removal.
2 - PRESS the armrest release push button at the front of the armrest.
3 - While pushing in on the armrest release buttons, pull straight up on armrest to
remove.
SEAT
DO NOT ATTEMPT – Please see a dealer or qualified technician.
Any adjustment in your product seat can affect the stability of your product. We
HIGHLY recommend that you have a dealer or licensed technician adjust your seat
height to ensure that your adjustments are safe given your condition, and your product.
Seat adjustments affect other parts of your product, including without limitation, the
adjustment of your anti-tipping supports, the necessary size and position of your forks,
the necessary size and position of your rear wheels, and the size and position of safety
devices, such as straps, locks, etc.
If you raise your seat height YOU MUST purchase proper anti-tipping supports. If your
product came with anti-tipping supports, then they are not likely to work with your new
seat adjustment, and you must buy new, proper supports
REPLACING SEAT & BACK UPHOLSTERY
1 - Remove the Phillips screws and washers, replace upholstery, and reattach screws
WHEELS
REPLACING WHEELS
DO NOT ATTEMPT – Please see a dealer or qualified technician.
REMOVING AND REPLACING REAR WHEELS
1 - Remove dust cap (if any).
2 - Remove attachment bolt and related hardware (washer, spacers) that hold the wheel
in place.
3 - If replacing wheel, reverse above steps, and then continue with step 4.
4 - Tighten attachment bolt with torque wrench, to 40 ft.-lbs.
5 - Adjust brakes to ensure proper brake function.
6 - Rotate (or spin wheel) to ensure proper fitting and alignment. Wheel should not
wobble, grind, or catch.
REPLACING HAND RIM
6 of 8

 Loading...