--
•
Iii·
•.
I
~ ~
- •
~
~
i
.;
....
-:.
..
;.-;
- -
•
~ ~
• 4
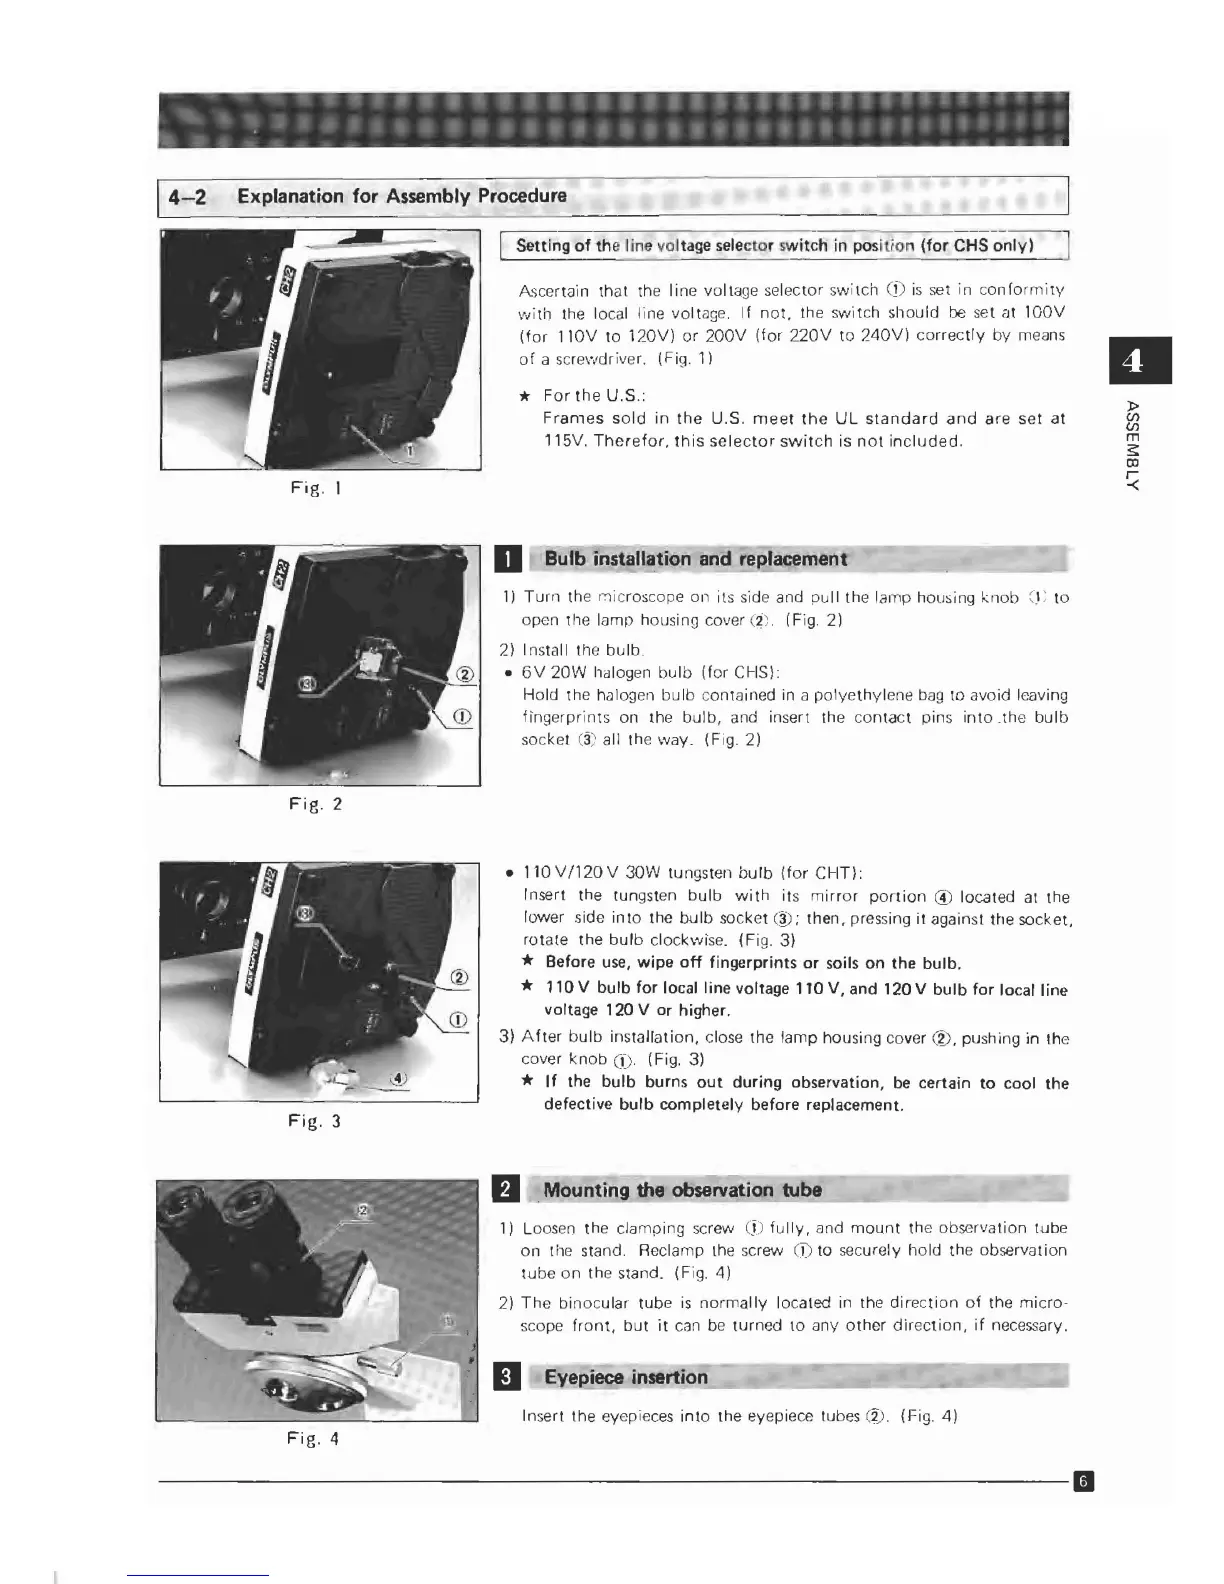
Explanation for Assembly Procedure
csewng
of
the line voltage selector switch in
position
(for
CHS
only)
Ascertain that the line voltage selector
switch
CD
is
set in
conlormity
with
the local line voltage.
If
not.
the
switch
should be set at
100V
(for
110V
to
120V)
or
200V
(for
2.20V to
240V)
correctly
by
means
of
a screwdriver. (Fig. 1)
*
For
the
U.S.;
Frames
sold
in
the
U.S.
meet
the
UL
standard
and
are
set
at
115V.
Therefor.
this
selector
switch
is
not
included.
Fig.
I
II
o Bulb installation and
re
'acement
1)
Turn
the l'licroscope on its side and
pull
the lamp housing
knob
~r
to
open the lamp housing cover
(;2). (Fig. 2)
2} Install the
bulb
.
•
6V
20W
halogen
bulb
(for CHS);
Hold the
halogen
bulb
contained in a
polyethylene
bag
to
avoid leaving
fingerprints on the
bulb,
and insert the contact pins
into
.the
bulb
socket
(3;
all the way. (Fig. 2)
Fig.
2
• 110
V/120V
30W
tungsten
bulb
(for
CHT);
Insert the tungsten
bulb
with
its
mirror
portion
'3) located at the
lower
side
into
the
bulb
socket
@;
then. pressing
it
against the socket.
rotale
the
bulb
clockwise. {Fig.
3)
* Before
use,
wipe
off
fingerprints
or
soils
on
the
bulb.
* 110 V
bulb
for
local line voltage
110
V,
and 120 V
bulb
for
local line
voltage 120 V
or
higher.
3)
After
bulb
installation, close the tamp housing cover
CV.
pUshing in the
cover
knob
0),
(Fig. 3)
*
If
the
bulb
burns
out
during
observation,
be
certain
to
cool the
defective
bulb
completely
before replacement.
Fig.
3
II .Mounting the observation tube
1)
Loosen the clamping screw
CD
fully,
and
mount
the observation tube
on
the stand. Reclamp the
screvv
CD
to securely hold the observation
tube
on
the stand. (Fig. 4)
2)
The
binocular tube
is
normally
localed in the
direction
of
the
micro-
scope
Iront,
but
it
can
be
turned to any
other
direction,
if
necessary.
II
Eye
ieee insertion
Insert the eyepieces
into
the eyepiece tubes (2). (Fig. 4)
Fig.
4
-----------------------------11
 Loading...