9
Fig. 8
Fig. 9
ASSEMBL Y
1
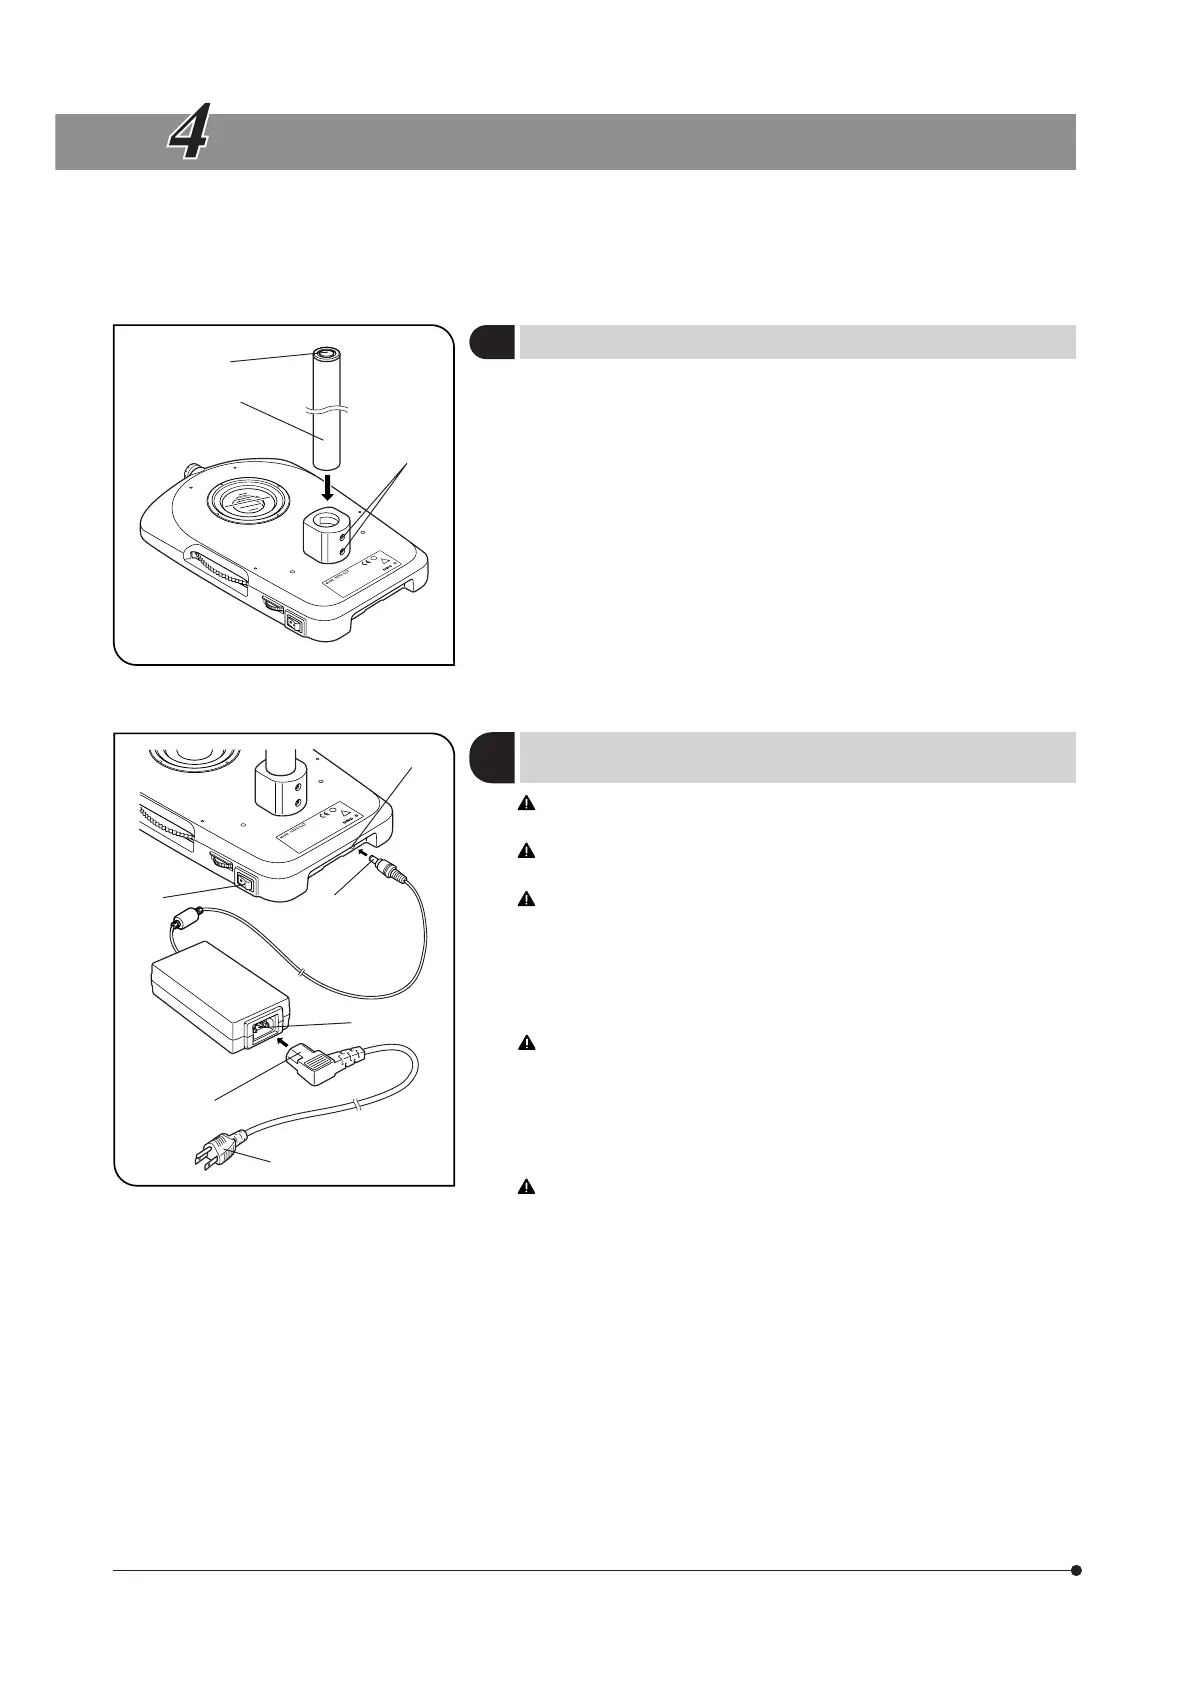
Installing the Pillar
(Fig. 8)
1. Using the Allen wrench provided with the illuminator stand, loosen the
two clamping screws @ on the pillar support sleeve completely.
2. Hold the pillar ² so that the Allen screwdriver storage hole ³ comes at
the top, and insert the pillar into the pillar support sleeve until it reaches
the bottom.
3. Tighten the two clamping screws @ securely using the Allen wrench.
}A long pillar such as the SZH-P400 (400 mm) or SZH-P600 (600 mm)
auxiliary pillar can also be installed. However, as this makes the microscope
body to be displaced to a higher position and deteriorates the stability,
be sure to take the toppling prevention measures and to use the SZX-R
drop prevention ring.
2
Connecting the AC Adapter and
Power Cord
(Fig. 9)
Cables and cords are vulnerable to bend or twist. Do not apply
excessive force to them.
Make sure that the main switch @ is set to “\” (OFF) before
connecting the AC adapter and power cord.
Always use the AC adapter and power cord provided by Olympus. If
no power cord is provided, please select the power cord by referring
to the section “PROPER SELECTION OF THE POWER SUPPLY CORD”
at the end of this instruction manual. If the proper AC adapter and
power cord are not used, Olympus can no longer warrant the
electrical safety performance of the equipment.
Use only the AC adapter specified by Olympus.
1. Connect the AC adapter plug ² to the AC receptacle ³ on the illuminator
stand.
2. Connect the power cord connector | to the AC receptacle ƒ of the AC
adapter.
3. Connect the power cord plug … to a 3-conductor power outlet.
Connect the provided power cord correctly and ensure that the
grounding terminal of the power supply and that of the 3-conductor
wall outlet are properly connected. If the equipment is not grounded,
Olympus can no longer warrant the electrical safety performance of
the equipment.
@
²
|
ƒ
…
³
@
²
³
 Loading...