18
4 Setting by PC Configurator Software
For the R7D series manufactured by M-System, the range of each channel can be set by using the PC Configurator
software.
The following sections describe how to set the range for each channel.
Operating Environment
・WindowsXP, Windows7 (32-bit/64-bit) or Windows10 (32-bit/64-bit) installed correctly
A DOS/V compatible personal computer.
To connect the device to the PC communication port, the configurator connection cable shown in the table
below is required.
Preparing to use R7CON
To use the Configurator software, you must install the software.
To write the configured data to the control module, the PC and the remote I/O converter must be properly
connected.
Installing R7CON
① Start Windows.
② Download the Configurator Software from the website of M-System Institute (https://www.m-
system.co.jp/download_w/dl_softwareE.html)) and save it on the local disc of your PC.
③ Check the size and version of the downloaded file.
File name: R7CON_R□. exe or R7CON_R□.zip □ contains the version.
④ Double-click to create R7CON folders.
⑤ Execute setup.exe in R7CON folders and follow the instructions of the installer to install.
Connection between PC and R7D
① Connect the Configurator Kick ^ to the COM port or USB of the PC.
② Connect the Configurator Connection Cable (Stereo Jack Side) to the setting connector on the R7D.
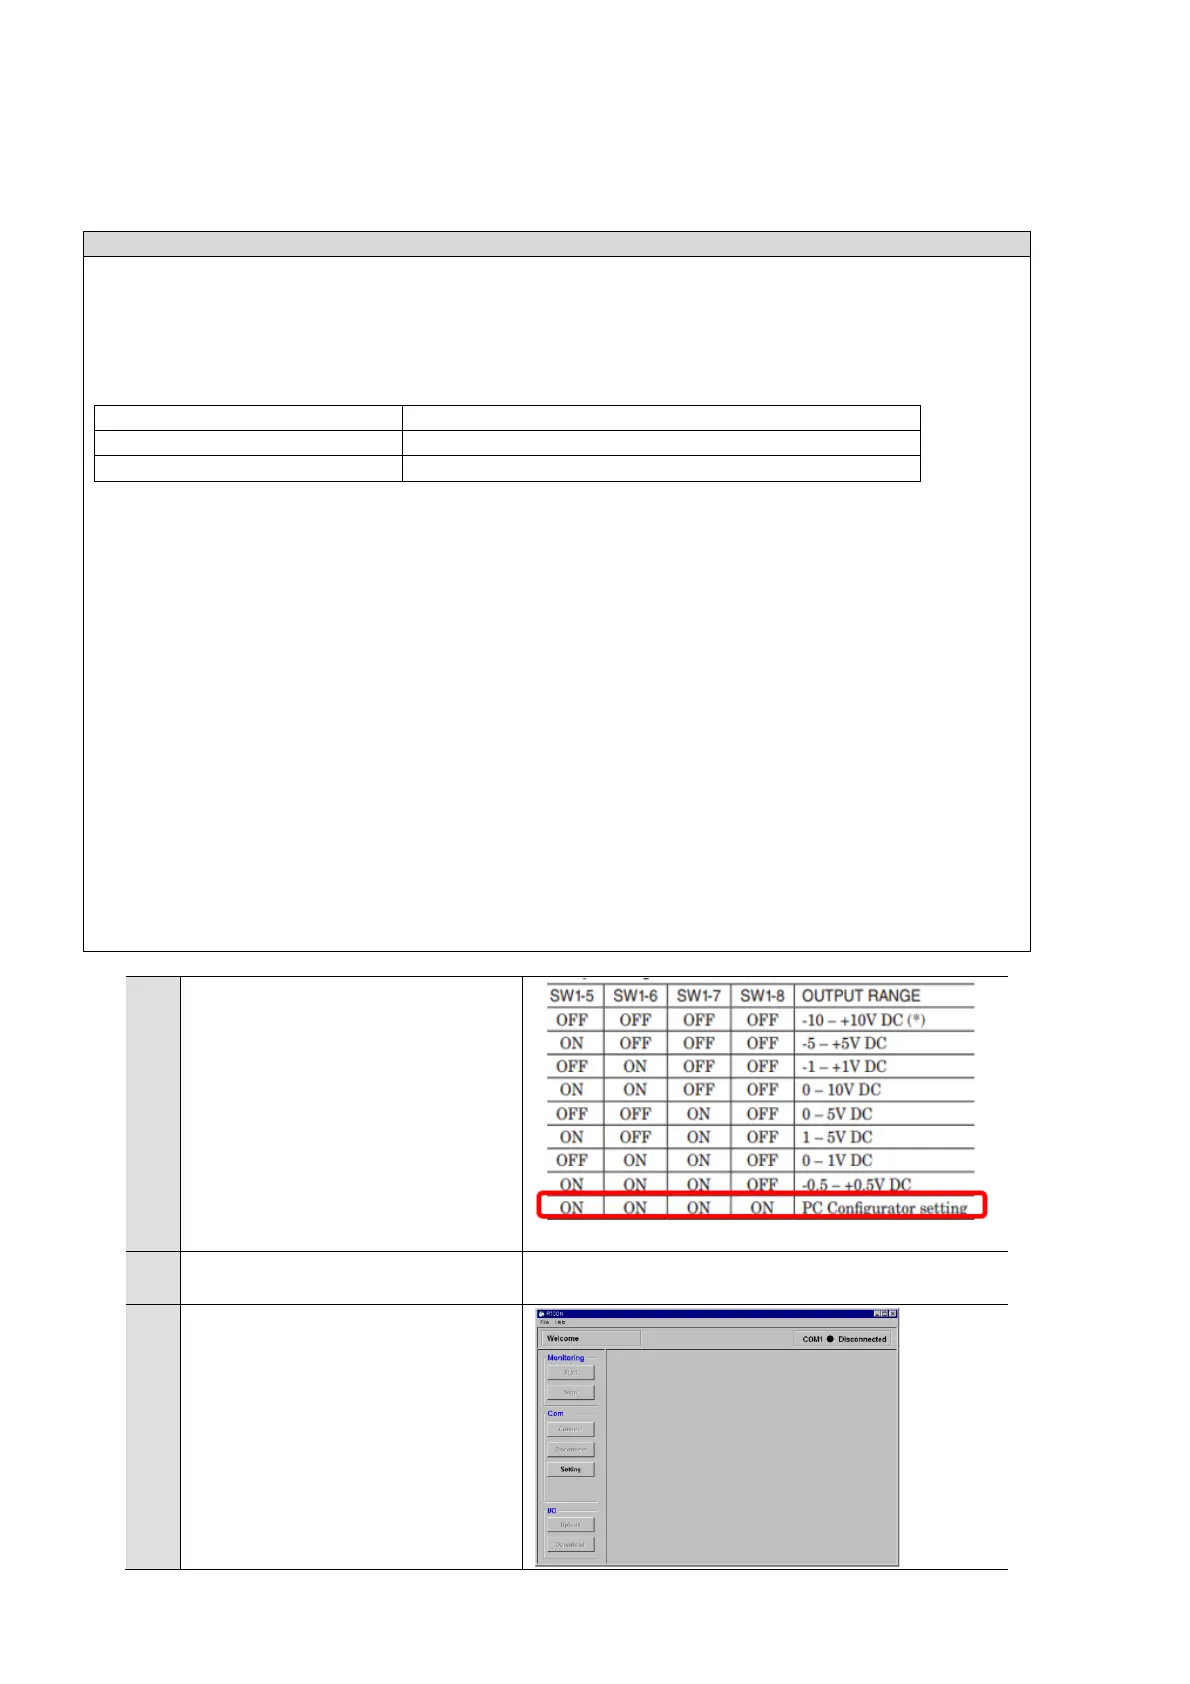
Setting the dip switch
To R7D-SV4/YV2's SW1-5, 6, 7, and
8
Turns all ON.
 Loading...