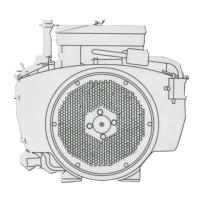
Engine
Disassembly
4.
As
each internal engine part
is
assembled, coat it
During
first
few
critical moments of operation, the
engine
will
depend on this lubrication.
5.
After
you have internal engine parts reassembled,
the
engine
should turn freely.
If
reasonable care
+
heavily with oil (same grade
used
in
crankcase).
ENGINE REBUILDING
When engine disassembly
is
necessary, remove
complete assemblies (tear down individual compo-
nents like fuel
pump,
breaker mechanism, etc., as
bench
jobs).
Use special
tools
available.
Disassembly
Common sense
will
dictate proper order of
disas-
sem
bly.
As
disassembly progresses, the order may be
changed, as
will
become self-evident.
A
suggested procedure would be as follows:
1.
Radiator, water
pump.
2.
Flywheel-using puller
or
pry-bar method.
3.
Gear Cover-protect oil seal from keyway
4.
Crank Gear-use puller and gear puller
ring.
5.
Loosen accessories such as
fuel
pumps
and oil
6.
Starter motor.
7.
Drain oil-discard
oil
removed.
8.
Cylinder head.
9.
Valves,
springs,
rocker arms.
damage.
filter.
10. Camshaft and gear, rear bearing plate, oil
pump.
11. Piston, connecting rod bearings.
12. Crankshaft.
13.
Try
to
analyze reasons for any parts failure and
necessity
of
the repair.
14.
Cleanliness and neat, orderly work area makes
job
easier to do.
15.
Use
proper meters and gauges. Observe
if
cylinder requires boring, crankshaft needs grind-
ing,
or
if
other major shop work
is
necessary.
Assembly (Use Genuine Onan
Parts)
1.
Engine assembly procedure
is
normally the
reverse of disassembly
-
observing proper
clearances of bearings, connecting rod, proper
fitting
and
sizing
of
piston,
rings,
etc..
2.
Follow proper recommended procedure for fit of
valves, adjusting clearances, and torque
of
all
special items. Use a torque wrench to assure
proper tightness without danger of stripping
threads.
3.
As
each internal engine part
is
assembled, use a
wrench to rotate crankshaft, making certain it
turns freely.
If
tightness
is
noted
after
any opera-
tion,
you
then
know
your
last
step
is
responsible.
and attention have been given, the engine
will
operate efficiently.
6.
At this point, it
is
a matterof mechanically adding
outside accessory items to the block assembly.
Order
of
assembly
is
reverse
of
disassembly.
7.
When engine
is
complete, install controls. Check
the tagged wires. Use wiring diagram to connect
leads to control and leadsfrom control to engine.
All
wires are marked for correct identification.
If
the
unit
is
to work properly,
wires
must
be con-
nected correctly.
8.
The engine
is
now ready for starting. Before final
adjustments,
run
the engine about 15 minutes
under
light load to reach normal operating
temperature.
ASSEMBLY
SUGGESTIONS (Things
to
Keep
in
Mind
During
Engine
Assembly)
1. See Onan Tool Catalog (900-0019)
-
many items
require a special
tool
for correct installation.
Some of these tools are:
Oil
seal
driver
and
guide,
bearing driver.
Valve spring compressor, valve lock replacer,
valve
guide
driver,
and valve seat remover.
Gear
puller
and gear puller
rings.
Piston
ring
spreader and compressor.
Flywheel
puller,
pry bar, armature puller.
Torque wrench, plastigauge (for correct bear-
ing
clearance).
Armature growler, gas pressure gauge (or
manometer).
2.
Wet holes
in
crankcase (holes through crank-
case)
-
always
use
copper (gasket) washers.
3.
Nuts, bolts
and
screws that do not require exact
torque should be tightened
snugly,
then 1/4 extra
turn.
4.
Select proper length
of
any screw or bolt and
position
in
hole. Make
sure
they do not
bottom.
5.
Gasket kits sometimes cover more than one
engine. Therefore, select gasket of correct size
and shape for part being used. Always
use
new
gaskets.
75
Redistribution or publication of this document,
by any means, is strictly prohibited.
 Loading...