18
En
Playback
■ Operating with the remote controller
■ Operating on the AV receiver
See “Controlling Other Onkyo Components” about the
operation of other components (➔ page 40).
The on-screen menus appear only on a TV that is
connected to the HDMI OUT. If your TV is connected
to the MONITOR OUT V or the COMPONENT
VIDEO OUT, use the AV receiver’s display when
changing settings.
This manual describes the procedure using the
remote controller unless otherwise specified.
Playing the Connected Component
1
Press RECEIVER followed by INPUT
SELECTOR.
2
Start playback on the source component.
See also:
• “Playing iPod/iPhone via USB” (➔ page 19)
• “Playing USB Device” (➔ page 20)
• “Listening to AM/FM Radio” (➔ page 20)
• “iPod/iPhone Playback via Onkyo Dock”
(➔ page 38)
• “Controlling Other Onkyo Components”
(➔ page 40)
3
To adjust the volume, use VOL q/w.
4
Select a listening mode and enjoy!
See also:
• “Using the Listening Modes” (➔ page 23)
1
Use the input selector buttons to select the input
source.
2
Start playback on the source component.
3
To adjust the volume, use the MASTER VOLUME
control.
4
Select a listening mode and enjoy!
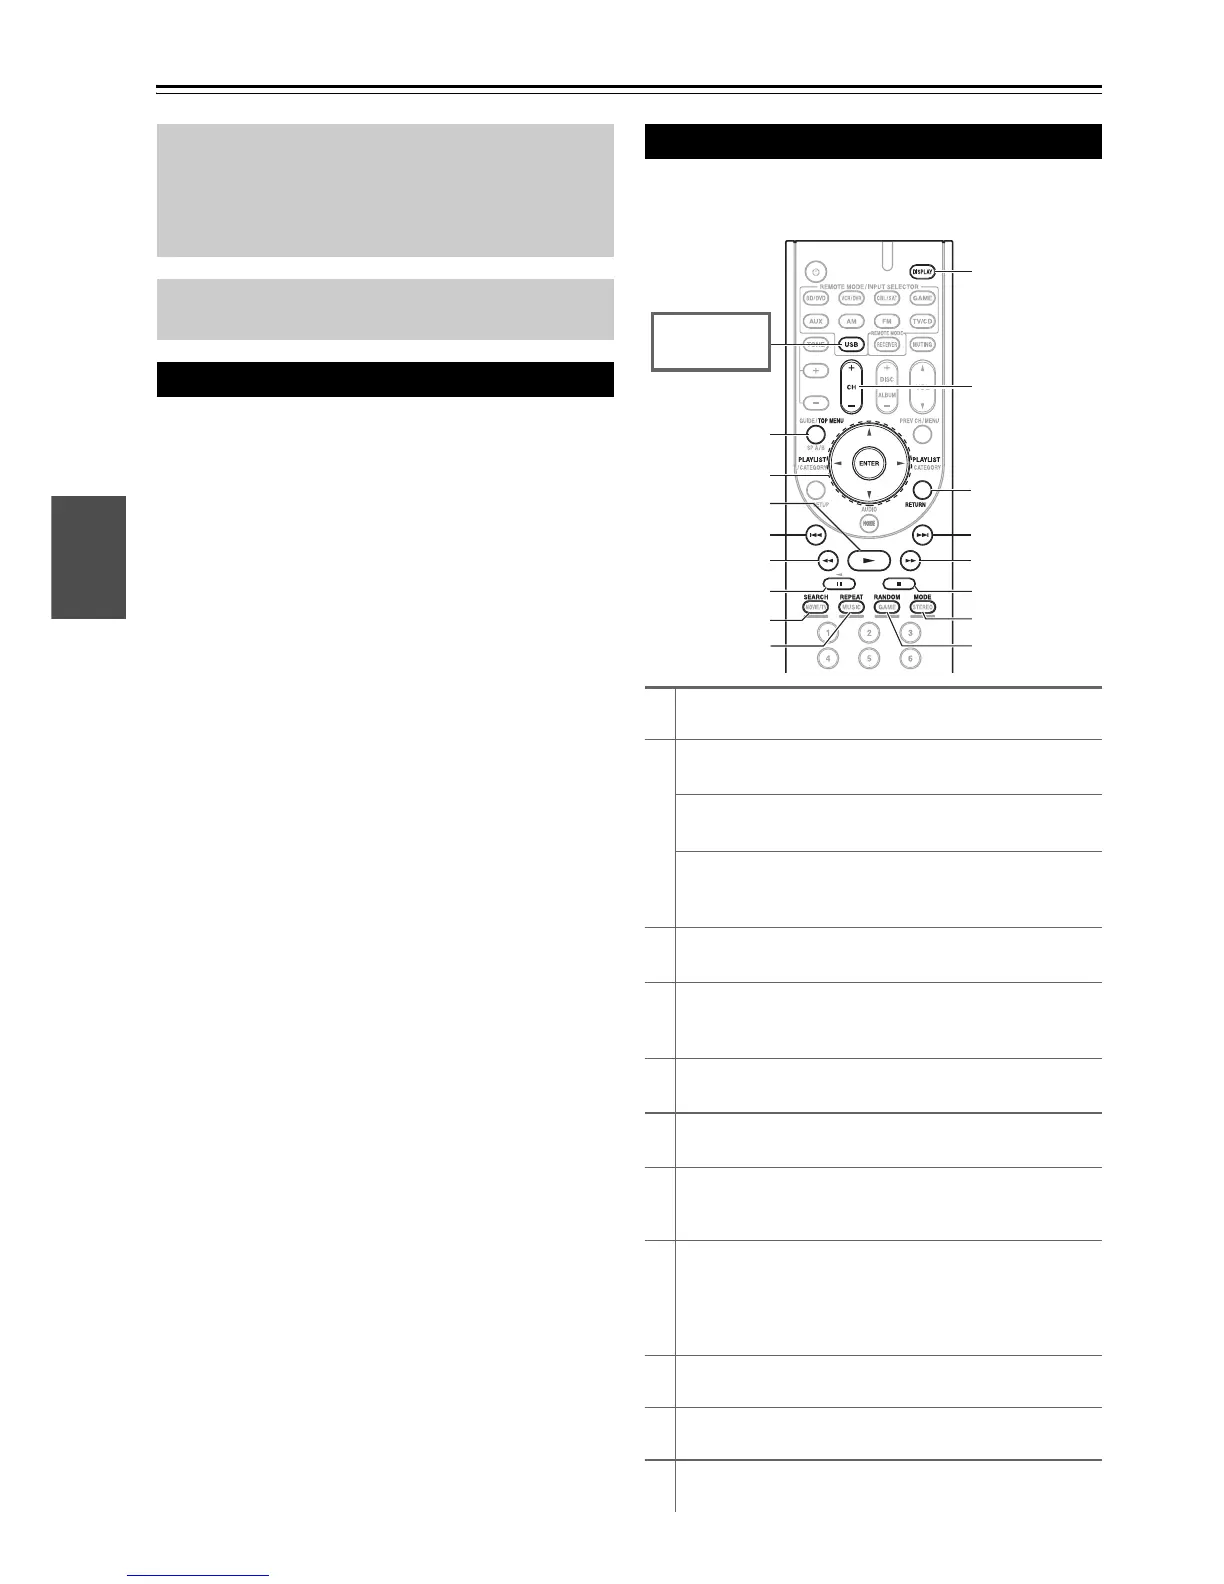
Controlling Contents of USB Devices
a
TOP MENU
This button displays the top menu for each media or service.
b
q/w and ENTER
These buttons navigate through the menus.
e/r
This button cycles through pages.
PLAYLIST e/r
In Standard Mode (iPod/iPhone), this button selects
playlists.
c
1
This button starts playback.
d
7
This button selects the beginning of the current song.
Pressing this button twice selects the previous song.
e
5
This button fast-reverses the current song.
f
3
This button pauses playback.
g
SEARCH
You can toggle between the playback screen and the list
screen during playback.
h
REPEAT
Press this button repeatedly to cycle through the repeat
modes.
To cancel repeat playback, press REPEAT repeatedly until
you select Off.
i
DISPLAY
This button switches between song informations.
j
CH +/–
In Standard Mode (iPod/iPhone), this button selects albums.
k
RETURN
This button returns to the previous menu.
k
l
m
i
j
p
o
n
e
g
d
b
a
c
f
h
Press USB
first.
 Loading...