Goldpress 5 • User guide
EN
6
INSTALLATION
• The equipment does not need assembling it is ready to use after removing from the de-
livery box.
• It is recommended to store the packaging in case of transporting to another place or
returning during the guarantee period.
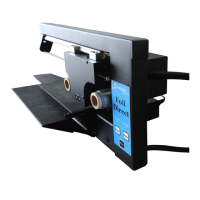
• The GoldPress 5, is designed for oce conditions.
• The equipment should be placed on a stable and flat surface.
• Rubber legs protect the work surface from damage or scratches.
• If the equipment was exposed to very cold conditions e.g. 0°C / 32°F temperatures, be-
fore con necting to the mains it must be allowed to warm up to normal room tempera-
tures above 8°C / +46.4°F for about 2 hours, in case of condensation on the electrical
circuits. It could course a fire or electrical shock.
• To ensure operator’s safety, the equipment should only be supplied mains power thro-
ugh the original cord.
A mains power socket should be provided with correct earthing. The supply voltage must
be consistent with the parameters specified on the technical plate positioned on the
housing. Not observing the above rules may result in electric shock or fire and cancelling
the guarantee.
The Goldpress 5 has a glass fuse of T 3.15 Amps for 230 V and T 6.3 Amps for the 120 V ver-
sion, which is on the power supply board located underneath the unit behind a cover,
which must be unscrewed. The mains cable must be unplugged before replacing the fuse.
7
PREPARATION TO WORK
1. Plug the mains cable in to the socket located next to the ON/OFF power switch on the
right side.
2. Switch on, the LED display will show the letters “OPUS”.
3. The heater temperature is preset 100°C / 212°F you can raise or lower the temperature by
the two buttons next to the LED display UP or DOWN.
4. Set stamping time required e.g. 1,5 – means: 1.5 seconds by the two same buttons next
to the display UP or DOWN.
5. The current heater temperature will be displayed.
6. If the current heater temperature diers from the one set by +/- 3 degrees, the figures
will blink slowly until the correct temperature is reached, then the figures will stop blin-
king followed by a bleep sound now you can start working.
7. If the temperature is too low or too high the LED display will show Lo or Hi and bleep.
Note!
The temperature can be measured both in Celsius and Fahrenheit scales. To change the
scale from Celsius into Fahrenheit, with the equipment switched o press the down ar-
row “
⬇” button keeping pressed, switch on the power for 4 seconds until you see the
inscription “St F” on the display this means the scale has been changed. When changing
the scale from Fahrenheit into Celsius, follow the procedure but now press the up ”⬆”
button until the inscription “St C” appears on the display.
 Loading...