p 801 295 9820
f 801 951 5815
www.fluid-studio.net
1065 South 500 West
Bountiful, Utah 84010
proof no: 1
date:
07.20.10
des: SM spck: XX
job no: NA
client: Orbit
sku: 55660
upc: NA
file name: 55660-24 rA.indd
software: InDesign CS5
colors
additional instructions:
· Translations Approval Code: ·
color
non printing
PMS
????
PMS
????
color
non printing
PMS
????
Registration
K
Printers are responsible for
meeting print production
requirements. Any changes
must be approved by the
client and Fluid Studio.
printed piece must meet
designated specifications
on this form.
dimensions:
flat: w: 11.25" h: 5.5"
finished (folded): w 3.75" d: 0" h 5.5"
© 2007 Fluid Studio. This
work is the property of Fluid
Studio, and cannot be used,
reproduced or distributed
in any way without their
express permission.
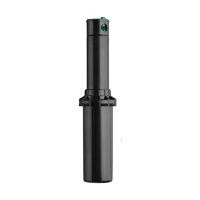
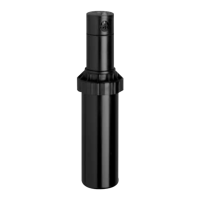
Voyager II
®
Professional
GEAR DRIVE
SPRINKLER
Regador profesional Voyager II
®
accionado por engranajes
PN 55660-24 Rev A
ENGLISH
READ ALL INSTRUCTIONS PRIOR
TO INSTALLATION
Set the pattern before installation
The Voyager II
®
can be set to
rotate between 40° and 360°
(preset at 180°)
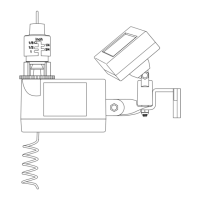
1. Turn the top of the head all
the way to the left until it stops
and then all the way to the
right. The top of the head must
be in this position to make
adjustments. (Figure 1).
2. Insert the plastic end of the key
into the pattern adjustment hole
(Figure 2).
3. Turn clockwise to increase
rotation; counterclockwise
to decrease rotation. Each
full turn increases/decreases
rotation by 90˚ (Figure 3).
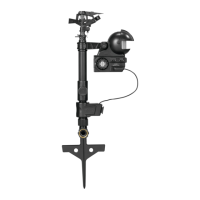
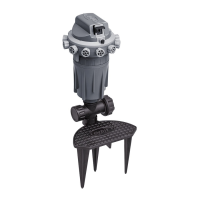
Head installation
1. Flush sprinkler lines.
2. Thread the sprinkler onto a
riser and set the head flush
with the finished turf height
(Figure 4).
Note: DO NOT use pipe dope on
the threads. If necessary, use
thread seal tape.
Set the spray distance
after installation
Set with water on under system’s
normal operating pressure.
Note: Preinstalled nozzle (#
7) adjusts from 25 ft. to 45 ft.
depending on system water
pressure.
1. Insert the hex (metal) end
of the key into the distance
adjustment slot (Figure 2).
2. Turn clockwise to decrease
distance; counterclockwise to
increase distance.
Caution: DO NOT turn the
adjustment screw too far in
either direction—screw may
come free of threads.
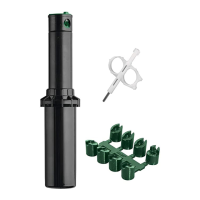
Replace the nozzle
See Nozzle Specs for other
distance ranges and replace the
nozzle if needed.
1. To access the nozzle, insert the
plastic end of the key into the
lifter socket (Figure 2).
2. Turn the key 90° and pull
upward.
Note: the spring inside the
canister is very strong.
3. Firmly grip the sprinkler stem.
4. Insert the hex (metal) end
of the key into the distance
adjustment slot (Figure 2).
5. Turn the screw
counterclockwise until it is just
clear of the nozzle.
6. Apply water pressure to your
system and the nozzle will pop-
out of the head. Or use pliers to
grip the edge of the nozzle and
pull it out.
7. Insert the replacement nozzle
so that the diffuser screw
channel is on top and turn the
diffuser screw back into place
(Figure 5).
8. Adjust distance if necessary
(see Set the Spray Distance).
Clean the filter
1. Remove grass and dirt around
the sprinkler head so you can
see the top 1 ½ in.
2. Unscrew the cap and remove
the stem assembly.
3. Use pliers to extract the filter
from the bottom of the stem
assembly.
4. Clean out debris and replace
filter.
5. Replace the stem assembly to
the sprinkler body and screw
tightly.
Pattern
Adjustment
Distance
Adjustment
O
rb
i
t
®
Professional
Pattern
Adjustment
Distance
Adjustm
ent
Orbit
®
Professional
.
.
.
.
.
.
.
.
.
.
.
.
.
.
.
.
.
.
.
.
.
.
.
.
.
.
.
.
.
.
.
.
.
.
.
.
.
.
.
.
.
.
.
.
.
.
.
.
.
.
.
.
.
.
.
.
.
.
.
.
.
.
.
.
.
.
.
.
.
.
.
.
.
.
.
.
.
.
.
.
.
.
.
.
.
.
.
.
.
.
.
.
.
.
.
.
.
.
.
.
.
.
.
.
.
.
.
.
.
.
.
.
.
.
.
.
.
.
.
.
.
.
.
.
.
.
.
.
.
.
.
.
.
.
.
.
.
.
.
.
.
.
.
.
.
.
.
.
.
.
.
.
.
.
.
.
.
.
.
.
.
.
.
.
.
.
.
.
.
.
.
.
.
.
.
.
.
.
.
.
.
.
.
.
.
.
.
.
.
.
.
.
.
.
.
.
.
.
.
.
.
.
.
.
.
.
.
.
.
.
.
.
.
.
.
.
.
.
.
.
.
.
.
.
.
.
.
.
.
.
.
.
.
.
.
.
.
.
.
.
.
.
.
.
.
.
.
.
.
.
.
.
.
.
.
.
.
.
.
.
.
.
.
.
.
.
.
.
.
.
.
.
.
.
.
.
.
.
.
.
.
.
.
.
.
.
.
.
.
.
.
.
.
.
.
.
.
.
.
.
.
.
.
.
.
.
.
.
.
.
.
.
.
.
.
.
.
.
.
.
.
.
.
.
.
.
.
.
.
.
.
.
.
.
.
.
.
.
.
.
.
.
.
.
.
.
.
.
.
.
.
.
.
.
.
.
.
.
.
.
.
.
.
.
.
.
.
.
.
.
.
.
. .
.
.
.
.
.
.
.
.
.
.
.
.