READ ALL INSTRUCTIONS PRIOR
TO INSTALLATION
Set the pattern before installation
The Voyager can be set to rotate
between 40° and 360° (preset at
180°)
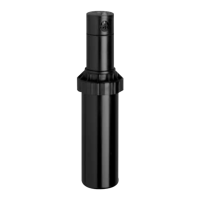
1. Turn the top of the head all the
way to the left until it stops and
then all the way to the right.
This is the starting point for the
rotation (Figure 1).
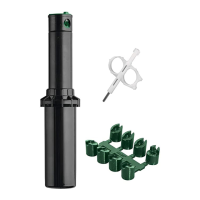
2. Insert a flat bladed screwdriver
into the pattern adjustment
screw (Figure 2).
3. Turn clockwise to increase
rotation; counterclockwise
to decrease rotation. Each
full turn increases/decreases
rotation by 90˚.
Head Installation
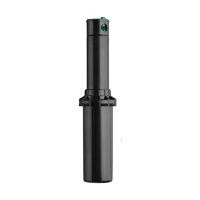
1. Flush sprinkler lines.
2. Thread the sprinkler onto a
riser and set the head flush
with the finished turf height
(Figure 3).
Note: DO NOT use pipe dope on
the threads. If necessary, use
thread seal tape.
3. Unscrew the cap and remove
the sprinkler stem from the
canister—be careful of debris
falling in canister.
4. Position the sprinkler stem so
that the arrow points to the
right edge of the rotation.
5. Slide the sprinkler stem back
into the canister and tighten the
cap.
Set the spray distance
after installation
Set with water on under system’s
normal operating pressure.
Note: Preinstalled nozzle (#
7) adjusts from 25 ft. to 45 ft.
depending on system water
pressure.
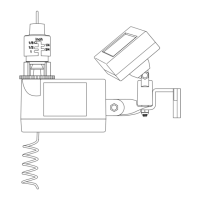
1. Insert a small flat bladed
screwdriver key into the distance
adjustment slot (Figure 2).
2. Turn clockwise to decrease
distance; counterclockwise to
increase distance.
Caution: DO NOT turn the
adjustment screw too far in
either direction—screw may
come free of threads.
Replace the Nozzle
See Nozzle Specs for other
distance ranges and replace the
nozzle if needed.
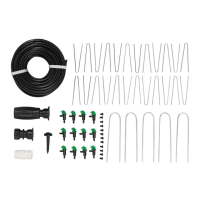
1. To access to the nozzle, insert
a flat blade screwdriver into the
lifting socket and lift upward
(Figure 4)
2. Firmly grip the sprinkler stem—
Note: the spring inside the
canister is very strong.
3. Insert a small flat bladed
screwdriver into the distance
adjustment slot..
4. Turn the screw
counterclockwise until it is just
clear of the nozzle.
Caution: DO NOT turn the
adjustment screw too far in
either direction—screw may
come free of threads.
5. Use pliers to grip the “ears” of
the nozzle and pull it out.
6. Insert the replacement nozzle
with the ears on top and turn
the screw back into place
(Figure 5).
7. Adjust distance if necessary
(see Set the Spray Distance).
Clean the Filter
1. Remove grass and dirt around
the sprinkler head so you can
see the top 1 ½ in.
2. Unscrew the cap and remove
the stem assembly.
3. Use pliers to extract the filter
from the bottom of the stem
assembly.
4. Clean out debris and replace
filter.
5. Replace the stem assembly to
the sprinkler body and screw
tightly.
Voyager
®
GEAR DRIvE
SPRINkLER
ENGLISH
Figure 1
Figure 4
Figure 3
Figure 2
Pattern
adjustment
slot
Distance
adjustment
slot
Figure 5
CAUTION
n
For outdoor use with cold water
only.
n
Do not spray near electrical
connections.
No Special key Required