6.2.1.IP address setup
You need to connect your printer to network before IP address setup.
1.
In case of wired network model, connect the printer to wired network by connecting to
its network interface with network cable.
2.
In case of wireless network model, the printer can be connected to wireless network via
wireless network setup tools or Wi-Fi Protected Setup(WPS) (please refer to Chapter 5.1.2).
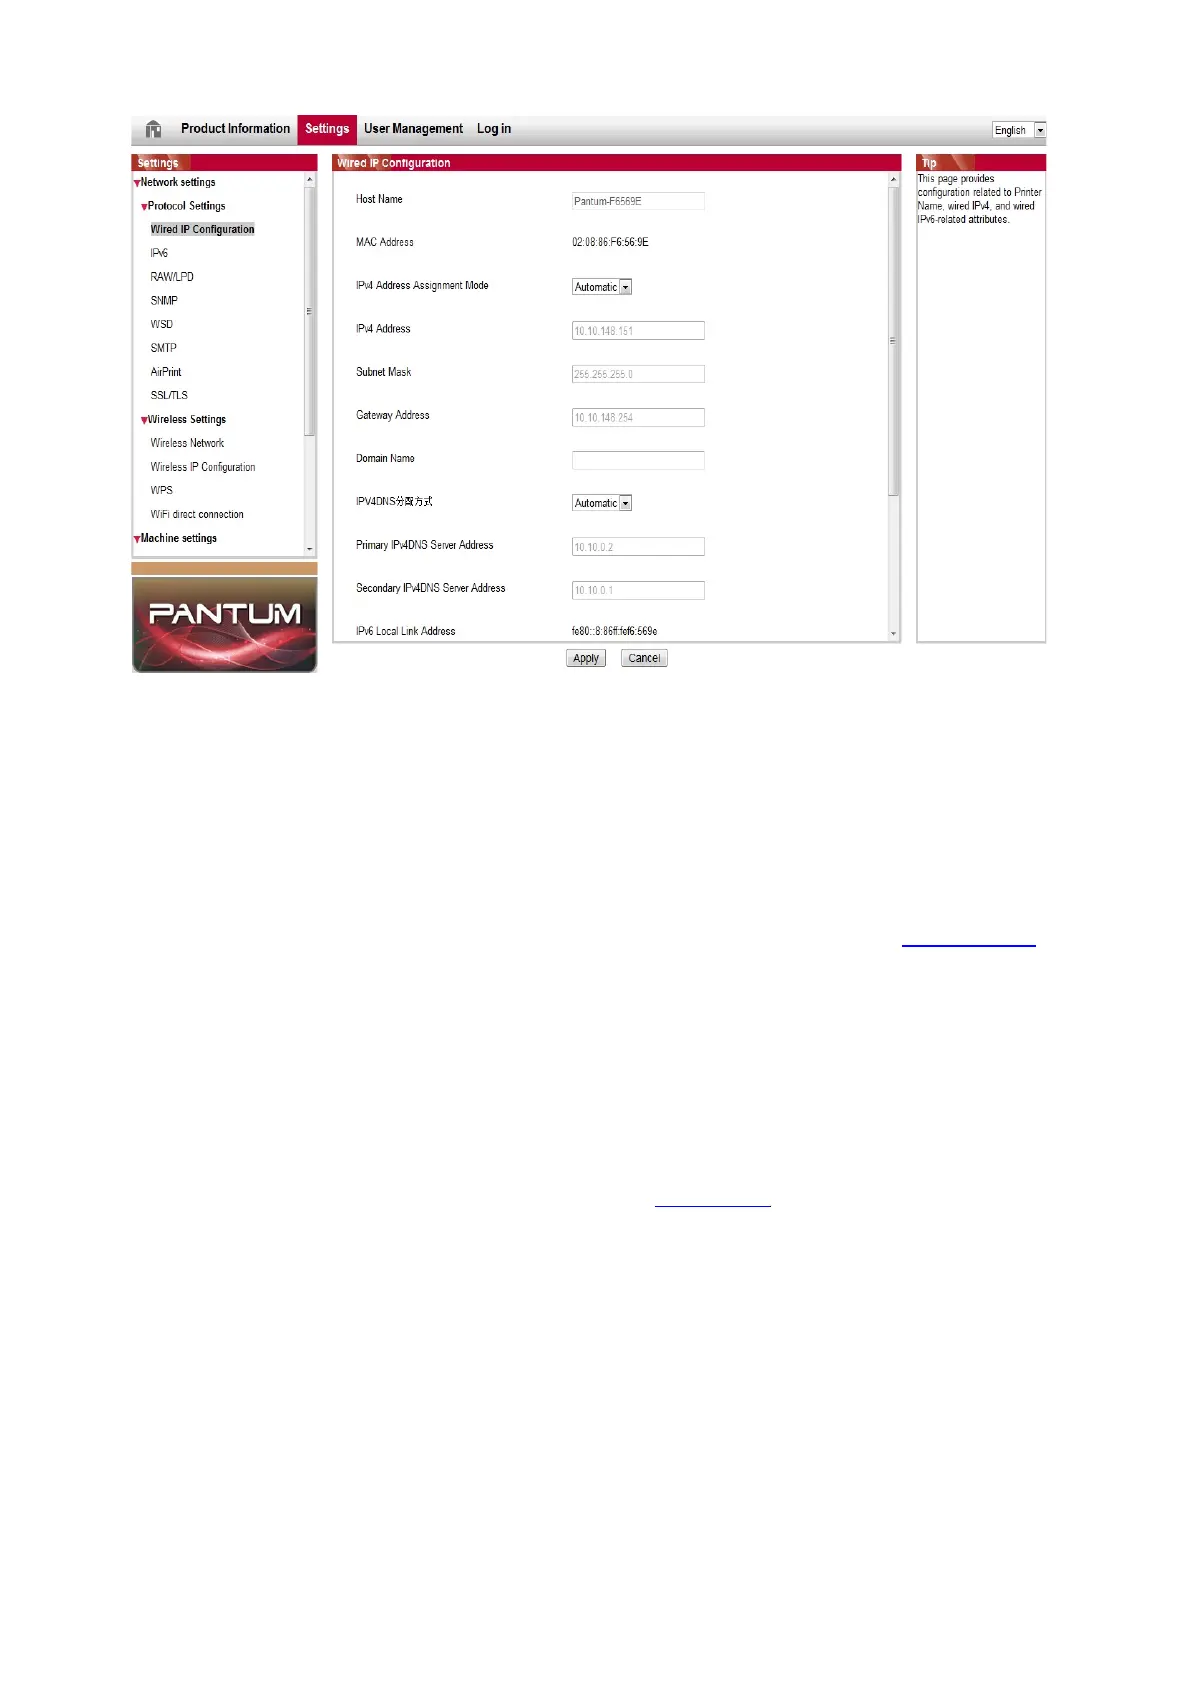
6.2.1.1.IPv4 setup
IPv4 address of the printer is divided into DHCP auto assignment and manual setting,
and the DHCP auto assignment function is on by default. You can set up the IPv4 address
of printer manually to set up fixed IPv4 address for the printer.
1.
Turn on
printer
power to
connect printer to network.
2. Log in the embedded
Web server
(please refer to Chapter 6.1 for login method).
3. Click “Settings” – “Network settings” – “Protocol Settings” – “Wired IP Configuration”.
4. Set the IPv4 address assignment mode as “Manual”.
5. Input “IPv4 Address”, “Subnet Mask” and “Gateway Address”, and then click “Apply”.
 Loading...