15
GB CY
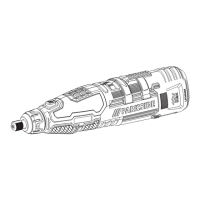
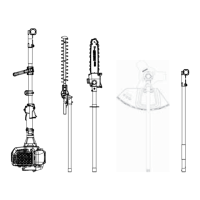
1. Turn the clamping lever (27) as far to
the left as possible and hold it rmly in
this position.
2. Insert the saw blade (16/17) into the
chuck (10). When inserting the saw
blade (16/17), make sure that the
back of the saw blade is in the notch
of the guide roller (9). Make sure that
the saw blade (16/17) is attached cor-
rectly and the teeth are pointing in the
cutting direction.
3. Release the clamping lever (27).
Be sure to always use the correct
saw blade for the material.
Removing the saw blade
1. Turn the clamping lever (27) as far to
the left as possible and hold it rmly in
this position.
2. Remove the saw blade (16/17) from
the chuck (10).
3. Release the clamping lever (27).
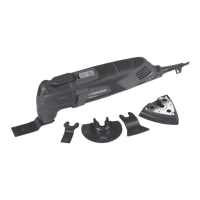
Removing/attaching the
parallel guide
The parallel guide can be tted on
both sides of the device.
Attaching the parallel guide
1. Loosen the retaining screws (12) if nec-
essary.
2. Slide the parallel guide (19) through
the slide-in openings (11).
3. Retighten the retaining screws (12).
Removing the parallel guide
1. Loosen the retaining screws (12).
2. Pull the parallel guide (19) out of the
slide-in openings (11).
Removing/attaching the
tension tear protection
Removing the tension tear protec-
tion
1. Press the tension tear protection (21)
away from the recess ( 28) in the
slide shoe (20).
Attaching the tension tear protec-
tion
2. Press the tension tear protection (21)
into the recess ( 28) in the slide
shoe (20).
Operation
Switch off the device and re-
move the battery before car-
rying out any maintenance
work.
Ensure that the ambient tem-
perature does not exceed
50°C or fall below -20°C
during work.
Switching on and off
The speed can be smoothly adjusted with
the on/off switch (2). The more you press
the on/off switch (2), the higher the speed.
1. To start the device, press and hold the
safety switch (1) and press the on/off
switch (2).
2. To stop the device, release the on/off
switch (2).
Adjusting the mitre
angle
1. Loosen the hexagon socket screws (7)
with the Allen key (18).

 Loading...