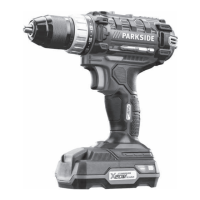
PABS 20-LI D4
GB
│
IE
│
19 ■
Operation
Switching on and off
Switching on:
♦ To start the appliance, press the ON/OFF
switch
and keep it pressed in (see Fig. K).
The LED work light
lights up when the ON/
OFF switch is depressed lightly or fully. This
allows for illumination of the work area in low
lighting.
Switching off:
♦ Release the appliance's ON/OFF switch
to
switch off the appliance.
Adjusting the rotational speed
The ON/OFF switch has a variable speed con-
trol. Pressing the ON/OFF switch lightly yields a
low speed. Increasing pressure increases the speed
(see Fig. K).
NOTE
► The integrated motor brake ensures rapid
stoppage.
Changing the direction of rotation
♦ Change the direction of rotation by pressing the
rotational direction switch towards the left or
right (see Fig. L).
Tips and tricks
Tip! This symbol indicates proper be-
haviour!
♦ Before operation, check whether the screw or
drill bit is correctly positioned, i.e. centred in the
drill chuck.
♦ Screw bits are labelled according to their di-
mensions and their shape. If you are uncertain,
always check whether the bit fits tightly in the
screw head without any free play.
Torque:
♦ Smaller screws/bits can be damaged if you set
the torque or rotational speed too high.
Hard screw joints (in metal):
♦ Particularly high torques occur, for example, in
metal screw joints made using drive sockets.
Select a low rotational speed.
Soft screw joints (e.g. in soft wood):
♦ Again, use a low rotational speed, to avoid e.g.
damaging the surface of the wood upon contact
with the screw head. Use a countersink.
When drilling in wood, metal and other
materials, observe the following:
♦ Use a high speed for drill bits with small diameter
and a low speed for drill bits with large diameter.
♦ Select a low speed for hard materials and a
high speed for soft materials.
♦ Secure or fasten the workpiece in a clamp or
vice (if possible).
♦ Mark the spot where you want to drill using a
centre punch or nail. Select a low rotational
speed when starting.
♦ Pull the rotating drill bit from the hole repeatedly
to remove dust and chips and clear the hole.
 Loading...