15
GB
Red and yellow LEDs are on:
Battery has a residual charge
(< 90 %).
Red LED lights up: Battery is
empty, please charge.
Practical tips
Wear gloves when handling the
saw blade. In this way, you avoid
injury from cuts.
Caution:Riskofinjuryand
damage to property!
- Do not use any blunt or bent
blades or blades which are dam-
aged in any other way.
- Before sawing the work piece,
check for hidden foreign objects
such as nails, screws. These must
be removed.
- Always insert a suitable saw
blade.
- Secure the work piece with the
aid of clamping devices on the
workbench.
- Apply only as much pressure as
is required for sawing. If there is
excessive pressure, the sawing
blade may bend and break.
- Switch the device off immedi-
ately if the sawing blade jams.
Spread the saw cut out and pull
the blade out carefully.
- Always stand to the side of the
saw when working.
- Always make sure that the work-
place is well ventilated.
- Avoid over-stressing the device
while working.
Conventional sawing:
1. Turn the device on. Before switching
the device on, ensure it is not in contact
with the work piece.
2. Place the base plate on the work piece.
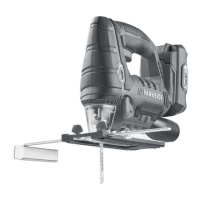
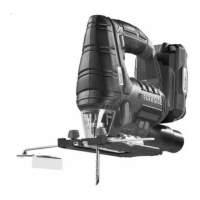
3. Cut with a uniform forward motion. You
can saw horizontally (see
), diago-
nally or vertically (see
).
4. After completion of the work, rst re-
move the blade from the saw cut and
then switch the device off.
Plunge sawing:
Plunge cuts are technically more demand-
ing and harbour a greater risk. Only per-
form this work if you are familiar with this
technique.
Plunge cuts may only be car-
ried out in soft materials such
as wood or plasterboard
and with short blades (max.
length 150 mm). There is a
riskofkickbackandperson-
al injury.
1. Place the front edge of the base plate (2)
on the work piece so that the saw blade
(1) does not touch the work piece.
2. Turn the device on and let the saw blade
(1) slowly plunge into the work piece.
3. When the work piece depth has been
cut through, continue sawing as usual.
Flush separation:
With elastic bi-metal saw blades (see
spare parts/accessories) you can separate
water pipes, for example, ush to the wall.
Makesurethatthebladeis
always longer than the pipe
diameter.Thereisariskof
kickbackandpersonalinjury.
 Loading...