PWM 4 A1
GB
│
MT
│
41 ■
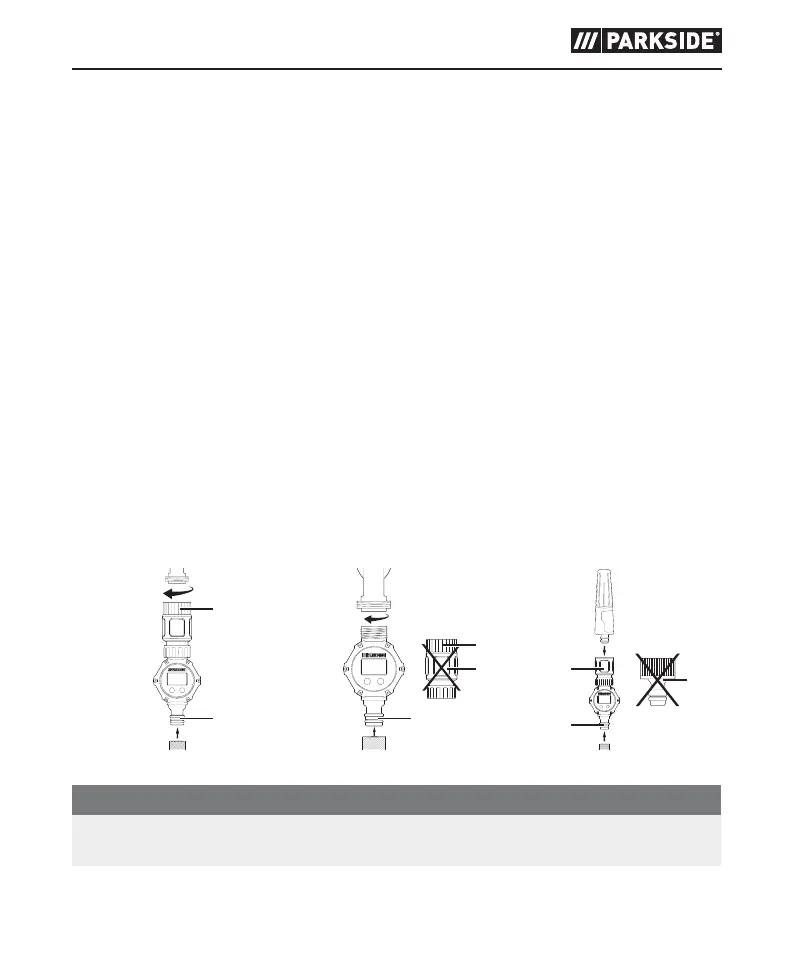
Connecting the appliance
The appliance can be connected to a water connection with a G¾" internal or external thread.
Alternatively the appliance can be connected to a garden spray, for example, to allow a direct
view of the display during watering.
Water connection G¾" external thread (see fig. 3)
♦ Screw the tap connector clockwise onto a water connection with a G¾" external thread
so that it is hand-tight.
♦ Connect a water hose to the water hose connection .
Water connection G¾" internal thread (see fig. 4)
♦ Unscrew the coupling including the tap connector from the appliance.
♦ Screw the appliance clockwise onto a water connection with a G¾" internal thread so that
it is hand-tight.
♦ Connect a water hose to the water hose connection .
Connection for garden sprayer etc. (see fig. 5)
♦ Push the front part of the coupling to the rear and pull the tap connector out of the
coupling .
♦ Insert the garden sprayer or similar into the socket of the coupling .
♦ Connect a water hose to the water hose connection .
Fig. 3 Fig. 4 Fig. 5
NOTE
► You may need an additional adapter depending on the watering system. If this is case,
contact your dealer.
 Loading...