21
SHIFT 2
SHIFT 2 air
At this stage all cables can be connected to the system components.
For easier cable management we recommend to connect all small
cables rst and power cables last.
CABLE MANAGEMENT
1. SMALL CABLES
2. USB 3.0
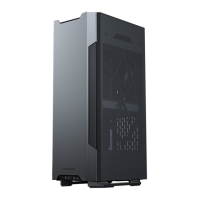
Route the CPU Cable to the cut-out at the top where it
can be connected to the motherboard.
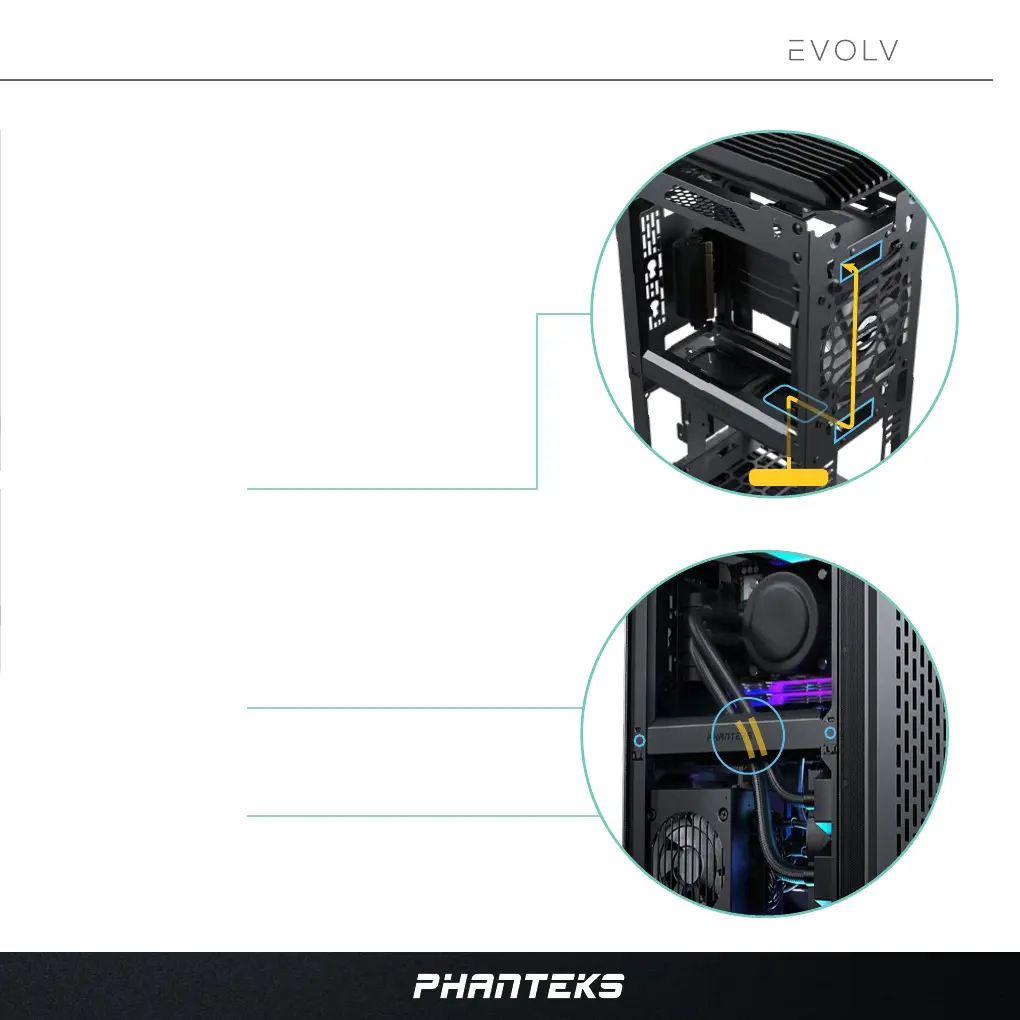
Route the tubing in the cut-out. Optionally you can use
zip-ties to hold them in place here.
Connect all small cables to the motherboards; Power
Switch, fans, D-RGB, SATA Data.
Connect the USB 3.0 cable to the motherboard.
Connect the 24-PIN Motherboard cable to the
motherboard.
The magnetic cable cover securely snaps into place on
the inside of the chassis by magnets.
3. CPU CABLE
4. 24-PIN MOTHERBOARD CABLE
5. AIO TUBING
6. CABLE COVER
6
6
5
3.CPU cable
 Loading...