EasyManuals Logo

Philips CD 850 User Manual

Philips CD 850
12 pages
To Next Page IconTo Next Page
To Previous Page IconTo Previous Page
Page #2 background imageLoading...
Page #2 background image
English
INSTALLATION
POWER
SUPPLY
SETTING
e
Check
that
the
type
plate
on
the
rear
of
your
player
indicates
the
correct
supply
voltage.
e
if
your
mains
supply
voltage
is
different,
consult
your
dealer
or
our
Service
Organisation.
Certain
versions
of
this
player
are
equipped
with
a
voltage
selector
(6),
which
enables
you
to
set
the
player
to
the
correct
mains
voltage
yourself.
When
changing
the
voltage
setting,
itis
also
necessary
to
change
the
mains
fuse
to
one
of
the
correct
rating:
300
mA
(slow
blow
fuse)
for
110/127
V;
160
mA
(slow
blow
fuse)
for
220/240
V.
CONNECTIONS
(Fig.
1)
1
ANALOGUE
OUT
FIXED
For
the
connection
cable
to
the
amplifier.
e
Insert
a
red
plug
into
the
'R'
socket
and
the
other
plug
into
the
'L
socket.
e
Insert
the
two
other
plugs
into
the
corresponding
sockets
of
the
CD
or
AUX
input
of
your
amplifier.
You
can
also
use
the
TUNER
or
TAPE
IN
connection,
but
never
the
PHONO
input!
2
OPTICAL
OUT
This
output
supplies
a
digital
signal
via
an
optical
path;
for
this
reason
it
can
only
be
connected
to
a
Digital
Analog
Converter,
an
amplifier
with
an
optical
digital
input
or
a
digital
sound
processor.
For
this
use
an
optical
lead.
3
REMOTE
CONTROL
OUT
IN
Use
this
connection
for:
Connecting
up
the
equipment
when
you
are
incorporating
the
player
in
a
HiFi
system
with
its
own
remote
control
system.
Connecting
the
remote
control
receiver
EM
2200,
available
as an
accessory.
(Not
available
in
the
U.K.)
4
DIGITAL
OUT
For
digital
signal
processing
or
future
applications
such
as
CD-l.
This
output
supplies
a
digital
signal
and
can
therefore
only
be
connected
to
an
input
which
is
suitable
for
this
signal.
Use
here
the
cinch
lead
supplied.
Never
connect
this
socket
to
a
non-digital
input
of
an
amplifier,
such
as
AUX,
CD,
TAPE,
PHONO,
etc!
5
Mains
fuse
holder
(not
all
versions)
See
'Power
supply
setting'.
6
Voltage
selector
(not
all
versions)
See
'Power
supply
setting”.
7
Connection
for
the
mains
lead
FITTING
A
MAINS
PLUG
(U.K.
only)
The
wires
in
the
mains
lead
are
coloured:
Blue
-
Neutral
Brown
-
Live
As
these
colours
may
not
correspond
with
the
colour
markings
identifying
the
terminals
in
your
plug,
proceed
as
follows:
e
The
Brown
wire
must
be
connected
to
the
terminal
which
is
marked
with
the
letter
L
or
coloured
Red.
e
The
Blue
wire
mustbe
connected
to
the
terminal
which
is
marked
with
the
letter
N
or
coloured
Black.
No
connection
should
be
made
to
the
earth
terminal
of
the
plug!
For
13
A
plugs,
conforming
to
BS
1363,
use
a
3A
fuse.
For
other
plugs,
use
a
5A
or
lower
fuse
in
the
plug,
adapter
or
at
the
distribution
board.
OPERATION
FRONT
OF
PLAYER
(Fig.
2)
1
ON/OFF
Switching
on
and
off.
2
OPEN
Opening
the
CD
compartment;
the
compartment
closes
when
the
front
is
pressed
briefly.
3
Clear)
Erasing
track
numbers
from
a
programme.
Erasing
favourite
track
selections
from
the
FTS
memory.
Erasing
'names'
from
the
title
memory.
4
Display
Informs
you
about
the
functioning
of
the
player.
5
Digit/alphabet
keys
Selecting
another
track
during
play.
Selecting
a
track
to
start
play
with.
Selecting
tracks
when
compiling
a
programme.
Entering
the
recording
time
when
making
a
tape
recording.
Naming
discs
and
track
numbers.
6
S(tore)
Storing
tracks
in
a
programme.
Storing
a
programme
in
the
FTS
memory.
Storing
'names'
in
the
title
memory.
Storing
personal
presets.
STOP/CM
Stopping
play.
Erasing
a
programme
(CM
=
Clear
Memory).
8
DIRECT
PROG(ram)/PLAY
Direct
programming
or
immediate
selection
and
playback
of
track
numbers.
9
PAUSE
Interrupting
play.
10
PLAY/REPLAY
Starting
play.
Returning
to
the
beginning
of
a
track.
11
PHONES
Connecting
headphones.
12
VOL(ume)
For
adjusting
the
volume
when
listening
with
headphones.
13
IR
Receives
the
signals
from
the
remote
control.
14
DIG(ital)
OUT
For
switching
the
DIGITAL
OUT
output
on
and
off.
Only
use
this
key
if
you
connect
the
player
to
other
digital
equipment
via
this
output.
15
FTS
1
and
2
Activating
the
FTS
memory
(FTS
Favourite
Track
Selection).
INFO
Checking
the
FTS
and
the
title
memory.
16
TITLE
Naming
discs
and
track
numbers.
Calling
up
a
'name'
you
have
entered.
17
REVIEW
Checking
a
programme.
18
EDIT
Entering
the
recording
time
when
making
a
tape
recording.
"^l

Other manuals for Philips CD 850

Questions and Answers:

Question and Answer IconNeed help?

Do you have a question about the Philips CD 850 and is the answer not in the manual?
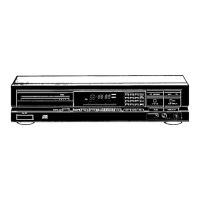
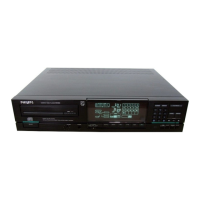
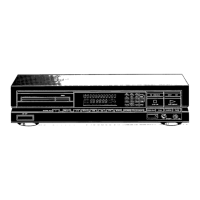
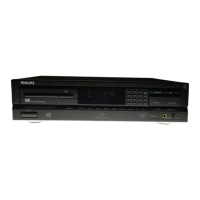
Philips CD 850 Specifications

General IconGeneral
Disc formatCD
Dynamic range96 dB
Total Harmonic Distortion0.0025%
Channel separation100 dB
Digital OutputsCoaxial
Weight5.5 kg
TransportCDM-1 Mk II
Frequency response20 Hz - 20 kHz
Output Voltage2 Vrms
Digital to Analog ConverterTDA1541A
Line Output2 Vrms

Related product manuals