3
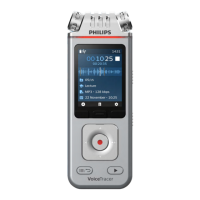
Press the Record button to start recording.
X The recording screen is displayed.
X The Record/Status LED illuminates red.
4
Press the Record button again to stop recording.
X The recording is saved to the preselected folder.
Edit a le
You can edit existing recordings in stop mode by
appending or overwriting a recording.
Append: Add additional recording parts at the end of an
existing recording.
Overwrite: Overwrite an existing recording part starting
from any point within the recording.
To append a recording part:
In stop mode of an existing le, press the Record button.
• If the cursor of the audio progress bar is at the end
of the recording:
X The recording screen is displayed and a new
recording part is added at the end of your le.
• If the cursor of the audio progress bar is at the
beginning of the recording:
X The editing panel opens.
X Press the Up/Down buttons to select Append
and then press the Record button to conrm
your selection.
X The recording screen is displayed and a new
recording part is added at the end of your le.
To overwrite a recording part:
1
In playback mode, press the Play/Stop button to stop
playback at your desired part.
2
Press the Record button.
X The editing panel opens.
3
Press the Up/Down buttons to select Overwrite and then
press the Record button to conrm your selection.
X The recording screen is displayed and a new
recording starts from where you stopped
playback.
Tip
• If you always want to either append or overwrite a
recording part and don't want the editing panel to
open each time, press the Right function button to
open the settings panel
. Press the Down button
to navigate to Edit mode and then select Append or
Overwrite.
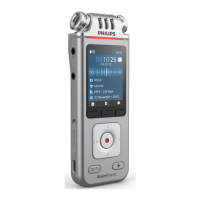
4 Recording
Record a le
Note
• Be careful not to cover the microphones while
recording. This might result in a lower recording
quality.
• If the recording time of your current recording exceeds
the available storage capacity, the recording will stop.
In this case, delete les from your device to make
more storage available.
Before you start recording:
• Make sure your device has enough battery power left.
When your battery is almost discharged, you will see a
battery low icon
.
X The device will turn o and your current recording
will automatically be saved.
• First select the folder you want your recording to
be saved in. For more information, see Start a new
recording. You can store 100 les in each of the folders
A, B, C, and D.
If one of the folders is full, your subsequent recordings
will automatically be stored in the next folder.
• We recommend that you make a test recording in order
to nd the most suitable presets for your recording and
achieve the best recording results.
Start a new recording
1
In stop mode, press the Left function button to start a
new recording.
X The new le mode screen is displayed.
2
Press the Right function button to open the settings
panel
.
To select a folder for your recording to be saved in.
• Press the Up/Down buttons to navigate to Folder
and then press the Record button to conrm your
selection.
Press the Up/Down buttons to navigate to the
folder you want your new recording to be saved in
and then press the Record button to conrm your
selection..
To return to the stop mode screen, press the Back
button.
To adjust the settings for your recording:
• Press the Up/Down buttons to navigate to your
desired setting and then press the Record button to
conrm your selection.
To return to the stop mode screen, press the Back
button.
10 Recording
 Loading...