Installation8
Copyright © 2012-2013 Pico Technology Limited. All rights reserved.ps3000ab.en r5
3 Installation
Important: Do not connect your PicoScope 3000 Series Oscilloscope to the
PC until you have installed the software.
Different oscilloscopes in the PicoScope 3000 Series have different power supply
options. Please follow the instructions in the Installation Guide included with your
oscilloscope and then consult the appropriate section below.
2-channel USB 2.0 oscilloscopes (including MSOs)
Connect the oscilloscope to the PC using the USB cable supplied (see image 3
below).
There is no need for an additional power supply, as the unit obtains its power from
the USB port.
4-channel USB 2.0 oscilloscopes
You have two power supply options:
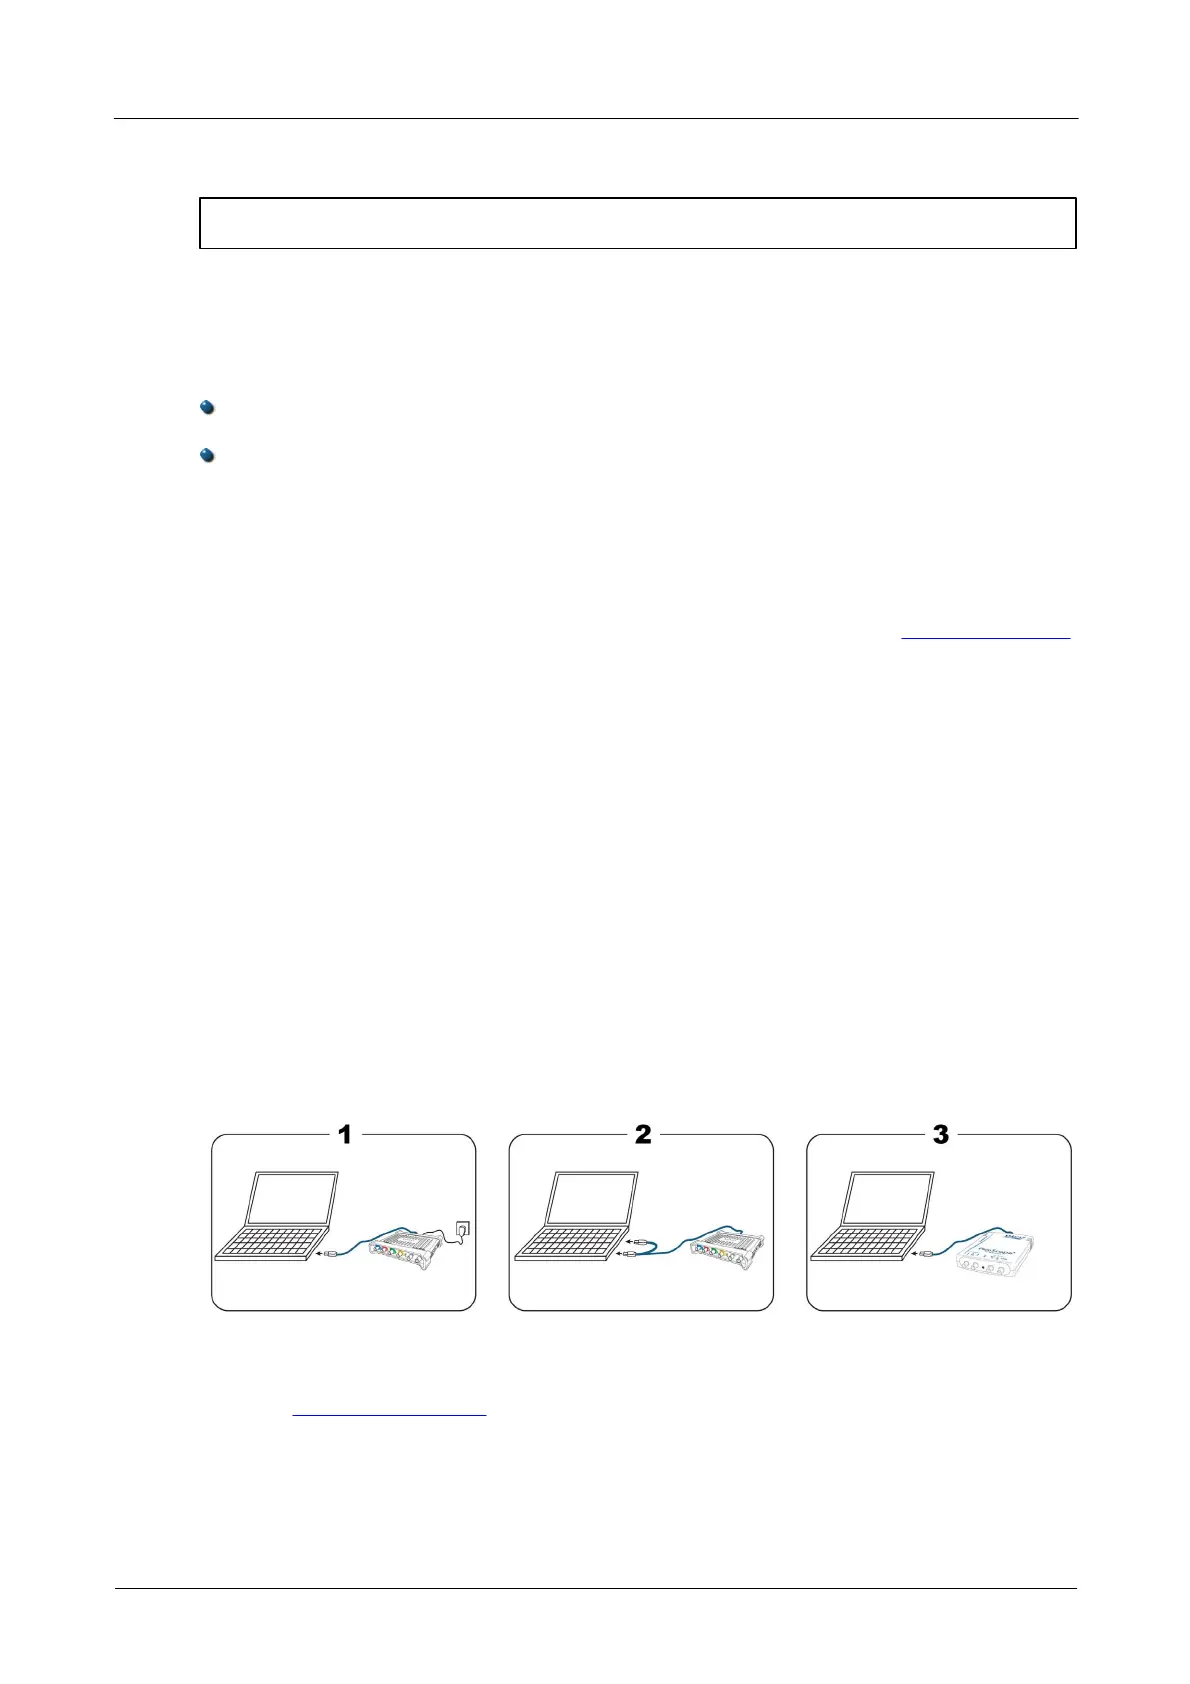
1. If your computer or USB hub does not have two free, powered USB ports, connect
the oscilloscope to the PC or hub using the single-headed USB cable supplied. Plug
the power adapter into the mains and connect the DC cable to the DC power socket
on the rear of the oscilloscope (see image 1 below).
2. If your computer or USB hub has two free, powered USB ports, connect the
oscilloscope to the PC or hub using the double-headed USB cable supplied, ensuring
that each USB plug is connected to a separate USB port (see image 2 below).
Note: If you connect or disconnect the AC adapter while the oscilloscope is in
operation, it will restart automatically and any unsaved data will be lost.
USB 3.0 oscilloscopes
You have two power supply options:
1. If your computer or USB hub has a free, powered USB 3.0 port, connect the
oscilloscope to the PC or hub using the USB 3.0 cable supplied (see image 3
below).
2. If your computer or USB hub does not have a free, powered USB 3.0 port, connect
the oscilloscope to the PC or hub using the double-headed USB 2.0 cable supplied,
ensuring that each USB plug is connected to a separate USB port (see image 2
below).
Checking the installation
Once you have installed the software and connected the PC Oscilloscope to the PC,
start the PicoScope software. The software should now display any signal connected to
the scope inputs. If you have a probe connected to your oscilloscope, you should see a
small 50 or 60 hertz signal in the oscilloscope window when you touch the probe tip
with your finger.