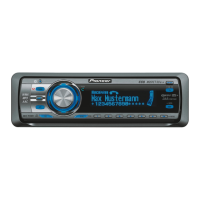
DEVICELIST (connecting or disconnecting a de-
vice from the device list)
! When no device is selected in the device list,
this function is not available.
1 Press M.C. to display the setting mode.
2 Turn M.C. to select the name of a device you
want to connect/disconnect.
! Press and hold M.C. to switch the
Bluetooth device address and device
name.
3 Press M.C. to connect/disconnect the selected
device.
If the connection is established, * is indicated
on the device name.
DEL DEVICE (deleting a device from the device
list)
! When no device is selected in the device list,
this function is not available.
1 Press M.C. to display the setting mode.
2 Turn M.C. to select the name of a device you
want to delete.
! Press and hold M.C. to switch the
Bluetooth device address and device
name.
3 Press M.C. to display DELETE YES.
4 Press M.C. to delete a device information from
the device list.
! While this function is in use, do not turn off
the engine.
ADD DEVICE (connecting a new device)
1 Press M.C. to start searching.
! To cancel, press M.C. while searching.
! If this unit fails to find any available cellular
phones, NOT FOUND is displayed.
2 Turn M.C. to select a device from the device
list.
! If the desired device is not displayed, select
RE-SEARCH.
! Press and hold M.C. to switch the
Bluetooth device address and device
name.
3 Press M.C. to connect the selected device.
! To complete the connection, check the de-
vice name (Pioneer BT Unit) and enter the
PIN code on your device.
! PIN code is set to 0000 as the default. You
can change this code.
! 6-digit number appears on the display of
this unit. Once the connection is estab-
lished, this number disappears.
! If you are unable to complete the connec-
tion using this unit, use the device to con-
nect to the unit.
! If three devices are already paired, DEVICE-
FULL is displayed and it is not possible to
perform this operation. In this case, delete
a paired device first.
A. CONN (connecting to a Bluetooth device auto-
matically)
1 Press M.C. to turn automatic connection on or
off.
VISIBLE (setting the visibility of this unit)
To check the availability of this unit from other de-
vices, Bluetooth visibility of this unit can be turned
on.
1 Press M.C. to turn the visibility of this unit on
or off.
PIN CODE (PIN code input)
To connect your device to this unit via Bluetooth
wireless technology, you need to enter a PIN code
on your device to verify the connection. The default
code is 0000, but you can change it with this func-
tion.
1 Press M.C. to display the setting mode.
2 Turn M.C. to select a number.
3 Press M.C. to move the cursor to the next posi-
tion.
4 After inputting PIN code, press and hold M.C.
! After inputting, pressing M.C. returns you
to the PIN code input display, and you can
change the PIN code.
DEV. INFO (Bluetooth device address display)
1 Press M.C. to display the setting mode.
2 Turn M.C. to display the device information.
Device name—Bluetooth device address
Phone menu operation
Important
Be sure to park your vehicle in a safe place and
apply the parking brake when performing this
operation.
1 Press
to display the phone menu.
2 Turn M.C. to select the function.
Once selected, the following functions can be
adjusted.
MISSED (missed call history)
DIALED (dialed call history)
RECEIVED (received call histor y)
1 Press M.C. to display the phone number list.
2 Turn M.C. to select a name or phone number.
3 Press M.C. to make a call.
PHONE BOOK (phone book)
! The phone book in your cellular phone will be
transferred automatically when the phone is
connected to this unit.
! Depending on the cellular phone, the phone
book may not be transferred automatically. In
this case, operate your cellular phone to trans-
fer the phone book. The visibility of this unit
should be on. Refer to VISIBLE (setting the visi-
bility of this unit) on this page.
1 Press M.C. to display SEARCH (alphabetical
list).
2 Turn M.C. to select the first letter of the name
you are looking for.
3 Press M.C. to display a registered name list.
4 Turn M.C. to select the name you are looking
for.
5 Press M.C. to display the phone number list.
6 Turn M.C. to select a phone number you want
to call.
7 Press M.C. to make a call.
PRESET1-6 (preset phone numbers)
1 Press M.C. to display the setting mode.
2 Turn M.C. to select the desired preset number.
3 Press M.C. to make a call.
! You can also use the preset number but-
tons 1/
to 6/ to recall a preset phone
number.
For more details about storing phone num-
bers, refer to Storing and recalling phone
numbers on the previous page.
PHONE FUNC (phone function)
You can set A. ANSR, R.TONE and PB INVT from
this menu. For details, refer to Function and opera-
tion on this page.
Function and operation
1 Display PHONE FUNC.
Refer to PHONE FUNC (phone function) on this
page.
English
Operating this unit
11
Section
Operating this unit
En
02
