BRAKES
6.8
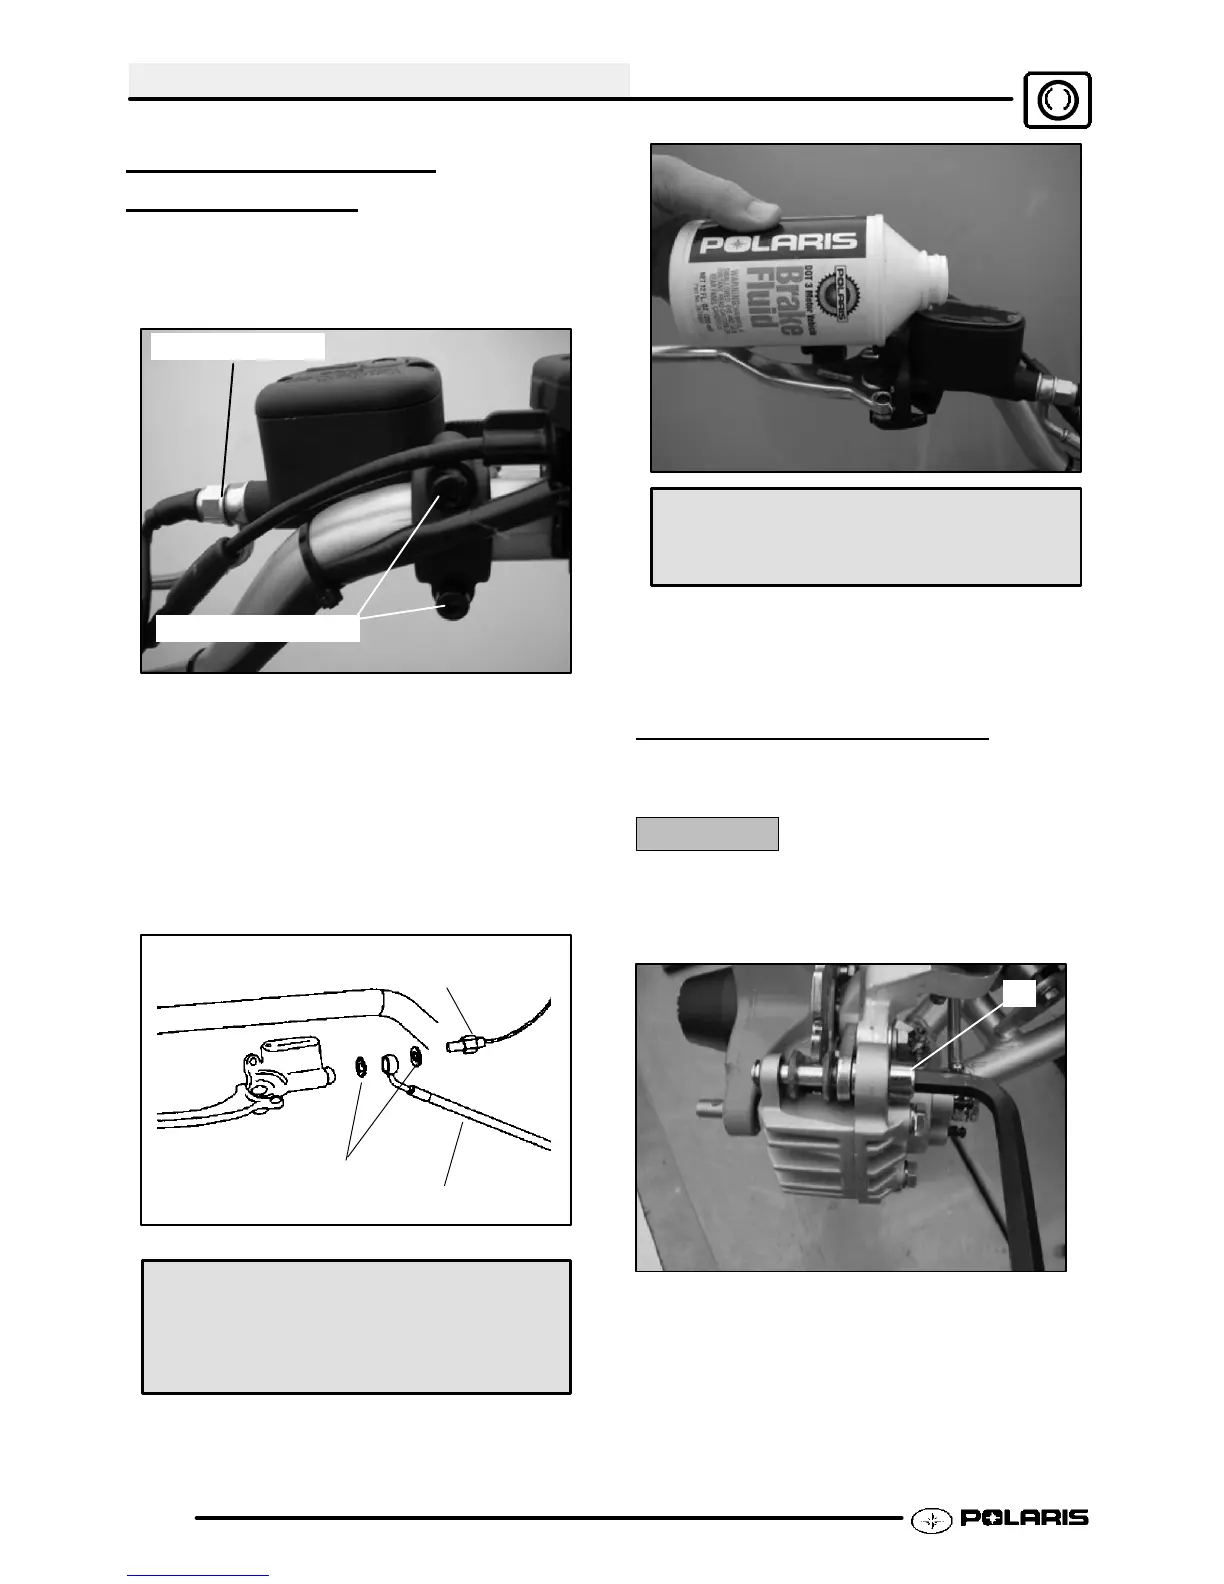
MASTER CYLINDER
INSTALLA
TION
1. Install master cylinder on handlebars. Torque
mounting bolts to 25 in. lbs. (3 Nm). Torque the
top bolt first.
25 in. lbs. (3 Nm)
15 ft.lbs. (21 Nm)
NOTE: To speed up the brake bleeding procedure the
master cylinder can be purged of air before brake line
is attached. Fill with DOT3 Brake Fluid (PN 2870990)
and pump lever slowly two to three times with finger
over the outlet end to purge master cylinder of air.
2. Place new sealing washers on each side of banjo
brake line. Install the brake line into the master
cylinder. Torque the brake switch bolt to 15 ft.lbs.
(21 Nm).
Brake Line
Sealing Washers
Torque to 15 ft.lbs.
(21 Nm)
Master Cylinder Mounting Clamp
Bolt Torque: 25 in. lbs. (3 Nm)
Brake Switch Bolt Torque:
15 ft. lbs. (21 Nm)
3. Fill reservoir with DOT3 Brake Fluid (PN
2870990).
Polaris DOT 3 Brake Fluid
(PN 2870990)
4. Follow bleeding procedure on Pages 9.5-9.6.
Check all connections for leaks and repair if
necessary.
FRONT PAD REMOVAL
1. Elevate and support front of machine.
CAUTION:
Use care when supporting vehicle so that it does not
tip or fall. Severe injury or damage may occur if
machine tips or falls.
A
2. Remove the front wheel. With the caliper installed
loosen the brake caliper slide bolts (A).
Enfocus Software - Customer Support
 Loading...