ENGLISH
Polaris
®
Prestige Above Ground Sand Filter
|
Owner’s Manual
Page 6
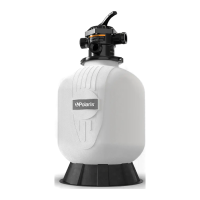
Align tabs on lateral to slots in hub.
4.3 Fill With Sand
The proper type, amount and cleanliness of your lter
sand is critical to the proper function and longevity of
your equipment.
#20 Silica Sand (for pool lter use only)
Size Range .40 - .55 mm
NOTE: Alternate Filter Media
Model Lbs. (kg)
Manufacturers directions must be
followed for any alternate media. Use
of other media may deliver unexpected
results and may void the warranty.
PAG19SF 150lbs (68kg)
PAG22SF 250lbs (113kg)
1. Make sure the lter is level on the equipment pad.
NOTE: Move the breather tube inside the tank on
top of the sand surface.
2. Prepare lter for sand.
Fill the lter 1/3 - 1/2 full of water before
adding sand.
• This will minimize any undue strain on the
laterals when adding sand.
Ensure stand pipe is seated at the bottom of
the lter tank.
Install the sand guard.
• The sand guard should completely cover the
pipe opening.
• Special care should be taken to avoid getting
lter sand into the stand pipe.
d
Using a small scoop, slowly and evenly add
sand to the lter.
• Be sure to allow the sand guard to fully drain
between each scoop to avoid spilling.
#20 Silica
Size Range .40-.55 mm
POOL FILTER SAND
Scoop
NOTE: Be sure to use
pool filter sand only.
CAUTION
d
The Sand Guard must be used at
any time filter media is being
added to the filter. Failure to use
the Sand Guard may result in filter
media intrusion into the pool
and/or malfunction, damage or
failure of the filter components.
Water Level
Sand Guard
Stand Pipe
Laterals
Assembly
a
b
c
When all lter sand has been added:
3. Remove sand guard and store for future use.
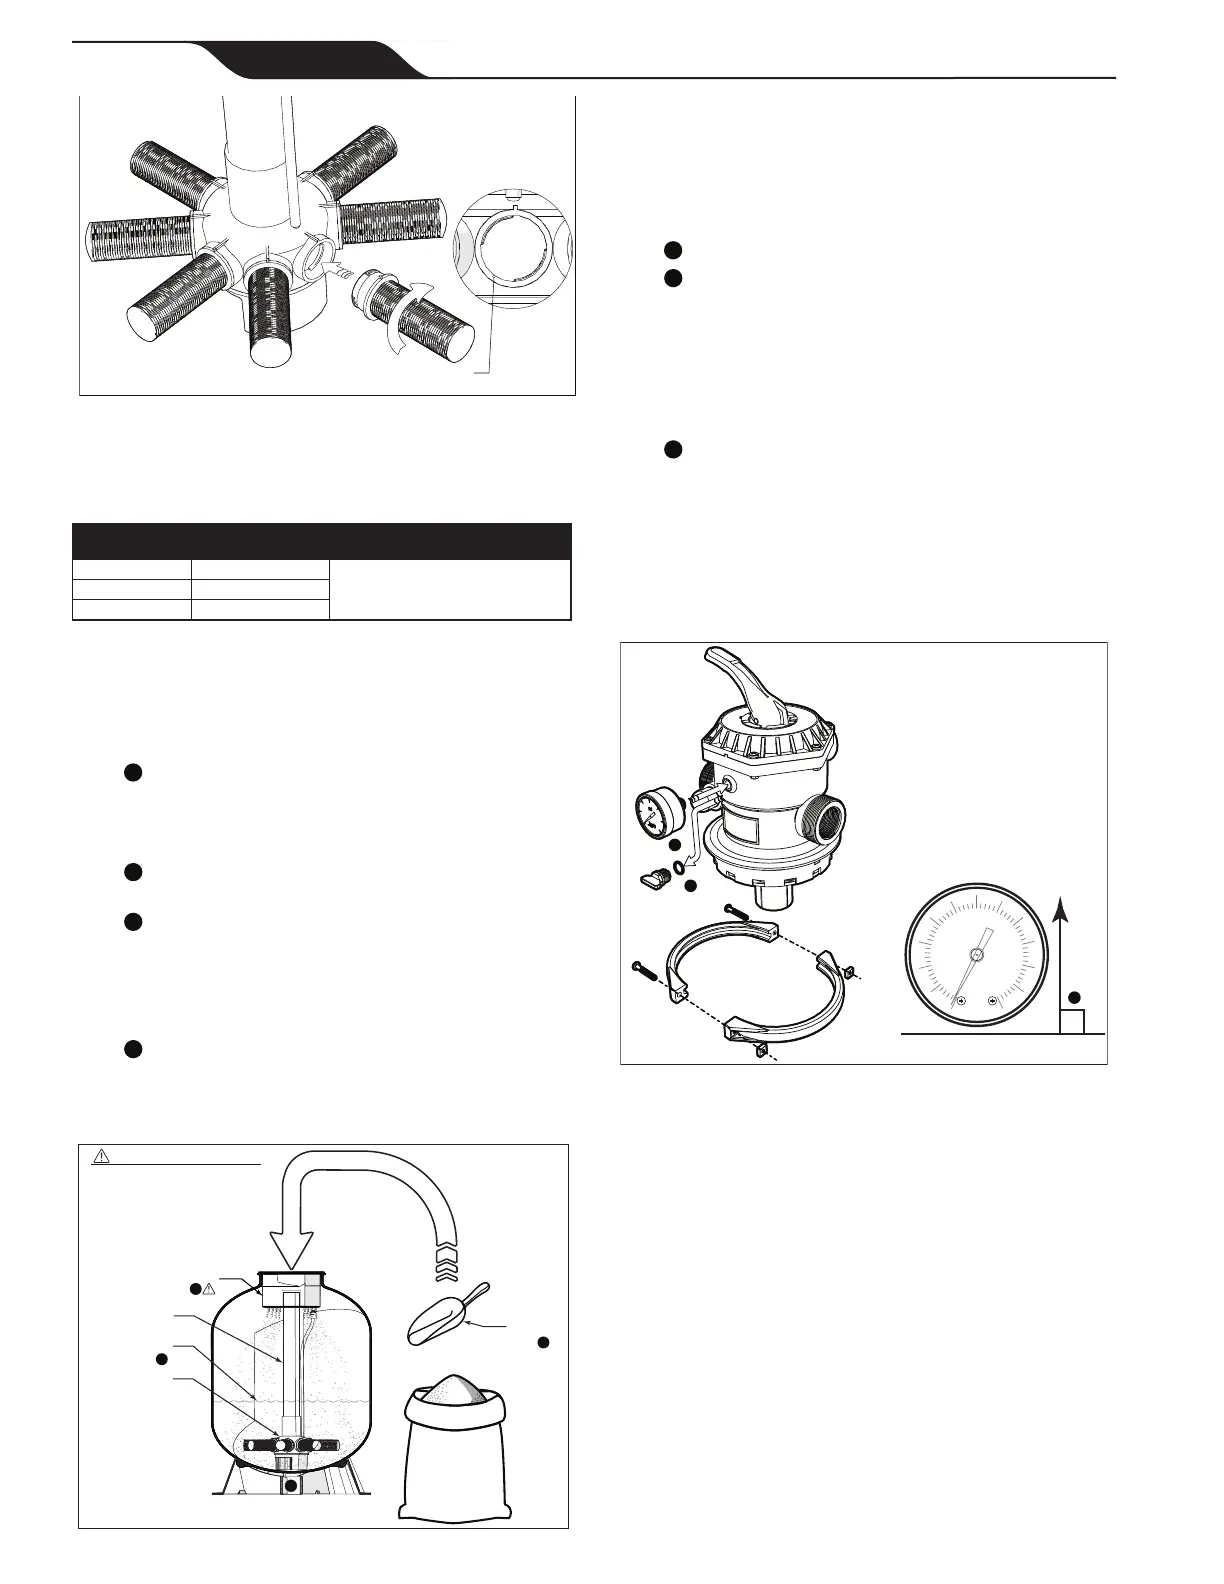
4.4 Assemble Multi-port Valve
1. Install pressure gauge.
Remove the plug from the pressure gauge port.
Install pressure gauge.
• Screw into place until snug. DO NOT
OVERTIGHTEN.
• If possible, orient the gauge so that it is
horizontally aligned. The included Teon
®
tape
can be used to aid in getting the appropriate
orientation and t.
If possible, orient the gauge so that it is right
reading and perpendicular to ground level.
• Apply 4-6 wraps of PTFE (plumbers) tape for
each union adapter installed at the multi-port
valve. Only install PTFE (plumbers) tape on the
adapter threads at the valve ports.
• Do not use PTFE (plumbers) tape on union nut
threads.
a
b
c
Pressure Gauge
Ground Level
4.5 Install Multi-port Valve
1. Flip the valve assembly upside down. Install the
valve/tank O-ring so that it is seated below the
valve body ange.
2. Seat valve onto lter tank with standpipe secured
in center port of the multi-port valve body.
3. Make sure pump and return ports are oriented
so that bends and/or joints in plumbing are
minimized.
4. Position the valve clamp so that it captures both
the valve body ange and the lter tank.
 Loading...