Should you encounter any problems, contact the Customer Service at (888) 919-0070 from 8 AM to 5 PM Mon. thru Fri.
EST. Extended operating days and hours during peak season requirements.
Should you encounter any problems, contact the Customer Service at (888) 919-0070 from 8 AM to 5 PM Mon. thru Fri.
EST. Extended operating days and hours during peak season requirements.
65
4 FILTER PUMP OPERATION
5 PUMP MOTOR PROTECTION
1. Plug the GFCI power cord to a properly grounded receptacle at least 15 feet (4.5m) away from the pool.
2. IMPORTANT: To start the filter pump, press the RESET button on the GFCI plug (22).
3. Check the return fitting on the inside of the pool for correct flow, it should feel like a solid stream
of water returning to the pool. You can use the return flow as a gauge to determine when the filter
needs cleaning or replacement. If you feel a reduction in flow, clean or replace filter.
4. Test water and adjust as needed, read Section 6 - “POOL WATER CARE”.
VERY IMPORTANT – FILTER PUMP ALONE WILL NOT PREVENT ALGAE FROM GROWING IN
POOL WATER; THIS CAN ONLY BE DONE BY MAINTAINING PROPER CHLORINE AND pH LEVELS
AT ALL TIMES!
5. The filter cartridge may need to be cleaned and/or replaced several times at start up until the correct
chlorine and pH levels are attained. We recommend that you keep at least one spare filter cartridge
on hand at all times. Filter cartridges may be purchased at the store you purchased your pool from, or
ordered from Polygroup.
6. To turn off the filter pump, unplug the GFCI power cord (22).
IMPORTANT! Your filter pump is protected by a thermal switch. The switch senses the temperature of the filter
pump. If it gets too hot, the switch will stop the pump from running until it cools off. It will automatically turn back on
when the filter pump has cooled down. This is a safety device to prevent pump damage and prolong service life. If your
pump is automatically turning off, it is because of high pool water temperature and/or low water flow through the pump.
If this happens you need to check the water flow and correct it if needed, as this filter pump uses the water flow for
cooling. You may also want to run the pump at night when the temperature is lower.
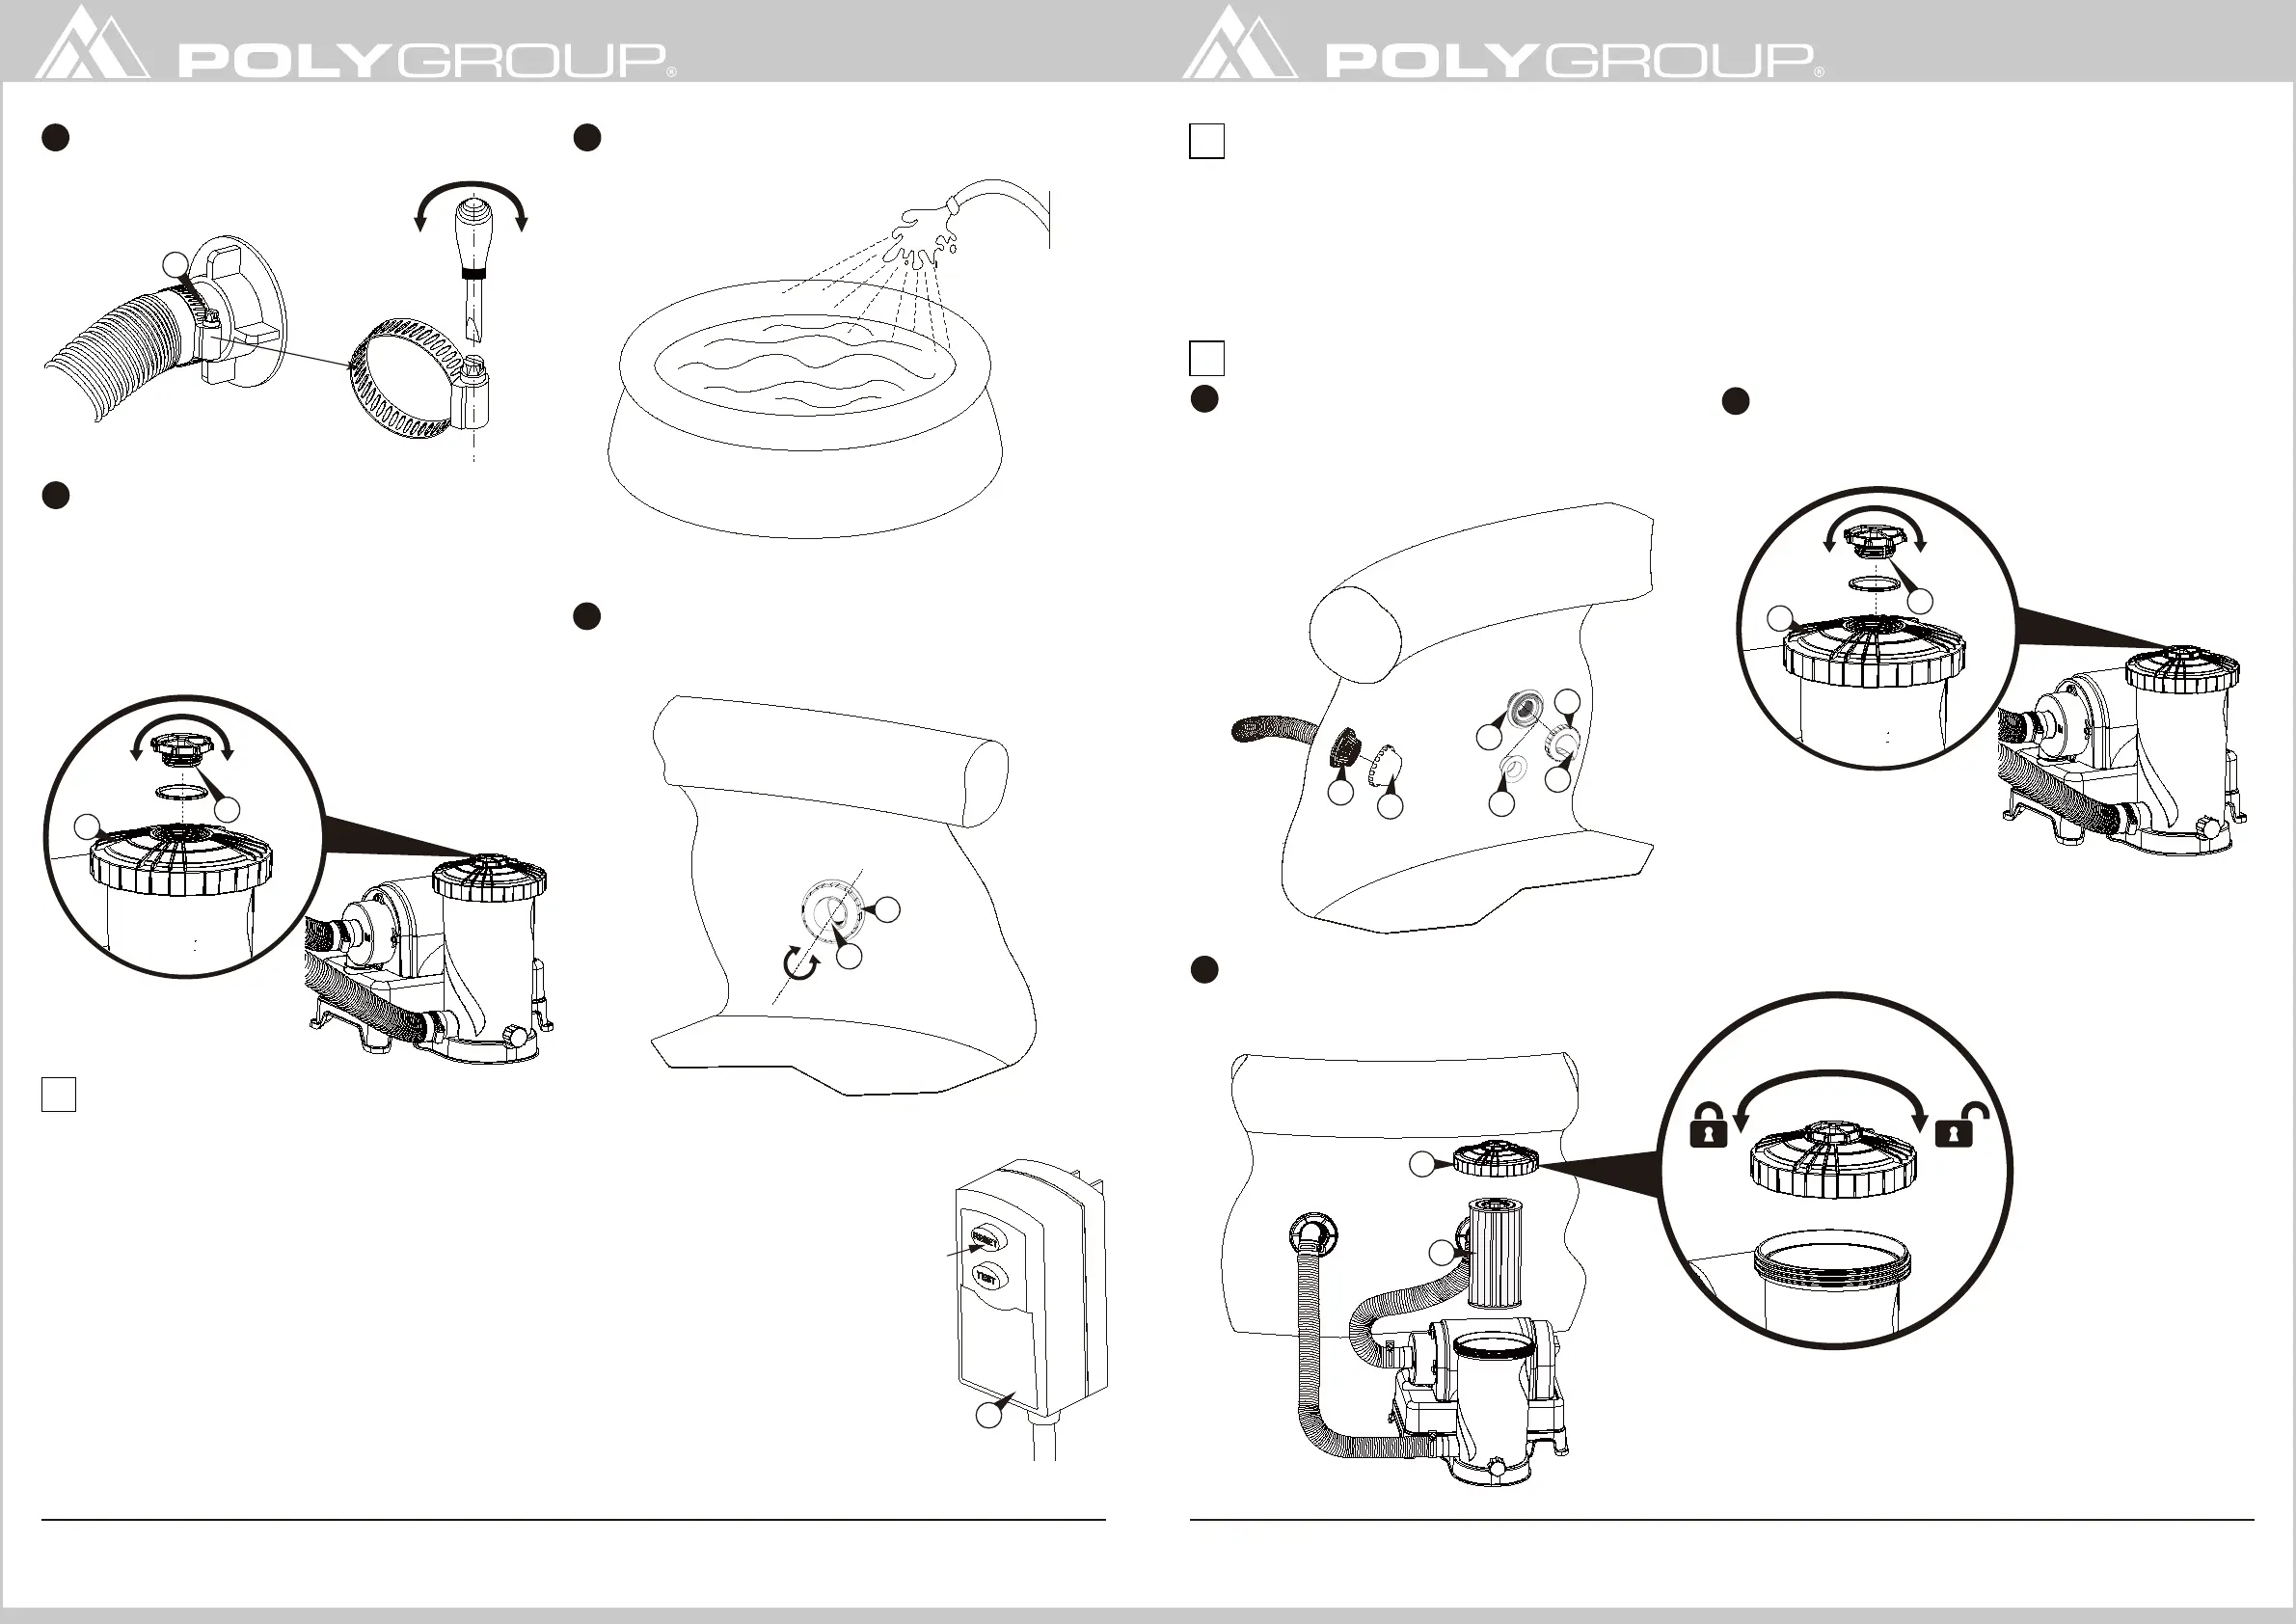
6 FILTER CARTRIDGE CLEANING AND REPLACEMENT
Tighten all Hose Clamps (14) to prevent water
leakage.
7
Air is now trapped inside the Filter Pump system,
which will prevent the water from flowing smoothly.
To VENT the system (release the trapped air), open
the Vent Screw (16) at the top of the pump by
turning it counter-clockwise. The water pressure
will force out all the trapped air inside the Filter
Pump system. Tighten the Vent Screw (16) when
you see water flowing out from the Seal Top(18).
9
Hand loosen the RF Locking Ring (8). Adjust the Return
Fitting Diverter (7) to maximize the calculate of the
pool water. Hand tighten the RF Locking Ring (8).
10
Do not plug in the filter pump at this point. Begin to
fill water until the water level reaches the fill line.
8
Unplug the Power Filter Pump. Release the RF Locking
Ring (8). Remove the RF Diverter (7) from the Return
Fitting (6) and then plug the Return Fitting (6) with the
RF Plug (23). Hand tighten the SF Cap (5) onto the
Suction Fitting (7).
1
Use both hands to twist off the Seal Top (18) by
turning counter-clockwise. Remove the Filter
Cartridge (21).
3
To depressurize the filter pump system, vent the
filter pump by twisting the Vent Screw (16)
counter-clockwise.
2
22
5
3
23
6
18
360°
PRESS
18
16
18
16
21
Loose Tight
7
8
7
8
14
 Loading...