6
6
POOL MAINTENANCE
USING THE DIVERTER FITTING AND VACUUM ADAPTER
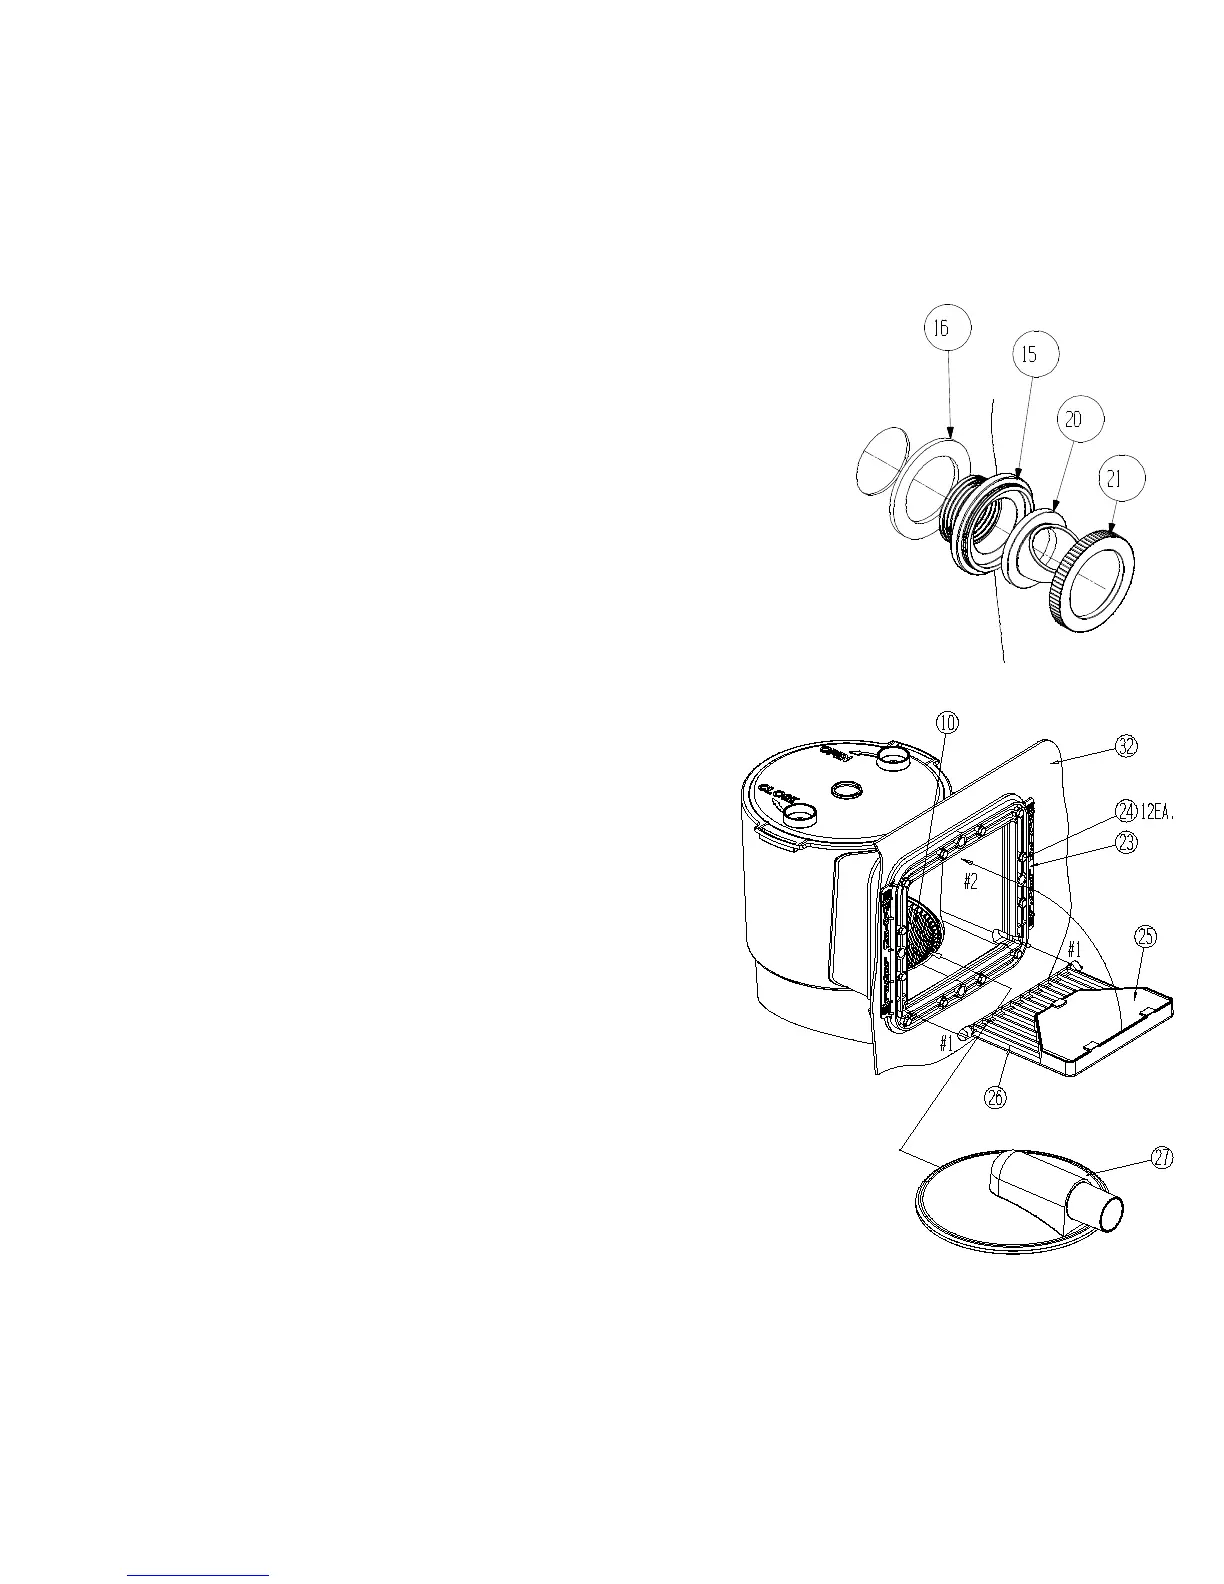
1. DIVERTER FITTING USE; diverts direction of return water entering the pool, see part #20 FIG.5. You
can adjust the fitting by loosening the LOCKING RING see part # 21 FIG 5. The DIVERTER FITTING can be
used to help generate clockwise rotation of the pools water toward the SKIMMER intake opening area of your
pools wall. To do so slightly loosen the LOCKING RING and rotate the DIVERTER FITTING upward pushing
water horizontally under the waters surface pointing away from the SKIMMER Intake area. DO NOT POINT it
directly toward the SKIMMER this will deeply decrease skimming and filtration. Tighten the LOCKING RING
to hold the DIVERTER FITTING in the desired position you choose. You can
position the DIVERTER FITTING downward later to assist in keeping sedi-
ment from building along the bottom of your pool.
2. VACUUM ADAPTER USE; allows you to vacuum your pool, see part # 27
FIG.4 The VACUUM ADAPTER is included with the SKIMMER unit, it will
be necessary for you to purchase a Vacuum, Vacuum handle, and a Vacuum
hose from your local pool supply retailer, also your home improvement cen-
ters, and large retail stores sometime carry these as seasonal items and they
range from economy to deluxe.
3. To install the VACUUM ADAPTER turn off your pump, remove the WEIR part
# 26 FIG. 4, see the section on WEIR installation page 4 (step E) and reverse
the process by lowering the WEIR and sliding it out through the openings in
the FACE PLATE part # 23 shown in FIG 4. Place the WEIR in a safe place
because you need to reinstall it after vacuuming so that your skimmer operates properly.
4. Next attach your vacuum to it’s handle and place the swivel end of
the hose on the vacuum unit and lower vacuum into the pool. Place
your vacuum hose into the pool (it will float somewhat), keep the
remaining end near the DIVERTER FITTING, now turn on the
pump and hold the hose up to the DIVERTER FITTING filling the
hose, this primes the hose with water pushing out the air. The hose
will sink as it fills. Now that the hose is filled, turn off the pump
again and slide the VACUUM ADAPTER into the SKIMMER
opening and attach hose to the adapter. Now start your pump, keep-
ing the vacuum under water at all times during this process. Now
you can move your vacuum along the bottom cleaning your pool.
Never Use the hose alone without the vacuum attached, liner
damage could occur, also Never vacuum with the Strainer Bas-
ket removed or Filter out, pump blockage and damage will oc-
cur. Never leave hose hanging out of the pool because a siphon
can occur draining your pool.
5. When you finish vacuuming turn off the pump once more. Slide
the VACUUM ADAPTER out of the SKIMMER and reinstall the
WEIR back into place. Remove the hose and vacuum draining the
hose back into the pool as you raise it out of the water. Remove the
STRAINER BASKET, empty and rinse it, also remove your FILTER CARTRIDGE and clean it according to
instructions page 5 step 3. Now place the FILTER CARTRIDGE back in and add your chlorine tablets, install the
STRAINER BASKET and the LOCK TOP.
NOTE: It’s a good practice to store the Vacuum Adapter, Vacuum Unit, Vacuum Hose, and Handle in a good loca-
tion to prevent damage or loss and possible UV weathering which might result in early failure.
USING THE SERVICE PLUGS: When Pump (1) needs servicing or working on Return Hose (13), turn off
power and install the Service Plug (30) into Pool Wall Fitting (15) after removing Locking Ring (21) and Divert-
er Fitting (20). Also install a Service Plug (30) into center hole of the Skimmer Canister (8) after removing the
Pump Retaining Nut (7). See Fig. 1 page 3 for location of each. When service is complete remove both Service
Plugs (30) by reversing the procedures above.
FIG. 5
FIG. 4
 Loading...