Model 14 Sound Level Meter User Manual
Field Calibration
It is vital that the calibration of ANY sound level meter is checked before and after each
measurement. If this is done, it is reasonable to assume that the calibration during the
measurement was correct.
If this is NOT done, you will not subsequently be able to be certain that the instrument
calibration was correct and you can never be certain the sound level was as measured.
This process is commonly referred to as field calibration.
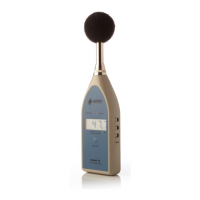
The sound level meter is calibrated acoustically using an external reference, e.g the
Sound Level Calibrator Model 106, which is placed over the microphone. The calibrator
generates a stabilised Sound Pressure Level of 94dB (+- 0.3dB) at a frequency of 1kHz.
Calibration Procedure
1. Ensure the batteries are fitted correctly and have sufficient power left.
2. Ensure the MK:268 microphone capsule is fitted correctly
3. Turn the instrument on with the following settings:
OFF/F in the F position
L/H in the L position
A/C in the A position
(This relates to Fast Time Weighting, Low Measurement Range and dB(A)
Frequency)
4. Ensure the MAX HOLD function is not active. (The word HOLD is not displayed
in the top left hand corner of the instrument display)
5. Attach the acoustic calibrator and turn it onto the 94dB output setting. An
acoustic calibrator such as the Model 106 is suitable.
6. Using the provided calibration screwdriver, slowly adjust the CAL
potentiometer until the instrument display reads 93.7dB(A). (Turning the CAL
potentiometer clockwise increases the displayed level whereas anti-clockwise
reduces the displayed level)
Note: Although the Model 106 Acoustic Calibrator has an output of 94dB, the
pressure correction of the microphone capsule is 0.3dBA. For this reason the
Model 14 must be adjusted to give a reading of 93.7dBA.
7. The instrument is now calibrated.
For details of the operation of the Model 105 and Model 106 Acoustic Calibrators, please
refer to the user manuals supplied with these units.
 Loading...