18 pulsar 3
Ti high – when the charger is overheated. All vents should be checked for signs of obscurity. The charger should
not be used in a closed car trunk , where the temperature may rapidly exceed the allowable value for the
charger’s use.
Vs low – when the supply voltage is too low (e.g. the car battery is discharged too deeply)
Vs high – when the supply voltage is too high
ERROR – error (when for example the battery is plugged into the balancer socket and the chosen battery type
was NiXX, a Wrong connect! and ! Disconnect accu ! message will be additionally displayed.
Software updating
The Pulsar 3 is prepared for an easy firmware
upgrade. To execute that, unpack the firmware
(ZIP) and start the EXE file (Pulsar 3 Utility). The
Pulsar 3 must be connected to the computer by
USB port for upgrade.
Pulsar 3 must be connected to the computer
through a USB cable. To prevent software conflicts
all PC programs should be turned off for the
duration of the updating process. Interrupting the
update may lead to the charger’s damage.
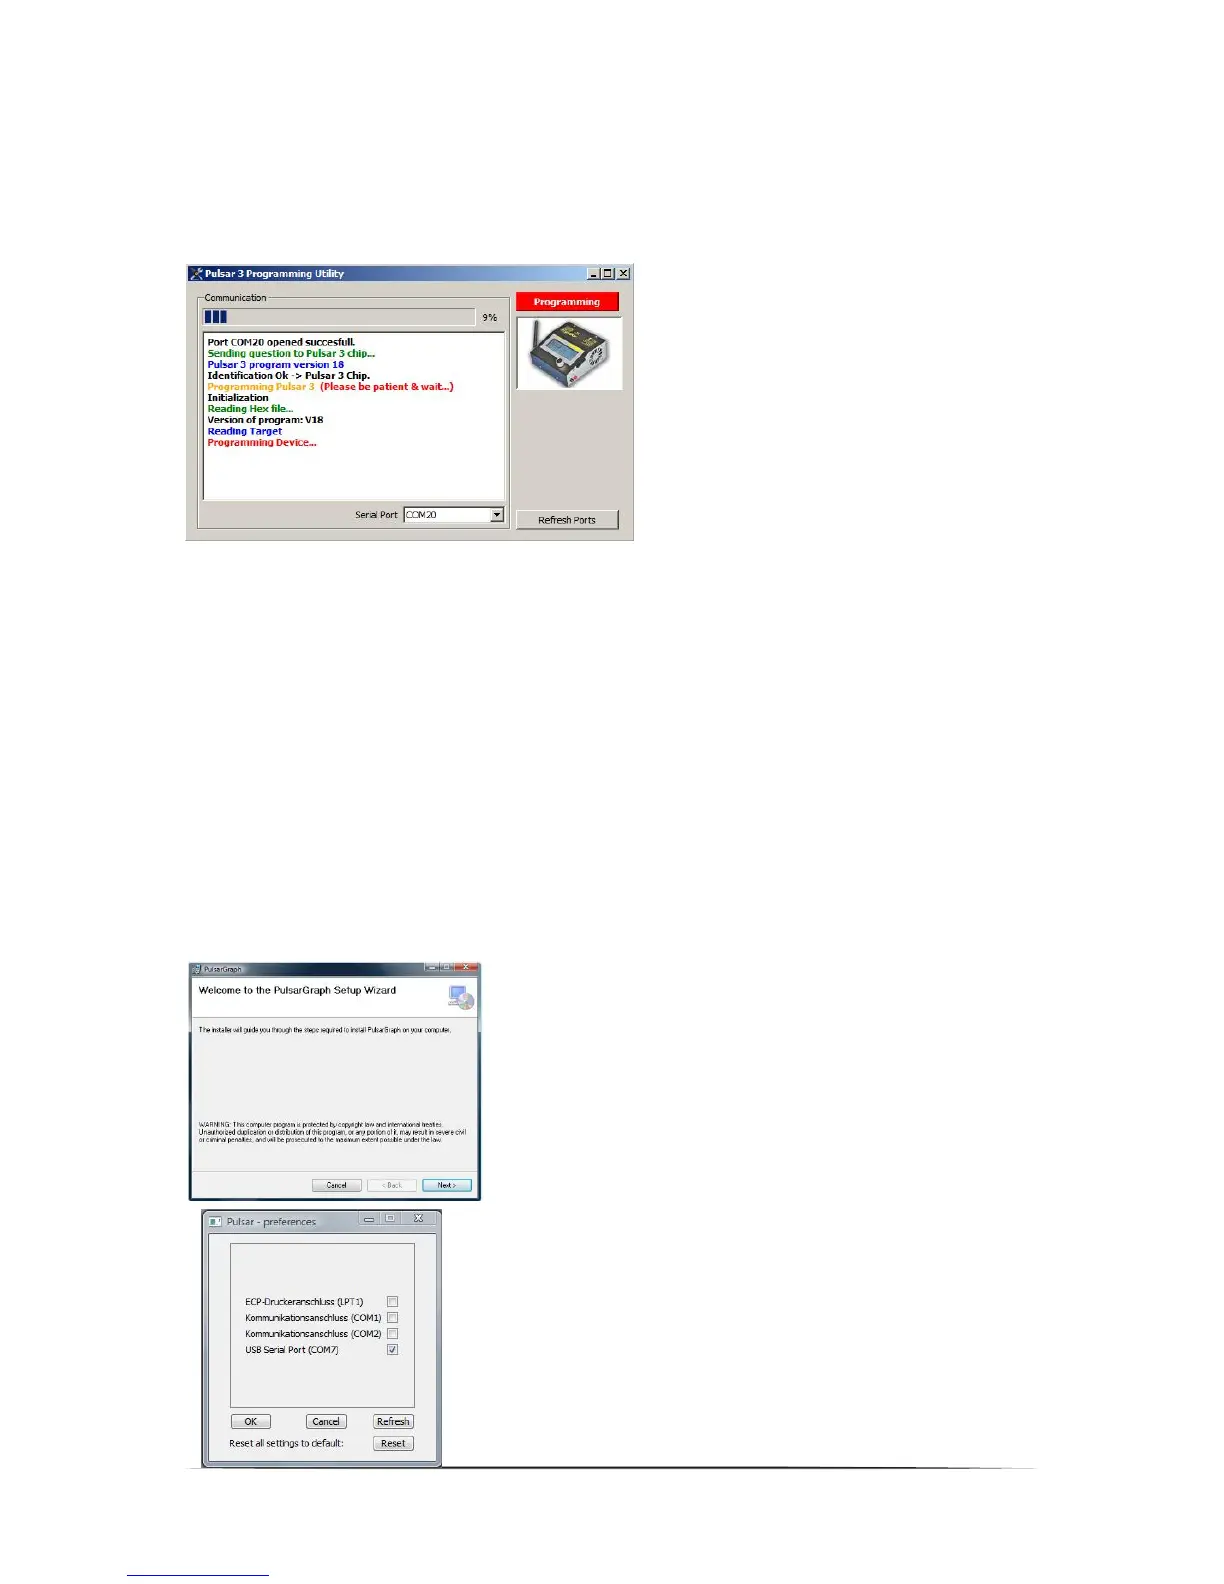
The charger should be connected with a power
supply and left in standard mode (see – main menu
– do not press the Rotary knob!) After starting the
program we chose the appropriate „Serial Port” (COM 7 in the example above) by which Pulsar 3 will
communicate with the computer and then Press the red “Programming” button to start the software exchange
process. The process progress is visible in the „Communication” window. The “Refresh Ports” button refreshes
the list of available ports.
The „Done“ message confirms that the software update has been finished successfully.
If the update is finished unsuccessfully, the whole procedure should be repeated (connect the charger to the
power supply again), even if the charger’s display remains clear.
PC software (PulsarGraph v 4.51)
The SD memory card added to the Pulsar 3 charger contains the installation version of Pulsar Graph. On the left
side of the charger there is a USB socket, through which a direct data flow to the computer is possible during the
process (communication is also possible wireless through BT). The computer software allows following the
process’ progress, saving data and comparing many processes registered earlier. Files saved in the charger on
the SD memory card can be analyzed through the software. The program operates with Windows systems (XP,
Vista, Windows 7 with 32 and 64 Bit).
Installation
To install the software the „PULSAR_3_UTILITY” folder must be copied
from the memory card to the hard disc. Next the Setup.exe file, located
in the “PULSAR_GRAPH” folder, must be started. The installation
progress is very simple and does not require further description
USB drivers.
In case the Pulsar 3 USB cable has not been recognized by the PC,
the „Drivers” folder should be chosen during the driver installation,
where the current USB driver is located.
Hardware installation
It is necessary to give the port name, with which Pulsar 3 will be
communicating with the computer. Through „File > Preferences“ we open the
window containing recognized hardware.
Pulsar 3 should be recognized as hardware – a “USB Serial Port“ assigned
to a communication COM port of the appropriate number (the same for
wireless BT communication). In the window we mark our device and
acknowledge by pressing OK.
 Loading...

