4
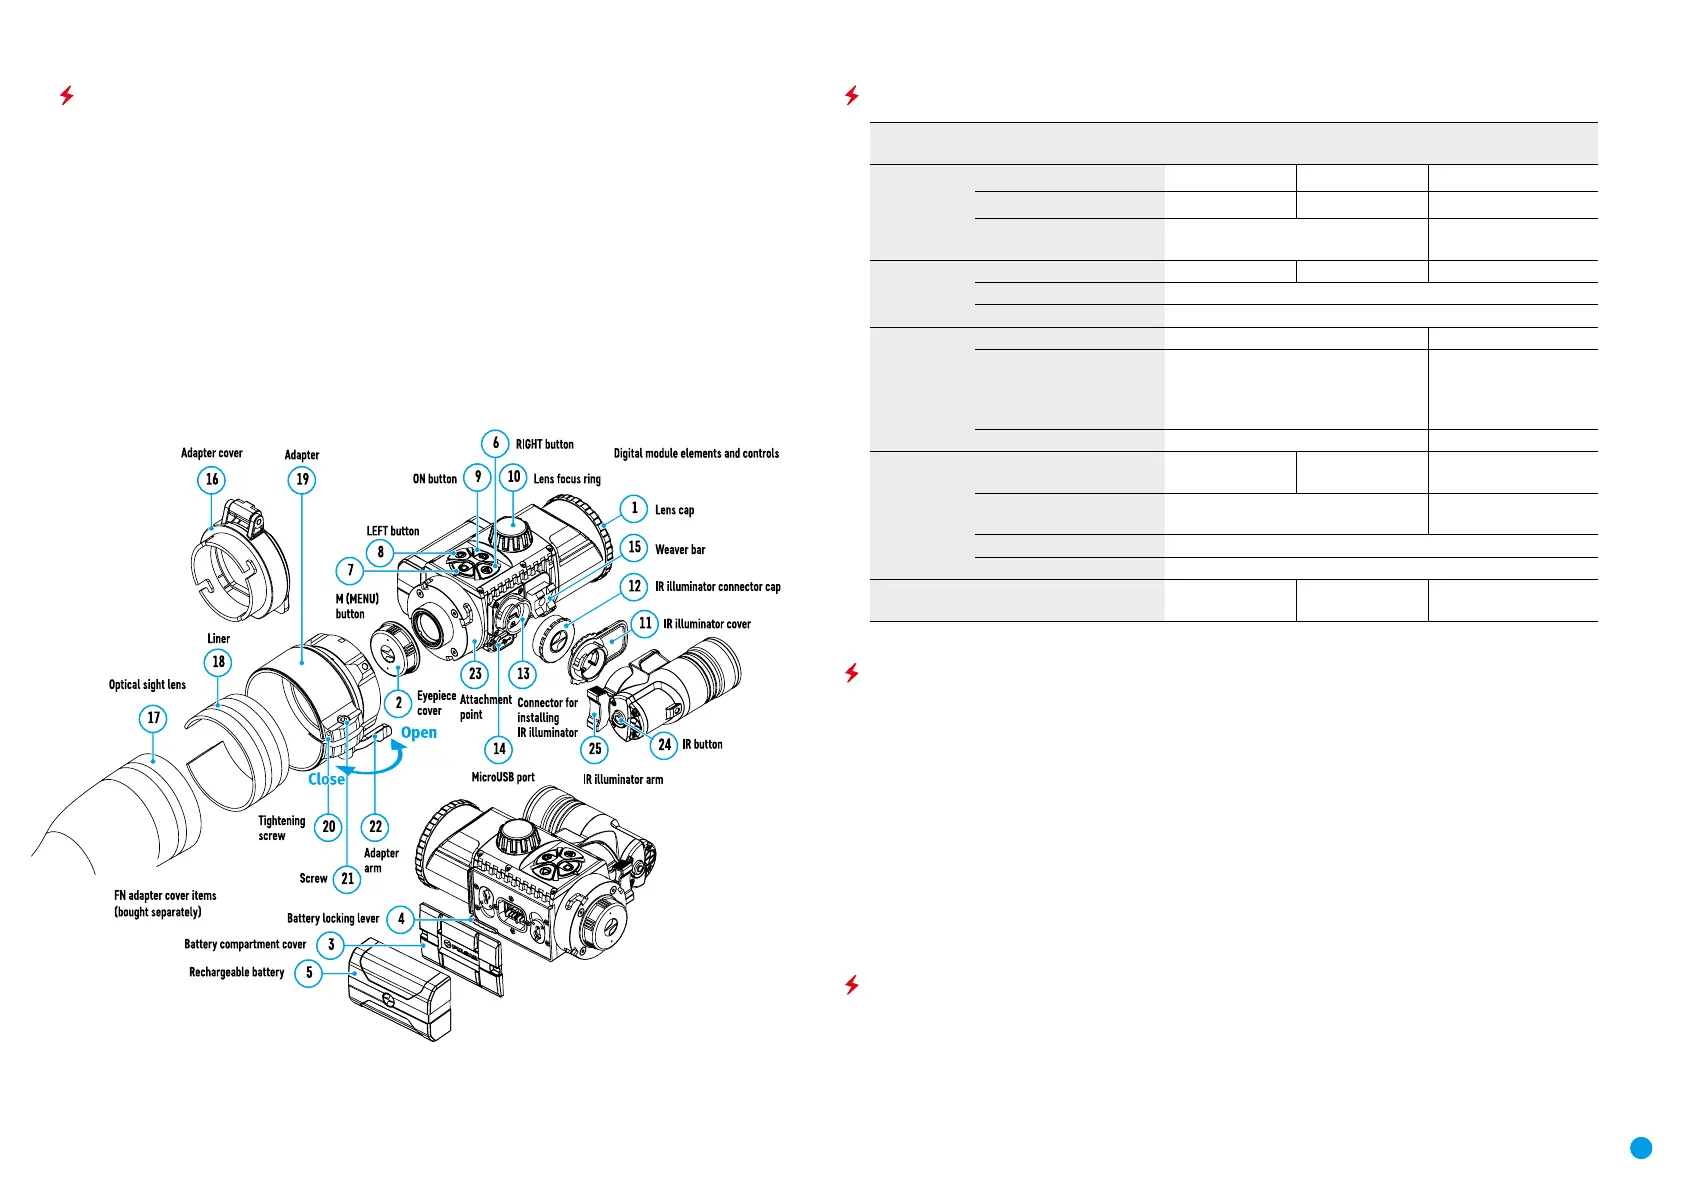
Units and controls
1. Lens cover
2. Eyepiece cover
3. Battery compartment cover
4. Battery locking lever
5. Battery Pack
6. RIGHT button
7. M (MENU) button
8. LEFT button
9. ON button
10. Lens focus knob
11. IR illuminator cover
12. IR illuminator connector plug
13. IR illuminator connector
14. MicroUSB port
15. Weaver lateral rail
16. Adapter cover
17. Optical sight lens
18. Insert
19. Adapter
20. Tightening screw
21. Screw
22. Adapter arm
23. Attachment point
24. IR illuminator button
25. IR illuminator arm
Description of Controls
Button Operating Mode First brief press
Other brief
presses
Long press
ON (9)
Device off Power on device Power on device
Display off Turn display on Turn device off
Device turned on, quick
menu, main menu
-
Display off / device
powered off
LEFT (8)
Device turned on Turn on SumLight Turn off SumLight Wi-Fi on / Wi-Fi off
Navigation through menu Navigation upwards, downwards, counter-clockwise
Quick menu Reduce value
MENU (7)
Device turned on Open quick menu Open main menu
Navigation through menu Conrm selection
Exit submenu without
conrming selection
/ exit menu (go to
monitoring mode)
Quick menu Navigation upwards Exit quick menu
TAKE A
PHOTO
6)
Device powered on (Video
mode)
Start video
recording
Turn off video recording
/ Switch to Photo mode
Device powered on (Photo
mode)
Take a photo Switch to Video mode
Navigation through menu Downwards / rightwards / clockwise
Quick menu Increase value
IR (24)
Device turned on, quick
menu, main menu
IR illuminator on
switch
Adjust IR strength IR illuminator off switch
Operating Features
The Forward F attachment is designed for long-term use. Please follow these guidelines to ensure long life and
maximum performance:
•
Before using the attachment make sure you mount it according to the instructions in the “Mounting the
attachment” section.
•
Power off the attachment after use.
•
Do not repair or dismantle a attachment under guarantee by yourself!
•
The attachment can be used over a wide range of temperatures. If the attachment has been operated in the
cold and brought into a warm room, do not remove it from its carrying case for at least 2-3 hours; this will
prevent condensation forming on the external optical elements.
•
Inspect and maintain the attachment regularly to ensure trouble-free operation and to avert and eliminate
the cases of premature wear and tear and failure of components.
•
The battery must not be exposed to excessive heat from the sun’s rays, re of other heat sources.
Using the Battery Pack
The Forward F455 attachment is supplied with a rechargeable IPS7 Lithium-ion Battery Pack which allows the
attachment to be used for up to 9 hours. Charge the battery before rst use.
Charging the Battery Pack:
•
Attach the microUSB plug of the USB cable to the microUSB connector (C) on the charger.
 Loading...