52
TD-001578-01-C
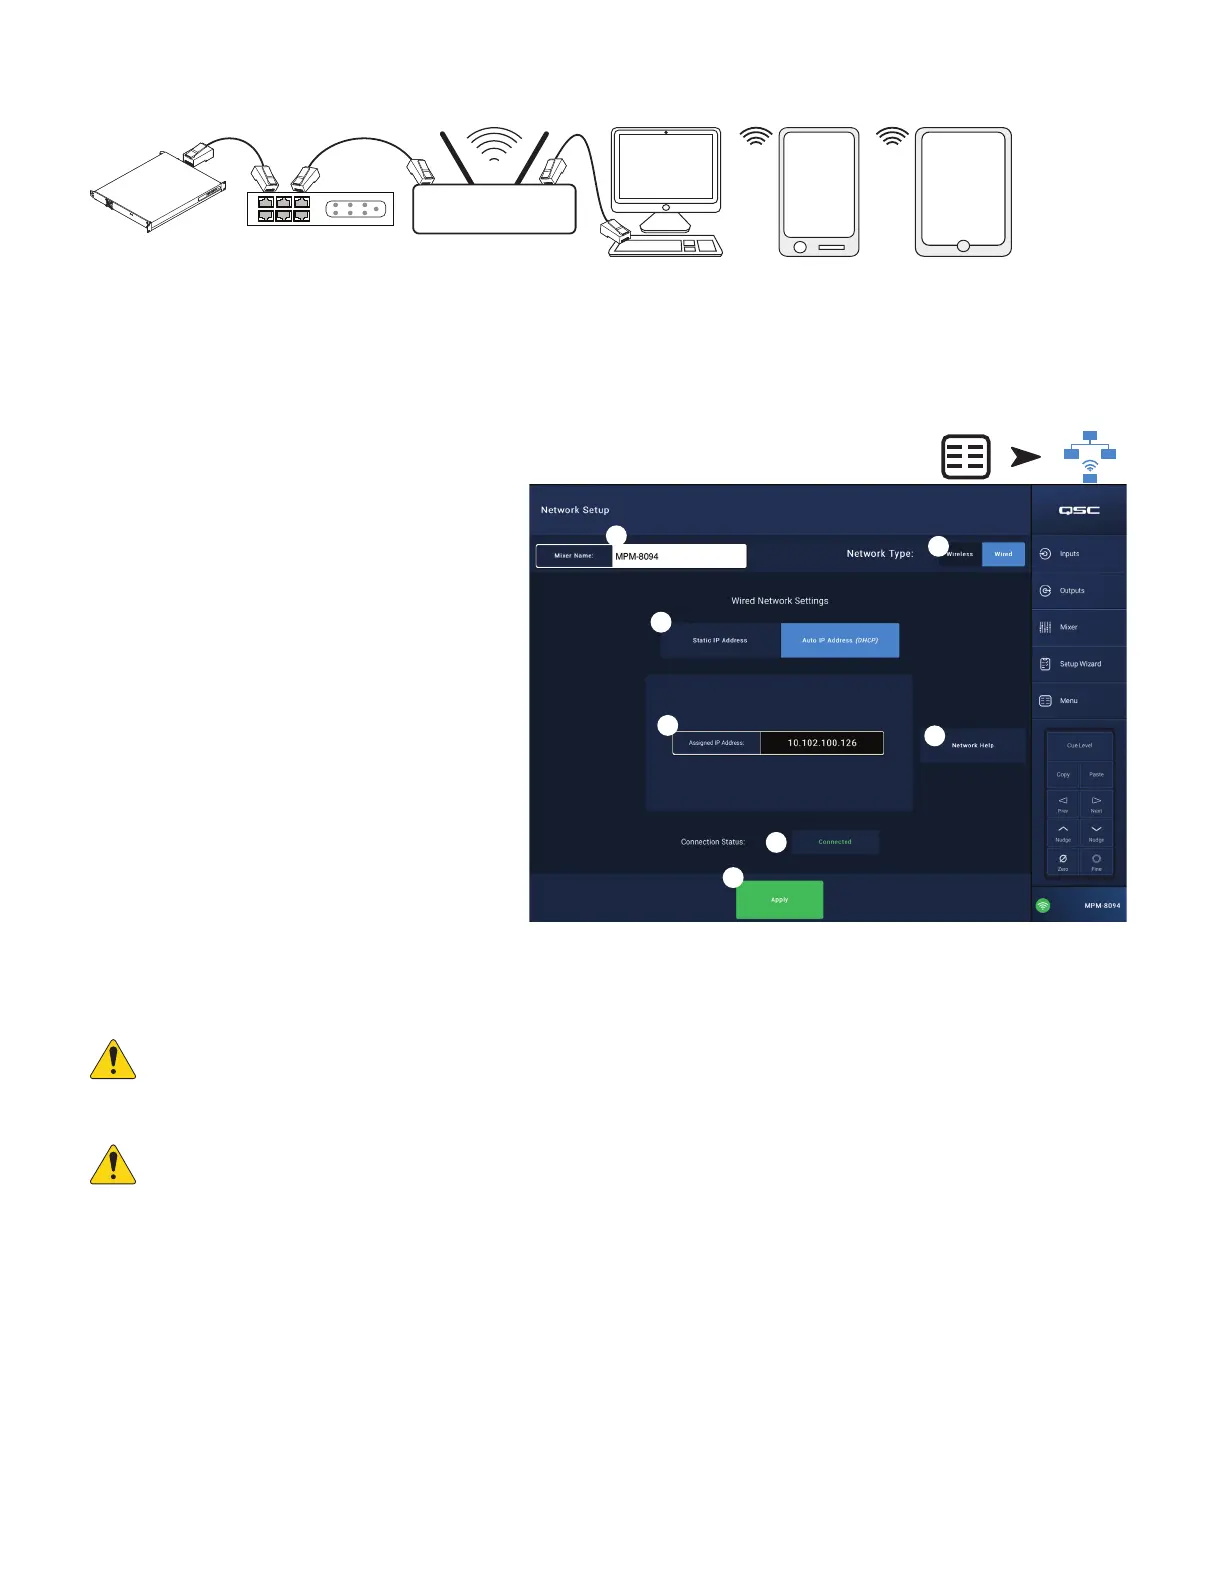
Menu – Wired Network Setup: Auto IP Address
1
= wired Ethernet connection (RJ-45 connectors)
2
= wireless connection established between a wireless device and the wireless router
3
= MP Install running on PC and tablet device (MP Manage not available on a PC.)
4
= MP Manage running on a smart phone and tablet device (MP Install not available on a smart phone.)
Wired Ethernet
connection – when an MP-M is wired
to an Ethernet network (
1
) with DHCP enabled, the MP-M
attempts to automatically obtain an IP address. If this isn’t
possible, the MP-M auto-assigns a link-local IP address.
The mobile devices join the network via the wireless
router(
2
). (Refer to the manufacturer’s instructions for
devices (iOS, Android) connecting to a network.)
Once an IP address is established for the MP-M, and
the devices with MP Install or MP Manage installed are
connected to the network, the MP Install app and the
MP Manage app can connect to the MP-M using the
default passwords “Admin” (
3
) for MP Install and “Access”
(
4
) for MP Manage. A strongly worded message displays
encouraging the integrator to change the network and
mixer passwords along with fields to enter the new
passwords.
1.
Mixer Name
– Enter a name for the mixer. Press
Enter to confirm the change.
2.
Network Type
– Set to Wired.
3.
Wired Network Settings
– Auto IP Address (DHCP)
4.
Assigned IP Address
– displays the IP Address
supplied by the DHCP or the link-local address if the
DHCP did not provide an address.
5.
Connection Status
– Displays the current status of the connection between the MP-M and the wireless router. Some possible readings are:
Connected, Not Connected, Searching
IMPORTANT:
Make sure changes are confirmed for all text fields by pressing Enter while the cursor is in the field.
6.
Apply
– Touch to configure the mixer according to the network settings. A message “Wired Ethernet connection operational” displays.
NOTE:
This step may take several minutes.
7. Touch
Okay
The devices can now connect to the mixer via the wireless router.
• A device connects to the wireless router in the device’s Wi-Fi settings using the router’s SSID (name) and password. Refer to the remote device
manufacturer’s instructions for joining networks.
• When the device is connected to the wireless router, follow instructions to logon to the MP-M. .
3
4
4
1 1 1
2
3
APPS
MP Install
MP Manage
MPM Ethernet Switch
Wireless Router
DHCP Enabled
MP
Manage
MP
Install
2
APPS
Touch
Menu
Touch
Network
3
4
1
9
6
5
2
 Loading...