Quantum Scalar i500: Rackmount Kit Installation
6-01492-04 Rev A
December 2013
Installing Additional Modules Into the Rack 13
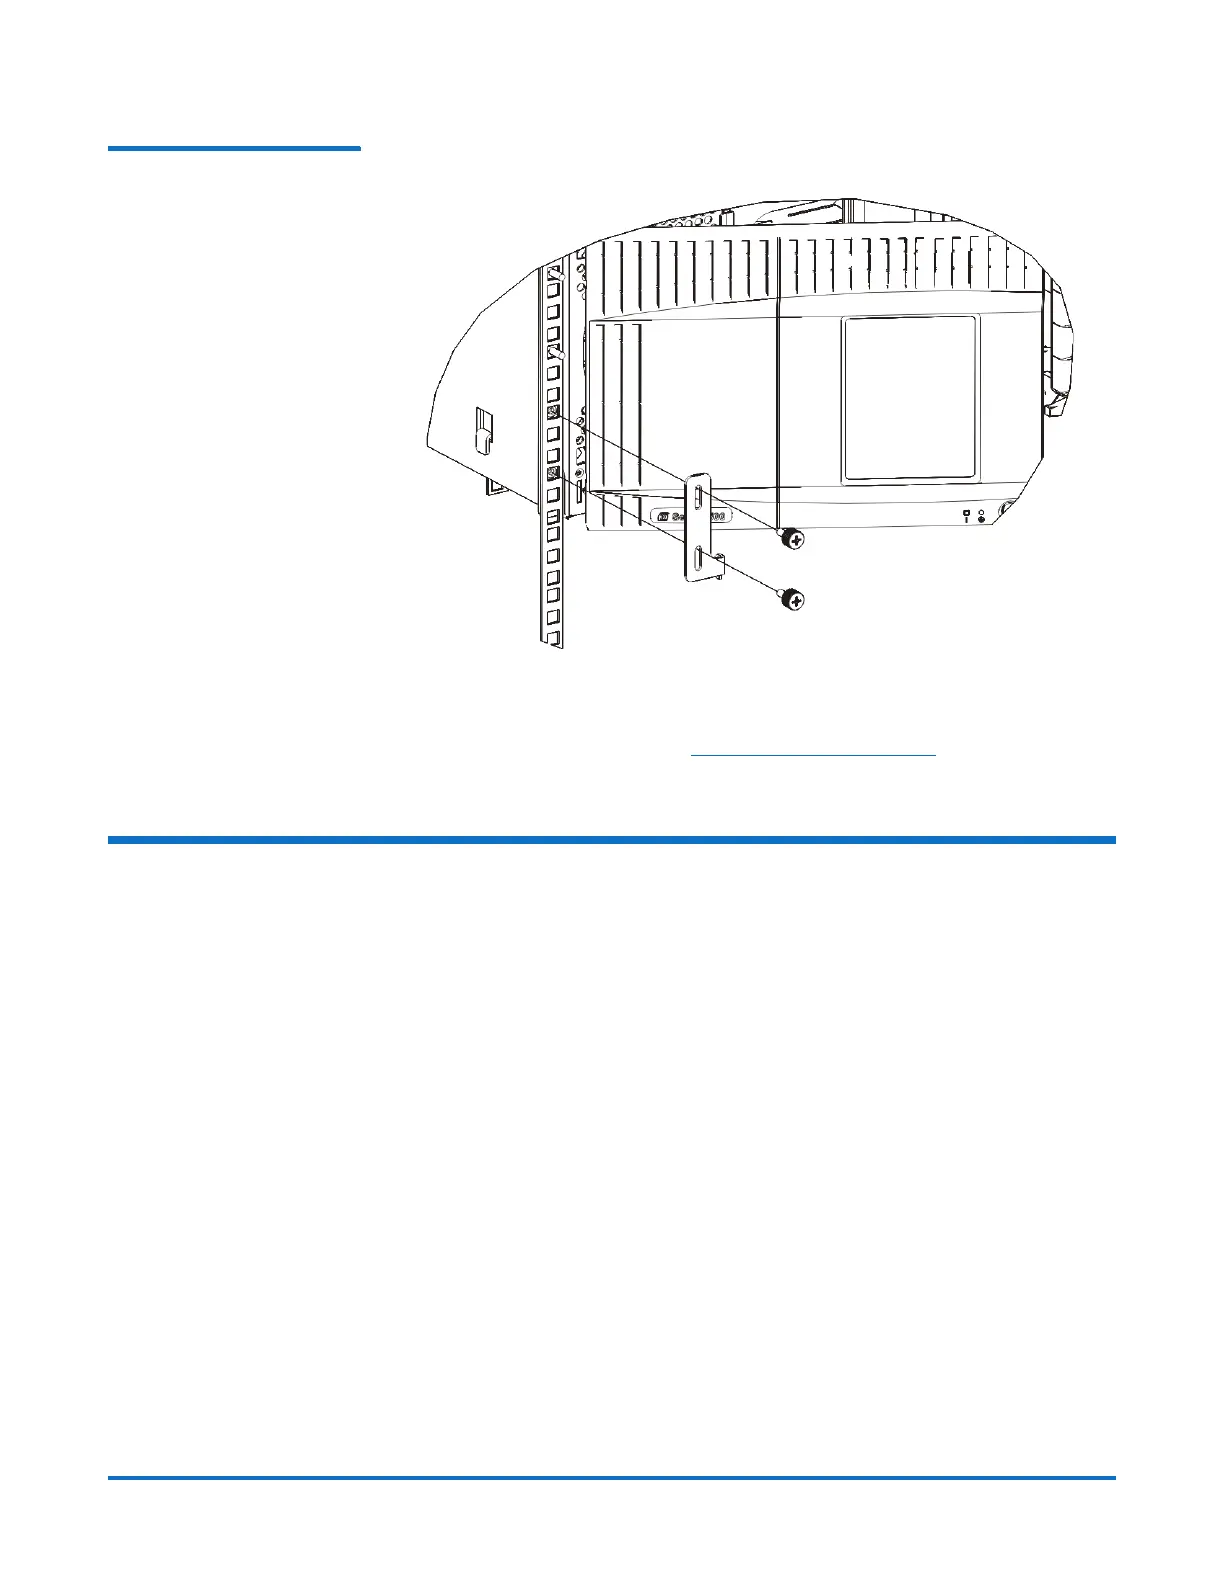
Figure 7 Attaching Left Rack
Ear Hinge to Rack
7 If you are installing only the control module, complete its installation by
following the instructions in
Completing the Installation on page 18.
Installing Additional Modules Into the Rack
All modules that you add to the rack must be positioned above the module that
you previously installed, since the bottom module must be secured to the
rackmount shelves (unless you decide to uninstall the entire library from the rack
and reconfigure it).
These instructions explain how to add and position modules into the rack.
Required parts: Rack ears, (4) M5 thumbscrews, (4) nut clips or (4) cage nuts
Explanation of parts: Each rack ear contains two elongated holes, enabling you
to fasten it to the rack (using the M5 thumbscrews and either the nut clips or
cage nuts), using the most accessible mounting holes.
1 Remove the covers, as needed:
• If you are installing a module above a module that currently has a top
cover, remove the top cover by unscrewing the screws holding the top
to the module.
• If the module you are installing has a bottom cover, remove the bottom
cover by unscrewing the screws holding the bottom to the module.
The module is now ready to be installed above another module in the rack.
You need to make sure the library is “hollow” all the way through, with just
one bottom cover on the lowest module and one top cover on the top
 Loading...