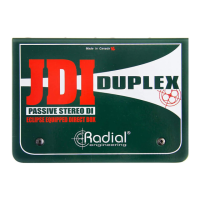
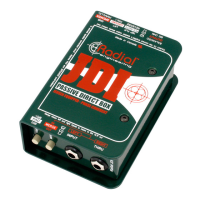
Radial Engineering JDI
™
User Guide
3
Part 3 – The JDI Quick Start
This section is for advanced users — it provides a quick set of instructions for those that are familiar with direct boxes and
gets right down to action! We suggest that you read through the entire manual for a better understanding of your JDI.
Caution! When connecting or disconnecting any audio device always ensure the power is off or all levels are set to
zero. This practice will reduce the opportunity for any noise such as a capacitor discharge from being sent through the
amplier to the speakers, which could cause a big bang in your sound system or even cause a speaker to blow. This
is especially true with phantom powered equipment.
The Radial JDI is a passive direct box and as such does not require any external power such as phantom or batteries to
make it work. Just plug-in and play!
To start, make sure all switches are in the outward position. Plug the instrument into the INPUT. Connect the THRU to the
guitar amplier or keyboard mixer and the XLR OUTPUT to the PA or mixing console. Set the PAD to 0dB. Slowly turn up
the input level at the mixer and listen. See the Part 5 ‘Features and Functions’ section about the MERGE function.
The JDI’s Jensen audio transformer should be able to handle most instrument signal levels without distortion. At exceptionally
high signal levels, the –15dB pad should be used to reduce the input level to the transformer. If you hear distortion, simply
depress the –15dB pad button. If you intend to use the JDI in parallel with a speaker load, it is important that you read the
details on this application in the ‘Part 5 - Features and Functions’ section of this manual.
Since the Radial JDI employs an audio transformer, you are actually isolating the electrical connections between the input and
output. This will usually eliminate all buzz and hum caused by so called ground loops. The JDI is designed to be grounded
at either the input or the output side of the transformer. If you encounter 60-cycle hum or noise, lift the ground at the XLR
output. This will assume the JDI is deriving its ground at the input from the instrument or instrument amplier.
The JDI also features a polarity reverse. This reverses pin-2 and pin-3 at the XLR. The JDI follows the "pin-2 hot" AES
standard; reversing the polarity is generally not required unless the instrument is being both DI’d and mic’d. The polarity
reverse switch would allow both the mic and the JDI to be set ‘in phase’ should these be reversed.
You are ready to go! Now... close your eyes and listen. The JDI is without a doubt, one of the most musical DI boxes ever
manufactured.
True to the Music
 Loading...