7. Changing the tube:
Your Tonebone has been designed to provide years of performance
before changing the tube. In fact, it is unlikely that a tube change will be
necessary for two to three years or more, depending on use. Change the
tube only when a degradation of sound is noticeable.
Disassembly
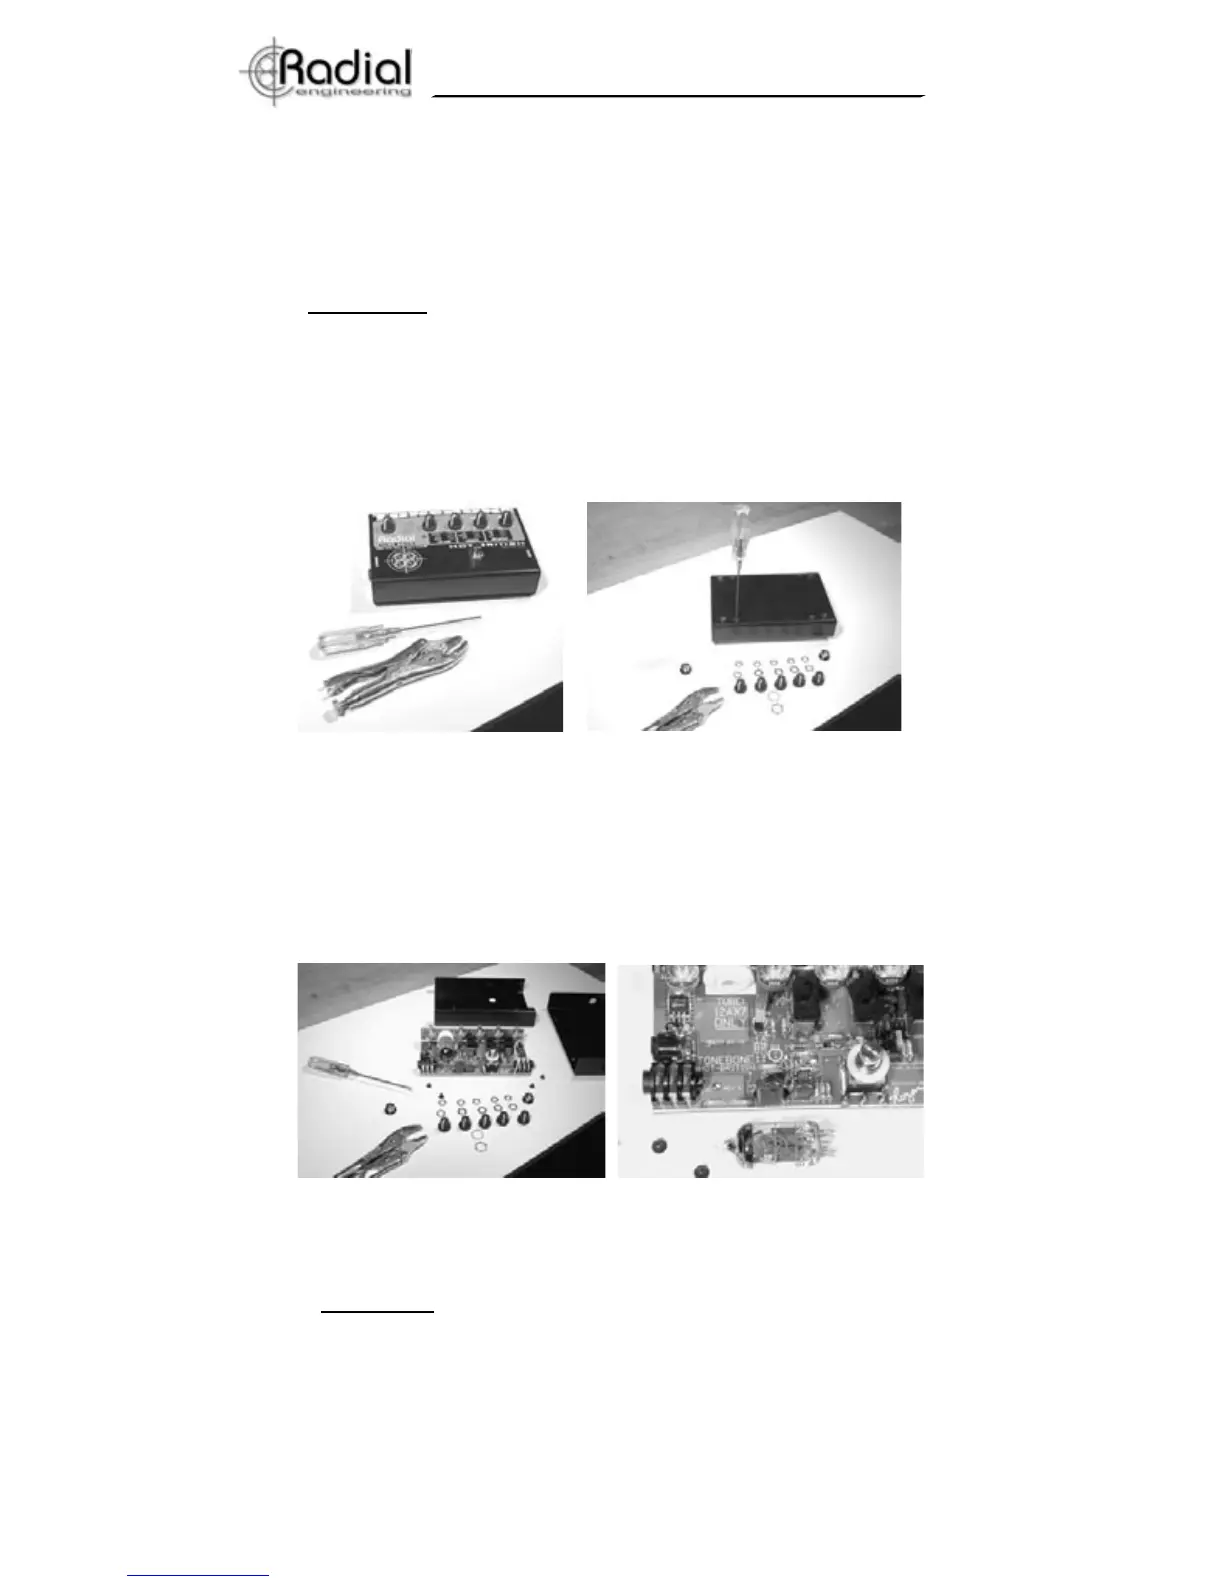
1. Remove the rubber knobs by pulling them straight up. These
pressure fitted knobs should be removed with care to avoid damage.
2. Remove the nuts and washers securing the potentiometer,
foot switch, and input/output using an open ended wrench or socket.
Please use caution so as not to mar the exterior finish.
3. Remove the 4 bottom screws that hold the top and bottom chas-
sis halves together. Carefully separate them. Note that the chassis top
and bottom fit snugly so a little careful force may be needed to clear
the two side mounted ¼” input and output connectors. Watch you
don’t loose the nylon washer between the footswitch and the chassis
top!
4. Remove and replace the tube: Gently loosen the 12AX7 tube in
the socket by wiggling it back and forth.
Reassembly
1. Install the PC board to the Chassis top: Carefully align the
potentiometers, LED and footswitch with the holes in the chassis and
assemble through the top. Don’t forget the nylon footswitch washer!
2. Attach the pot and footswitch washers and nuts, just finger
tight for now, to allow alignment of the jacks when the bottom is
attached.
5
Ready to change the tube? Ok, lets
start here.
Knobs off, nuts & washers off, side jack
nuts & washers off, now removing screws.
Ready to wiggle tube out of the socket.
12AX7 tube replacement.
True to the Music
TM
 Loading...