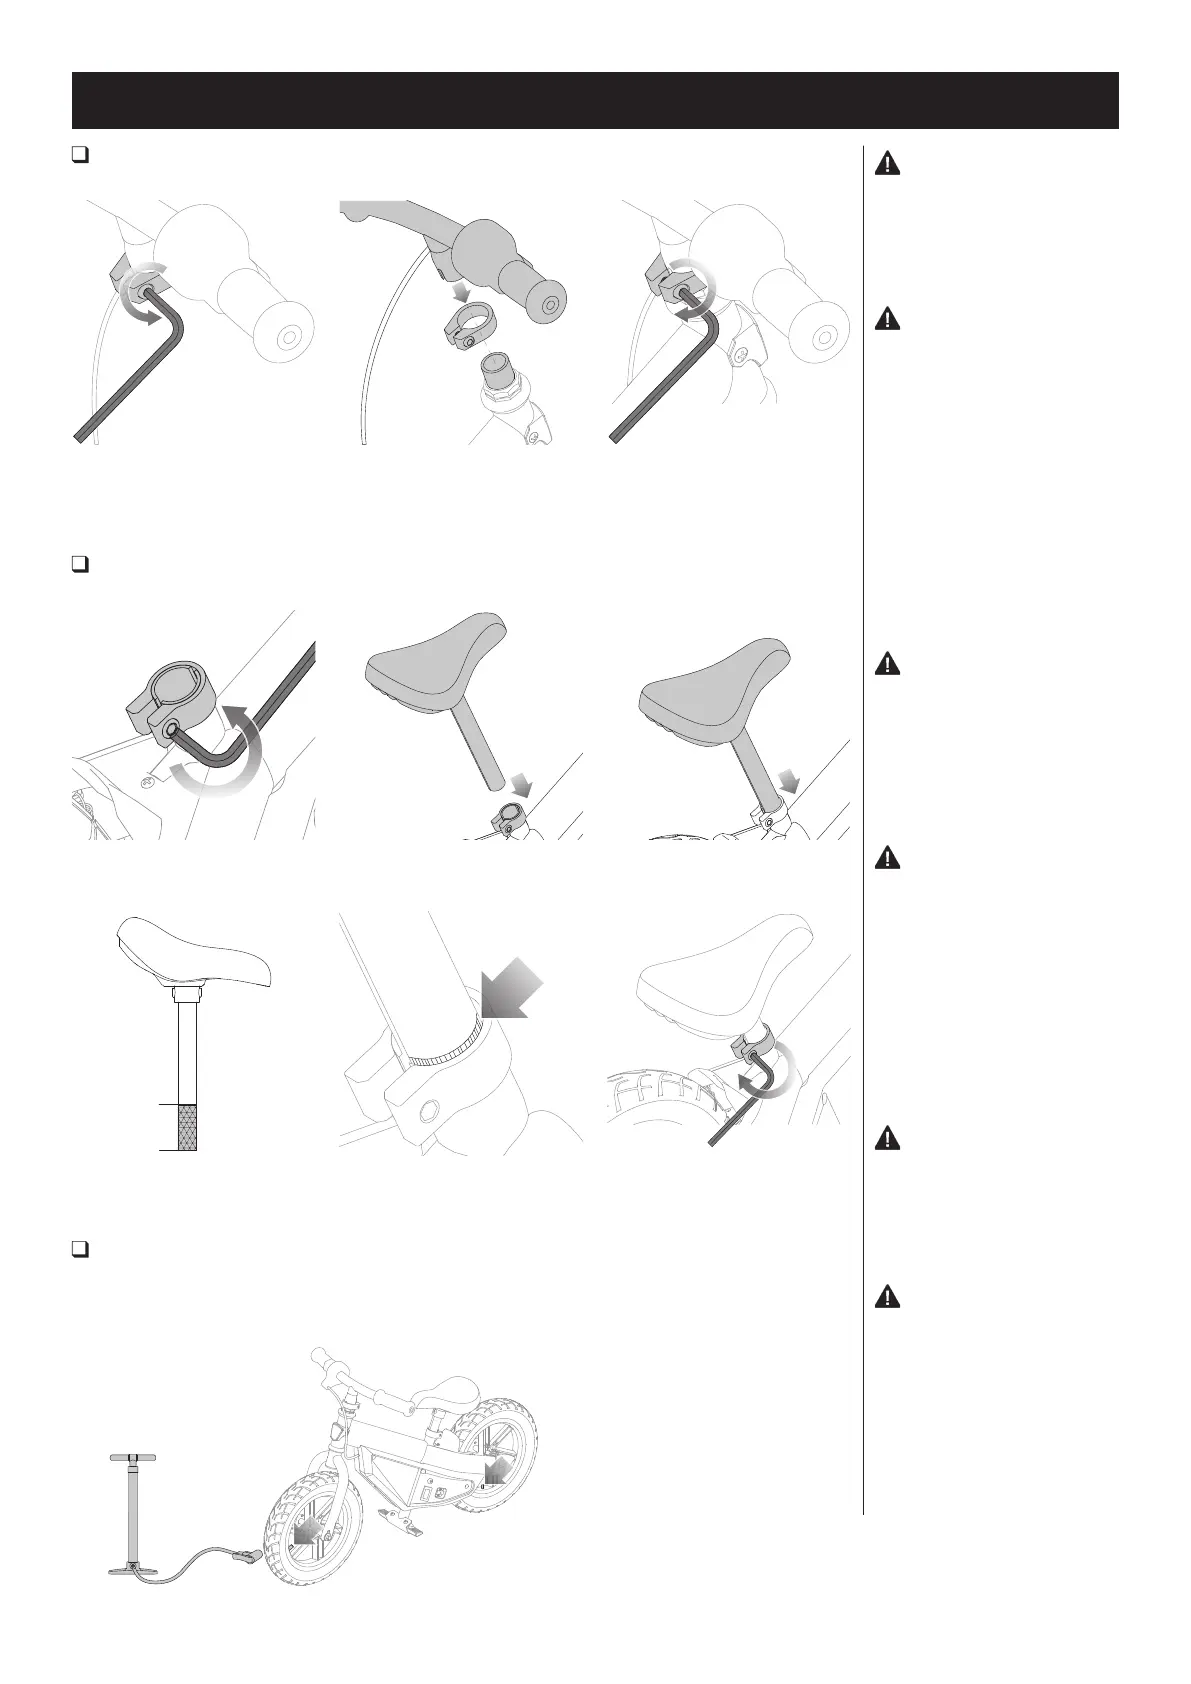
Inflating the Tires
The tires are inflated when shipped, but they invariably may lose some pressure between the point of manufacturing
and your purchase. Always inflate tires to the correct PSI before first time use.
Lower air pressure can result in a shorter ride time. Periodically check tires. Reinflate when needed.
WARNING: Do not
use the electric balance bike for
the first time until you have inflated
the tires to the correct PSI. Failure
to do so may damage your electric
balance bike and void
your warranty.
WARNING: Do not
overinflate, as this could damage
the tires or wheels.
Note: The pressure air supplies
found at gasoline stations are
designed to inflate high-volume
automobile tires. If you decide to
use such an air supply to inflate
your electric balance bike tires, first
make sure the pressure gauge is
working, then use very short bursts
to inflate to the correct PSI. If you
inadvertently overinflate
the tires, release the excess
pressure immediately.
WARNING: Failure to
properly install and tighten the seat
may cause the rider to lose control
and fall. If you do not understand
these instructions, contact Razor
customer care for assistance.
1 Using a bicycle style tire pump
equipped for a Schrader-type
valve, inflate the tires to the
correct PSI indicated on the
sidewall of the tires.
Note: Maintaining proper tire
pressure is important to the Electric
Assist drive system. always keep
your tires inflated to the proper
pressure for maximum performance.
Attaching the Seat
Required Tool: 5 mm Allen Wrench (included)
2
Align the seat, seat post clamp and
seat post as show in image above.
3 Install seat into seat post and
adjust height.
1 Loosen seat post clamp using a
5 mm Allen wrench.
Note: The minimum insertion depth
of the seat is 56 mm.
Note: The assembly and adjustment
should not pass the safety line.
4
Tighten seat post clamp bolt using a
5 mm Allen wrench. Tighten securely.
56 mm
4
ASSEMBLY AND SETUP
4
Attaching the Handlebars
Required Tool: 5 mm Allen Wrench (included)
2 Align the handlebars, collar
clamp and front fork as show in
image above.
3
Tighten collar clamp bolt using a
5 mm Allen wrench. Tighten securely.
1
Loosen collar clamp bolt using a
5 mm Allen wrench.
WARNING: Do not attempt
to thread the stem into the front
fork thread.
Note: Make sure any cables/wires
are out of the way before inserting
the stem into the fork.
WARNING: Failure to
properly tighten the collar clamp
may allow the handlebars to
dislodge while riding and may
cause you to lose control and fall.
When correctly tightened, the
handlebars will not rotate out of
alignment with the front wheel
under normal circumstances.
Note: The cable and wire assembly
from the handlebar must not
wrap around the steering tube or
handlebar. Sharp bends or twisting
of the throttle cable can cause the
throttle to malfunction.
WARNING: Check
handlebar grips regularly for wear
or damage, as grips are designed
to aid in gripping handlebars
and to provide some protection
against possible impact. Replace
immediately if worn, torn, damaged
or missing.
 Loading...