4
EN
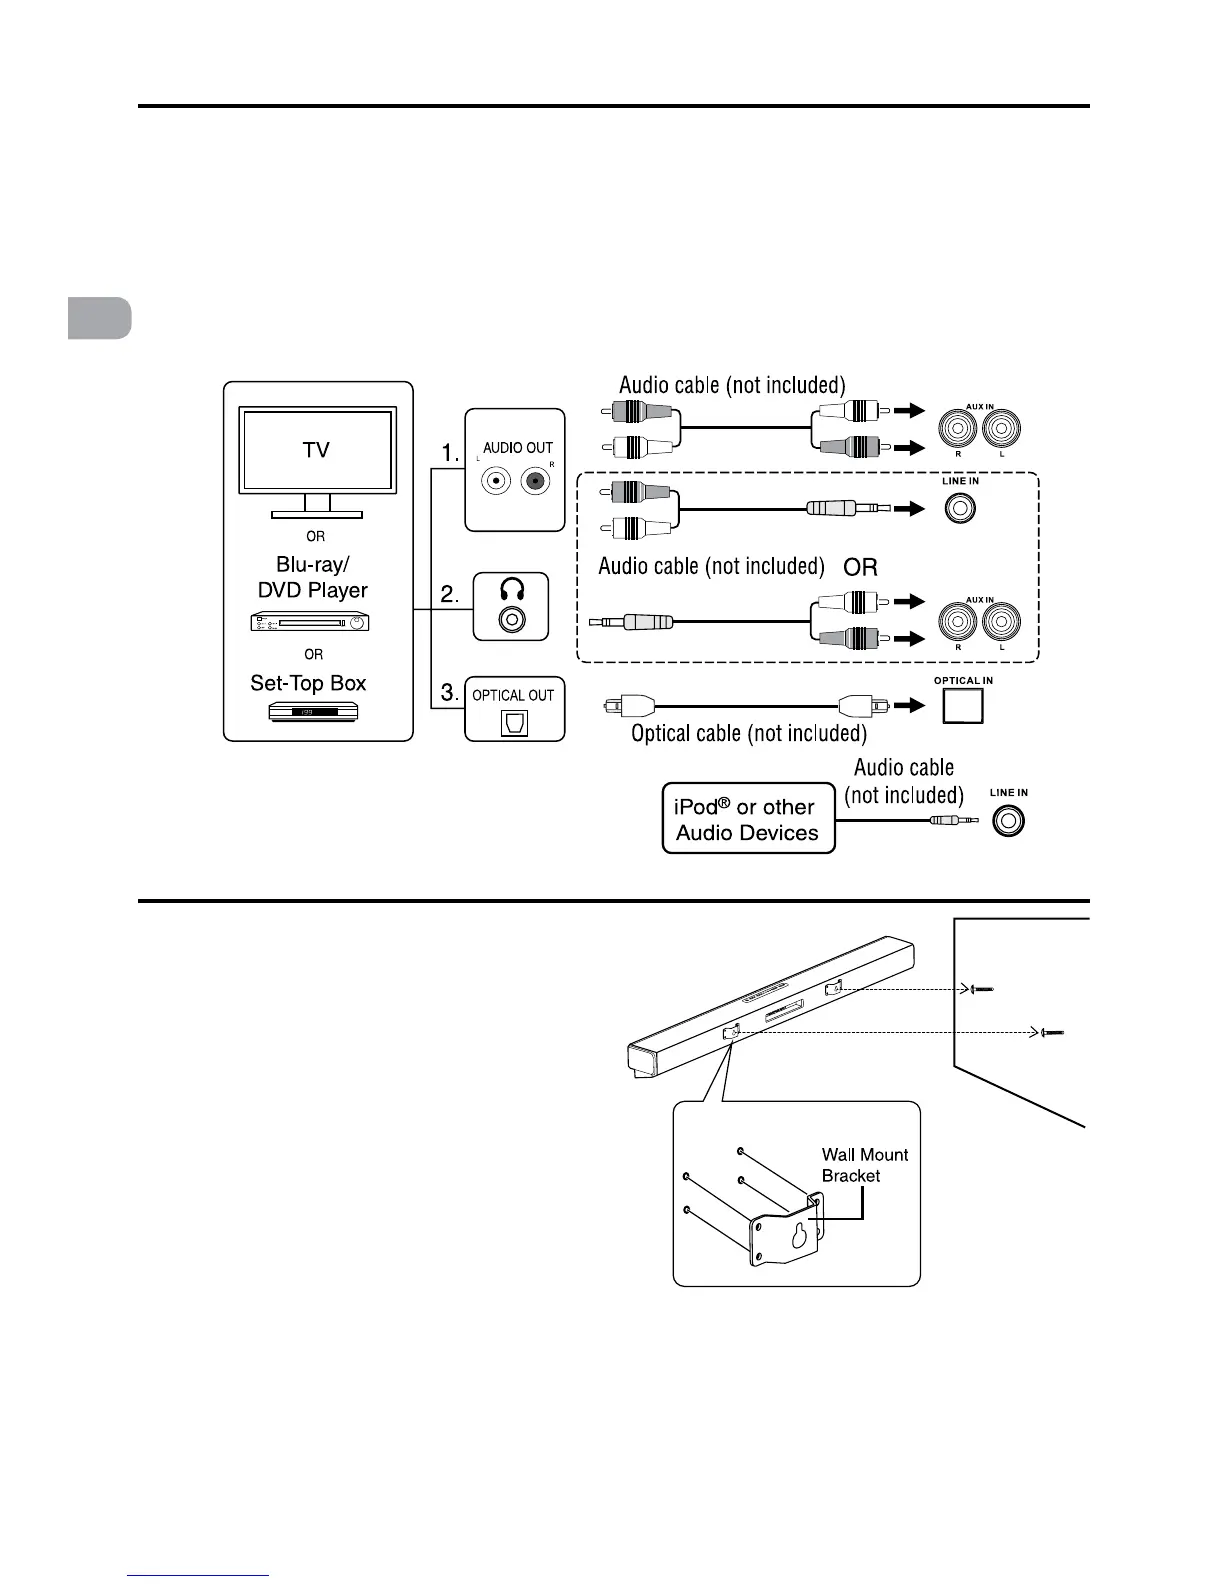
CONNECTIONS
CONNECT AUDIO THROUGH AN ANALOG AUDIO CABLE
1. ConnectanAudioCable(notincluded)fromtheAUXINjackstotheAUDIOOUTjacksofyourTV,Set-Top
BoxorBlu-ray/DVDPlayer.
2. Connecta3.5mmAudioCable(notincluded)fromtheLINEINjacktotheAUDIOOUTjacksorfromtheAUX
INjackstotheHeadphoneOutjackofyourTV,Set-TopBoxorBlu-ray/DVDPlayer.
CONNECT AUDIO THROUGH A DIGITAL OPTICAL CABLE
3.ConnectanOpticalCable(notincluded)fromtheOPTICALINjacktotheOPTICALOUTjackofyourTV,Set-
TopBoxorBlu-ray/DVDPlayer.
Note:OPTICALINonlysupportsPCMsignal.YoumayneedtoactivatePCM(Downmix)onyoursourcedevice,
e.g.TV,Set-TopBoxorBlu-ray/DVDPlayer.
Plugoneendofa3.5mmAudioCable(notincluded)
intotheLINEINjackandotherendintoyouriPad®,
iPhone®,iPod®orotheraudiodevices.
PLACEMENT
TheSoundbarcanbeplacedfreestandingonatableormountedonawall.
PLACING THE SOUNDBAR ON A WALL
TheSoundbarrequiresadditionalmountinghardware
that must be purchased separately.
1. InstalltheWallMountBracketstotheSoundbaras
shown.
2.PlacetheWallMountTemplate(included)onthe
wall and then mark the locations of the screw
holes.
3.Drill the screws (not supplied) into the wall
carefully.
4.GentlyhangtheSoundbarontothescrewsinthe
wall.
Note:Allow2mmspacebetweenscrewandthewall
for fitting the wall mount bracket.
CAUTION:
• WerecommendthatWall-mountingbecarriedout
by a professional. The wall mount bracket “key-
holes” are intended for use with #8 (Imperial) or
M4 (Metric) with head size: Diameter 7.5 - 9.4
mm.Additionaloralternativepartsmaybeneeded
for certain types of wall constructions.
• Make sure that the wall-mount is xed securely
enough so that it meets safety standards.
• Allowatleast2”(5cm)separationinalldirections
betweentheSoundBarandotherAVequipment
(suchasyourTVorSet-TopBox).
• It is recommended that all cables (AC adapter
andAudiocables)beconnectedtotheSoundBar
before placing it on the wall.
 Loading...