WIFI6-53B9_2.4G
rockspace-WiFi6-2.4g
2
II. Connect your devices to the new router
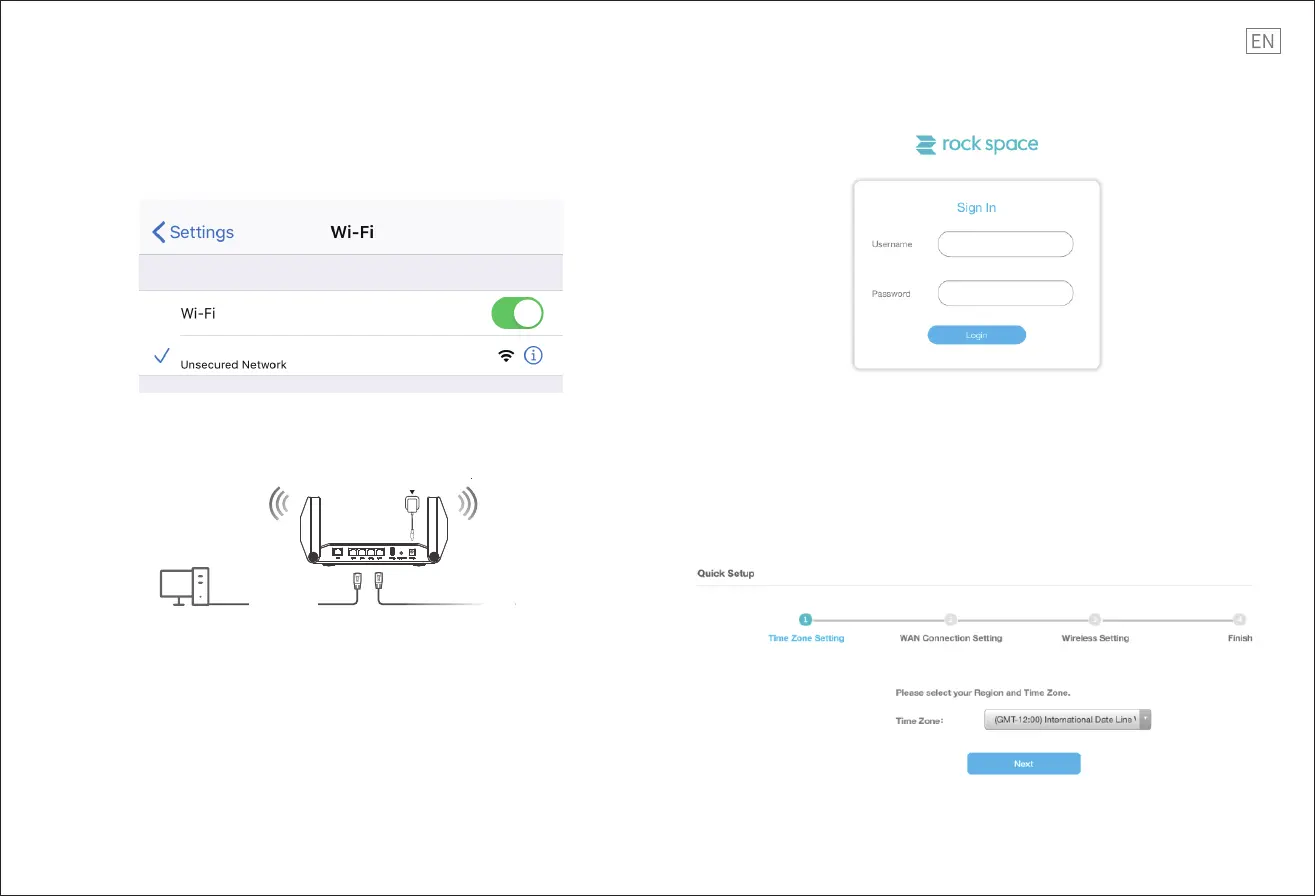
Method 1: Connect your WiFi-enabled device (such as a smart phone) to the new router’s WiFi
network using the SSID(WiFi name) labeled on the bottom of the router. There is no WiFi
password by default.
Note: Both the user name and password is “admin”. The password you entered in this step is
NOT the password for your extended network, it is the password for the extender's manage-
ment interface. If you cannot log in to the web UI of the router, refer to Q1 in FAQ.
Step 2: Set up the time zone.
Please select your region and time zone. Then click “Next”.
III. Set up the new router for internet access
Step 1: Enter the IP address.
After the connection with your client device is established, the setup page will automatically pop
up.
If the setup page doesn't pop up automatically, open your browser on your device and enter
192.168.1.1 in the address bar and press “Start” on the start page.
In the Password eld, type the user name(admin)and password(admin)to log into the manage-
ment interface.
Method 2: Connect your wired device (such as a computer) to a LAN port of the router using an
Ethernet cable. The LAN LED indicator lights up.
Power
Ethernet cable

 Loading...