8
Jun. 2021 AE-30
10. Press twice.
The screen like the following appears.
fig.testmode-serial3.eps
11. Press MENU.
The screen like the following appears.
fig.testmode-serial4.eps
12. On the computer, start AE-X Serial Writer.exe.
13. Verify that AE-30 are displayed at MIDI IN Devices and MIDI OUT
Devices in the application screen on the computer.
*If AE-30 is not displayed, check whether the USB driver is installed correctly.
14. Input the serial number written down in step 6 to Input No..
* At this time, input 21 first, then input the serial number. The serial number you
input (except 21) is displayed next to Write No..
fig.testmode-serial5.eps
The screen on the AE-30 is switched as shown below and the serial
number is written.
fig.testmode-serial6.eps
15. Turn off the power.
Test Mode
Items Required
• AC adaptor (PSD series)
• Computer (running Windows)
• USB cable (Type C <--> Type A)
•MIDI cable
• Audio cable (with miniature stereo phone plug x 1)
• USB memory device (Type-C)
• Headphones (A device equipped with a 1/4-inch phone/miniature
phone adaptor plug can be useful.)
• Ni-MH battery (AA, HR6) x 6
• Mobile device capable of Bluetooth (iPhone or Android)
• Software program capable of Bluetooth MIDI (Web MIDI Browser or the
like)
* Install this on the mobile device just described.
• MIDI sequence program (MIDI-OX or the like)
* Install this on the computer just described.
* MIDI-OX is available at the following website.
http://www.midiox.com/
• Mouth piece (for test)
* Kindly prepare a product (OP-AE10MP or OP-AE10MPH) for inspection
purposes.
Entering the Test Mode
1. Connect the AC adaptor.
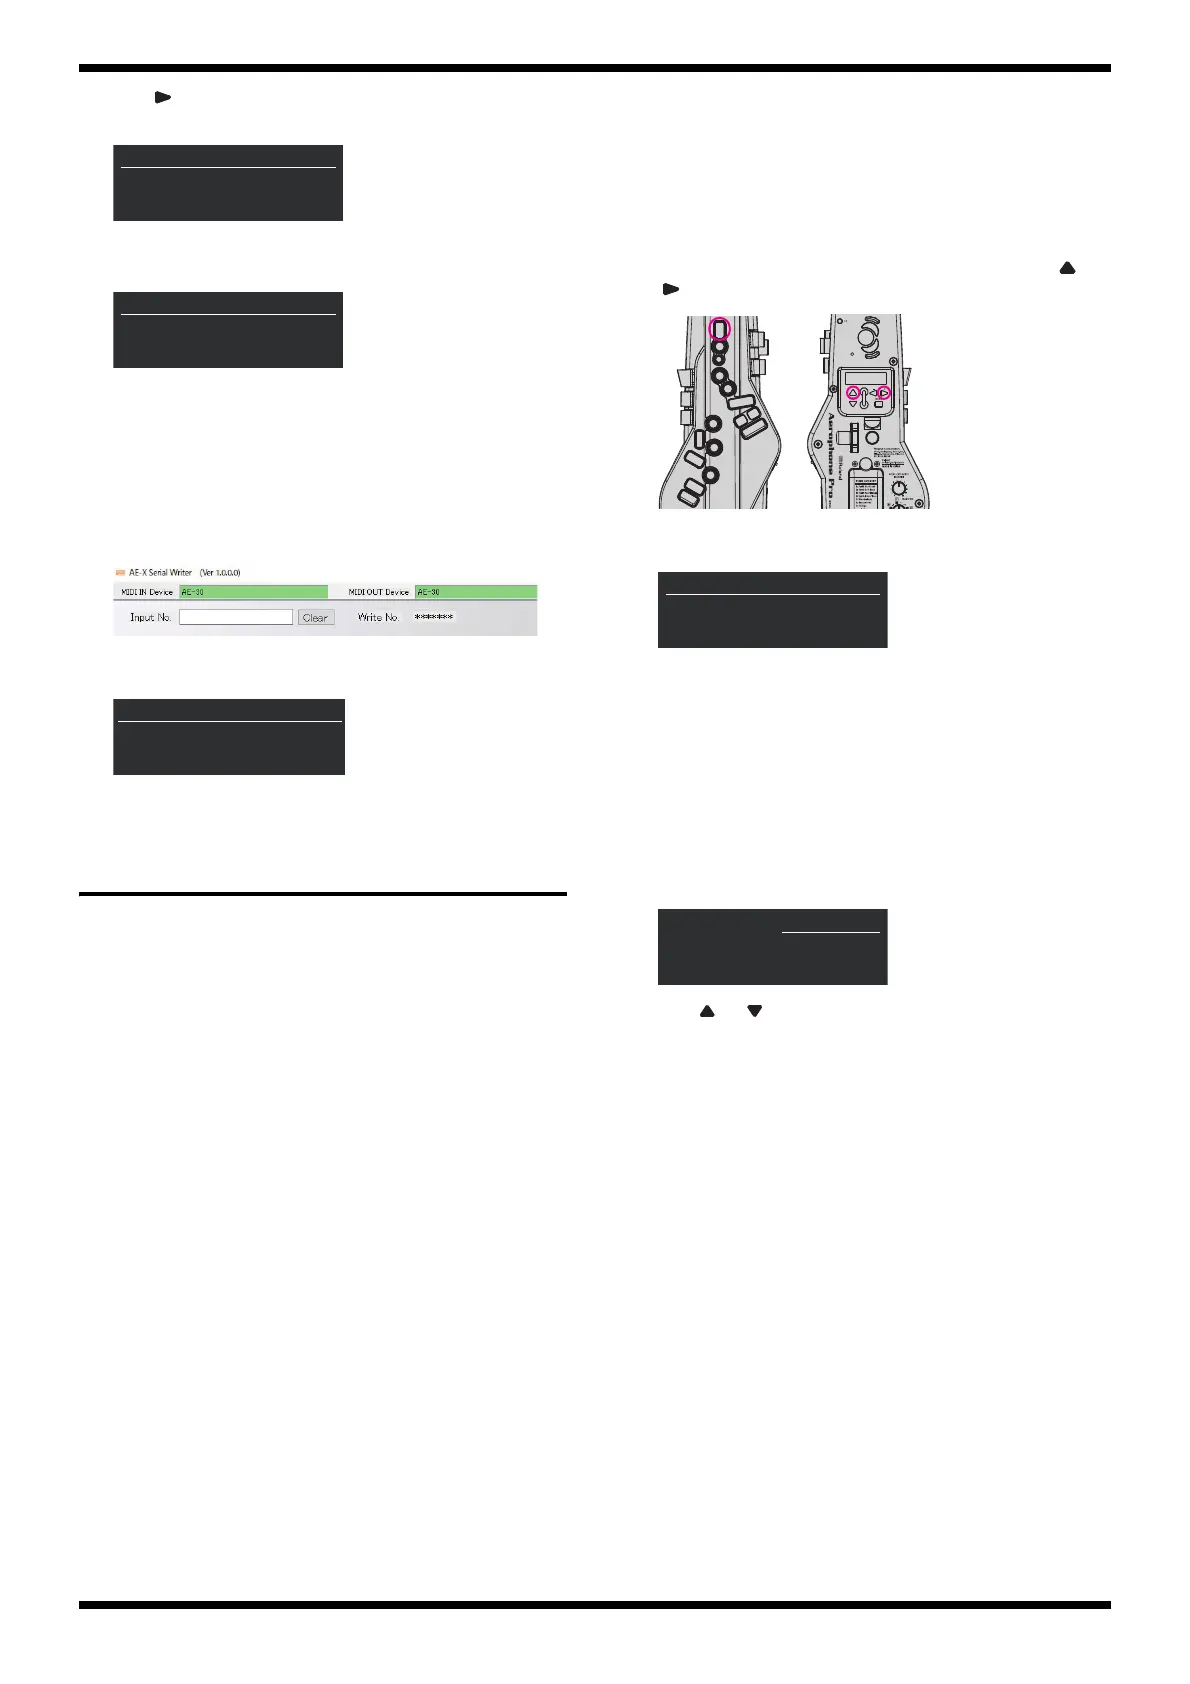
2. Turn the SCENE CATEGORY knob and the TRANSPOSE knob all the
way counterclockwise.
3. Set the MIDI CONTROL switch to OFF.
4. Turn on the power.
5. With the unit being powered up, press the following buttons (X, and
).
fig.testmode.eps
Continue to hold down the buttons above until the following screen
appears.
fig.testmode-screen.eps
6. Press MENU.
The unit enters the first item of the Test Mode (1. VERSION (p. 9)).
Quitting the Test Mode
Turn off the power.
Selecting Test Items
1. After entering the Test Mode, press MENU twice.
The TEST MENU screen is displayed.
fig.testmode-select.eps
2. Press or to select the test item.
3. Press MENU.
The screen for executing the selected test item is displayed.
When pressing MENU again, the unit goes back to the TEST MENU
screen.
Test Items
1. VERSION (p. 9)
2. DEVICE (p. 9)
3. WAVE ROM (p. 9)
4. LCD (p. 9)
5. LED (p. 9)
6. SW (p. 9)
7. AD (p. 10)
8. AUDIO (p. 11)
9. BLUETOOTH (p. 12)
10. MIDI (p. 12)
11. USB FUNC (p. 12)
12. USB HOST (p. 13)
13. PARAM WRITE (p. 13)
The following tests are executed in the normal mode.
1. Battery Test (p. 13)
2. Breath Test (p. 13)
T--
01/01
TEST SELECT
3/9
Serial Write
Push [MENU] to Start
T-S
01/02
SERIAL
1/3
Input
21
*******
T-S
01/02
SERIAL
0/1
Write
Data
OK[*******]
T--
01/01
TEST SELECT
1/9
Service 1
Push [MENU] To Start
TEST MENU [Ent]
>01.VERSION
02.DEVICE
03.WAVE ROM

 Loading...