23
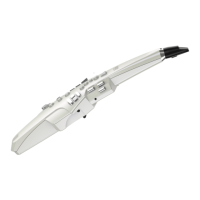
Oct. 2016 AE-10
Performing a Factory Reset
1. Press MENU.
The Menu screen appears.
2. When , are shown on the lower side, press MENU and move
them to the upper side.
3. Press , and select FctReset.
* FctReset is on the 2nd from the last (Version).
4. Press MENU.
A confirmation screen appears.
5. To execute the factory reset, press . To cancel the operation, press
.
Press and Working. will be displayed, and Factory Reset will be
performed.
When it ended, End will be displayed, and returns to the Menu screen.
6. Press TONE.
The initial screen returns.
Updating the System
Items Required
• Computer (Windows 7 or later)
•USB cable
• Update file (obtained via Service Net)
Procedure
1. Connect the computer to the USB connector.
2. Hold down Oct-2 and turn on the power.
fig.oct-button-2.eps
AE-10 display will show Updater, and then Waiting..
AE-10 drive will be shown on the computer screen.
3. Copy the update file to the root folder of the AE-10 drive.
4. Unmount the AE-10 drive, and disconnect the USB cable.
The update starts automatically. The update takes approximately 1
minute.
* Never switch off the power while the update is in progress.
When Finished is shown, the update has finished.
5. Turn off and on the power, then execute the factory reset.
Test Mode
* If the Main Board is exchanged, then before executing the Test Mode, follow the
procedure in Updating the System (p. 23) and update the system to the latest
version.
There are two kinds of Test Mode: AC Adaptor Mode, and Battery
Mode.
Kindly perform both modes. It doesn’t matter which mode is done first.
Items Required
• Computer (running Windows)
• USB cable (Standard)
• Headphones
• Audio player
• Audio cable (with miniature stereo phone plug x 1)
• AC adaptor (PSD series)
• Rechargeable NiMH Battery (AA Size x 6) (Fully charged)
• Commercially available recorder (wind instrument) cream.
• Phillips headed precision screwdriver (#0)
• Straight headed precision screwdriver (1.8 mm)
• Mouth Piece (for inspection)
* Kindly prepare an OP-AE10MP product or inspection purposes.
AC Adaptor Mode
Entering Test Mode
1. Connect the AC adaptor.
2. Turn on the power.
3. When the power is on, hold down MENU and press OCT-2 and .
fig.oct-button-2.eps
Quitting the Test Mode
Turn off the power.
Skipping Test Items
MENU + : This forces execution to advance to the next test item.
MENU + : This forces execution to return to the previous test item.
*In 7. Sound Check (p. 25), pressing MENU + will not allow returning
back to the previous test item.
Test Items
1. Version (p. 24)
2. Breath (p. 24)
3. DC Jack (p. 24)
4. Voltage (p. 24)
5. DSP (p. 24)
6. SW Check (p. 24)
7. Sound Check (p. 25)
8. USB (p. 25)
9. Phones (p. 26)
10. AD (p. 26)
11. LCD (p. 26)
12. Device (p. 26)
13. Bite (p. 26)
14. Factory (p. 27)
15 Auto Off (p. 28)
Oct-2
Oct-2
 Loading...
